It’s now mid-March, and false spring has come and gone. The weather had been lovely for a few days in a row and most of the snow melted. I was even able to go on a walk without wearing a coat. I know the thaw would only be temporary, but I am looking forward to actual spring coming soon.
As the layer of snow retreated, I was able to go outside in the yard and assess the garden. I did a bit of clean up in the beds, mostly removing frozen/eaten plants and pulling up old tags to throw out. I pruned the fruit trees this week, mostly just topped the main stems and removed any crossing branches to ensure they have good airflow. All the trees are still pretty young, so I do want them to put on a good amount of leafy growth this year. I did harvest 3 apples last year so maybe I will get the same amount this year.
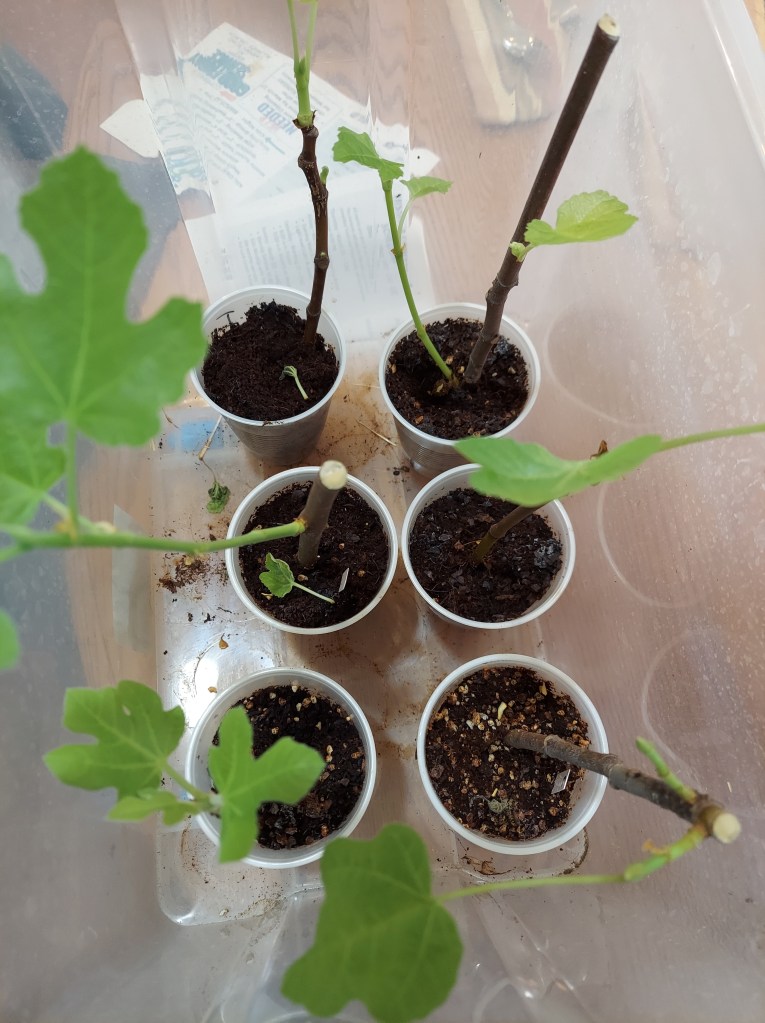
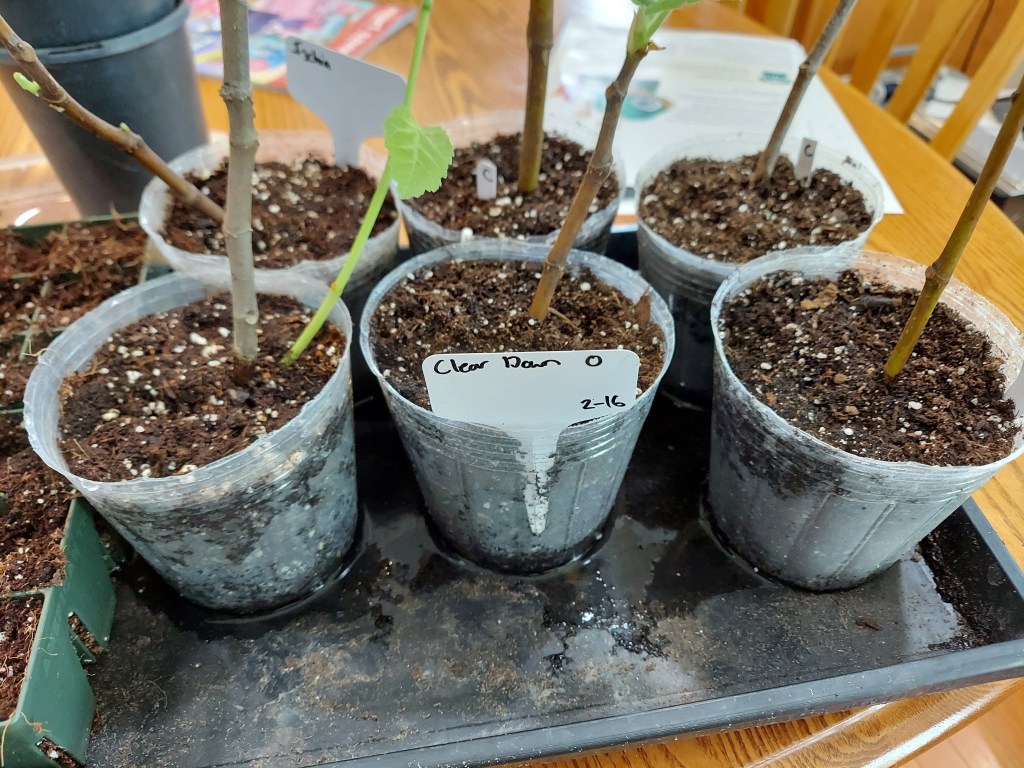
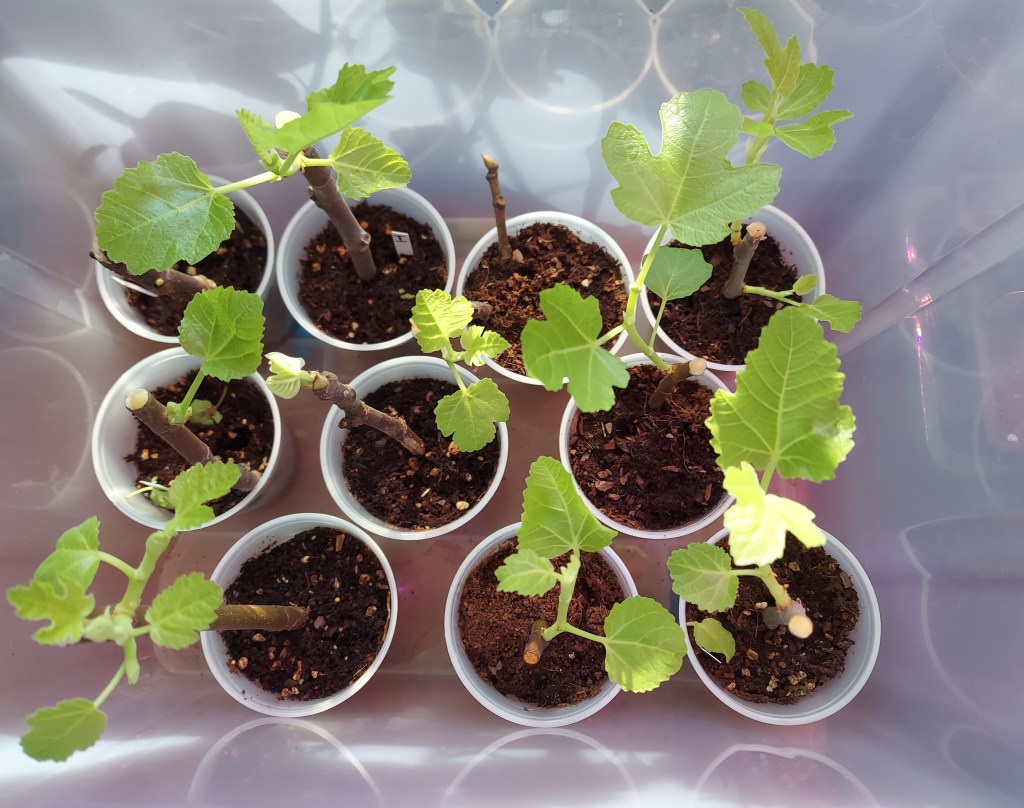
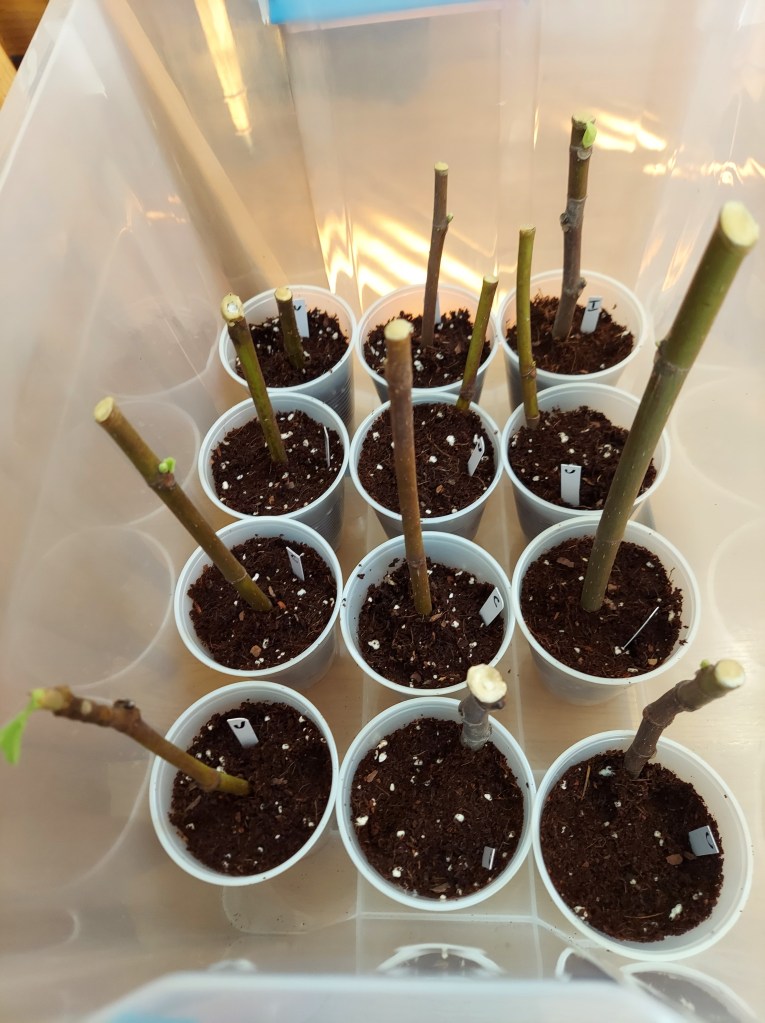
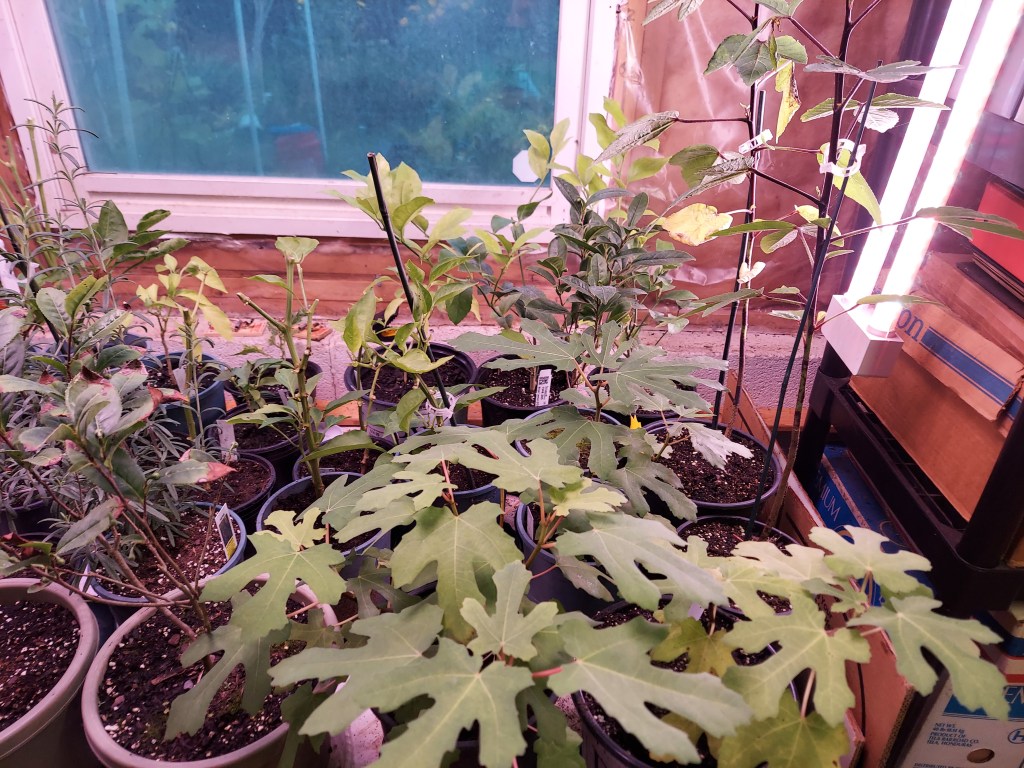
I have been slowly potting up the fig cuttings, I don’t really have room for them all, but they are doing very well. I potted up 10 of them over the weekend, into 4-6 inch pots with fresh soil. I have been giving all of the figs a diluted liquid fertilizer about once a month to boost their growth, and supplement their limited amount of soil.
Bigger pots will allow the roots to keep growing.
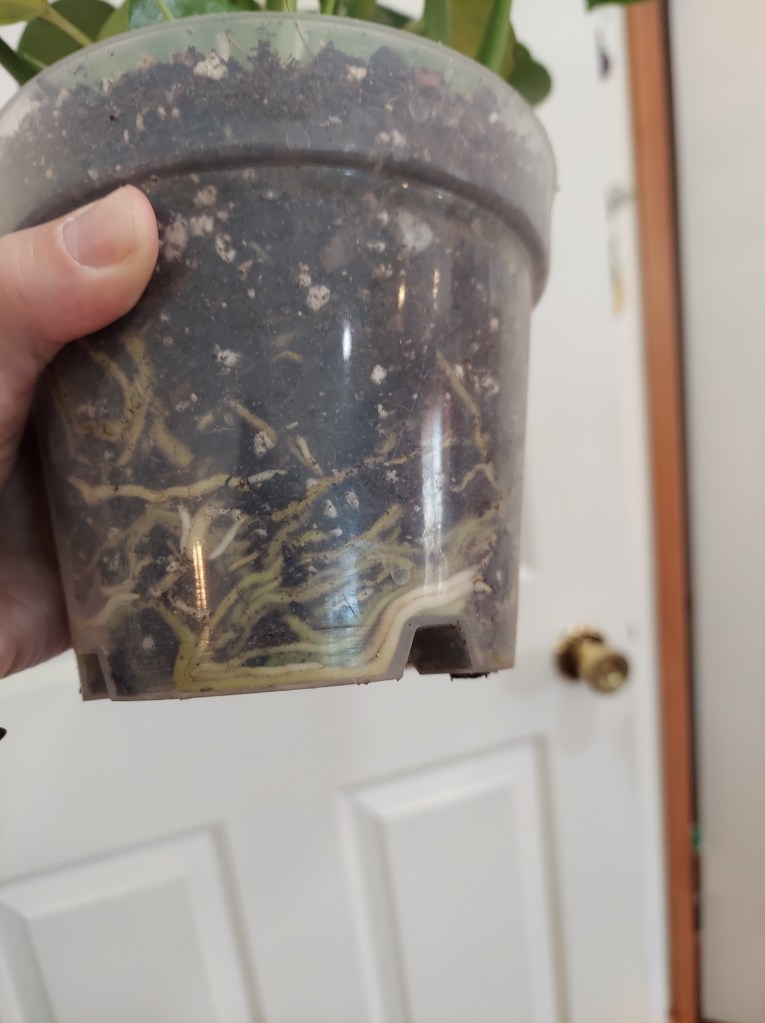
I also repotted a couple of houseplants this weekend. The monstera was completely root bound and circling the bottom of the pot.
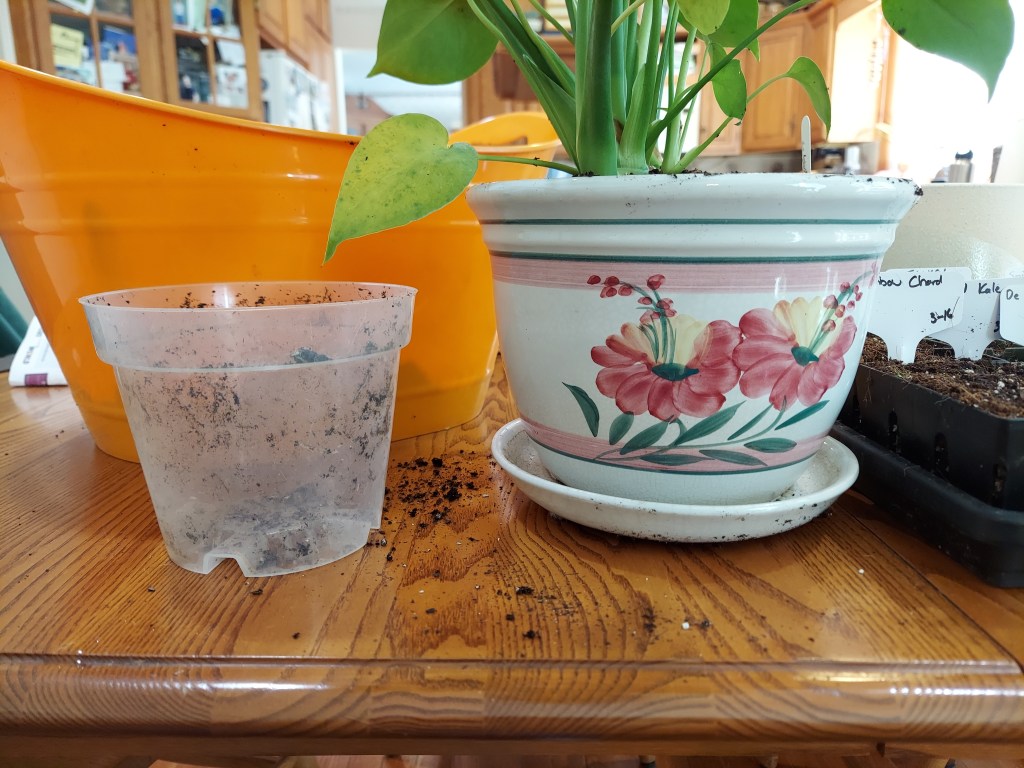
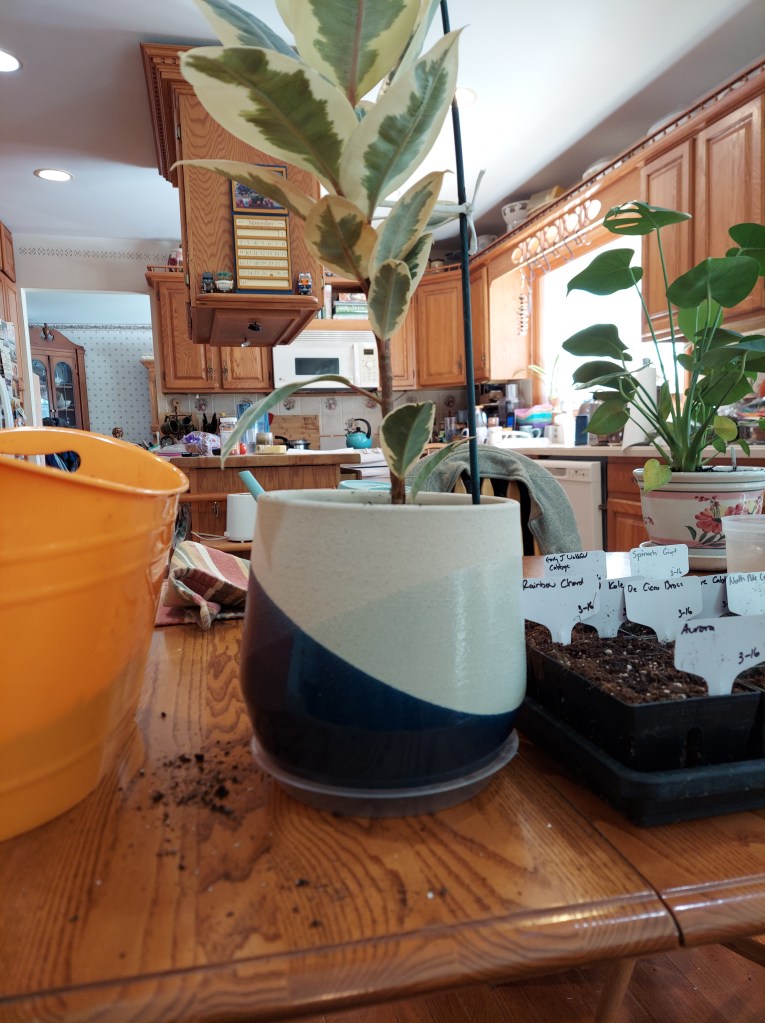
It had been in this pot for about 6 months, since I had purchased and initially repotted it over the summer. Time for some more space. I went looking in the basement and found a good pot which would allow it more room to grow. It’s ceramic with a drainage hole leading to the attached tray.
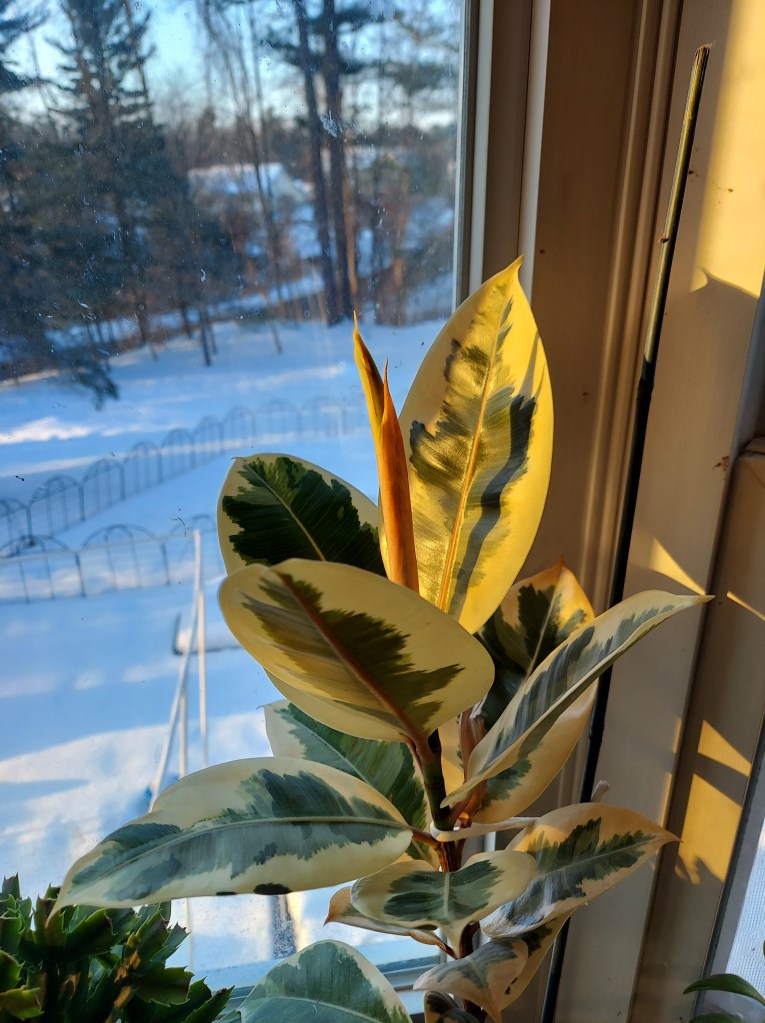
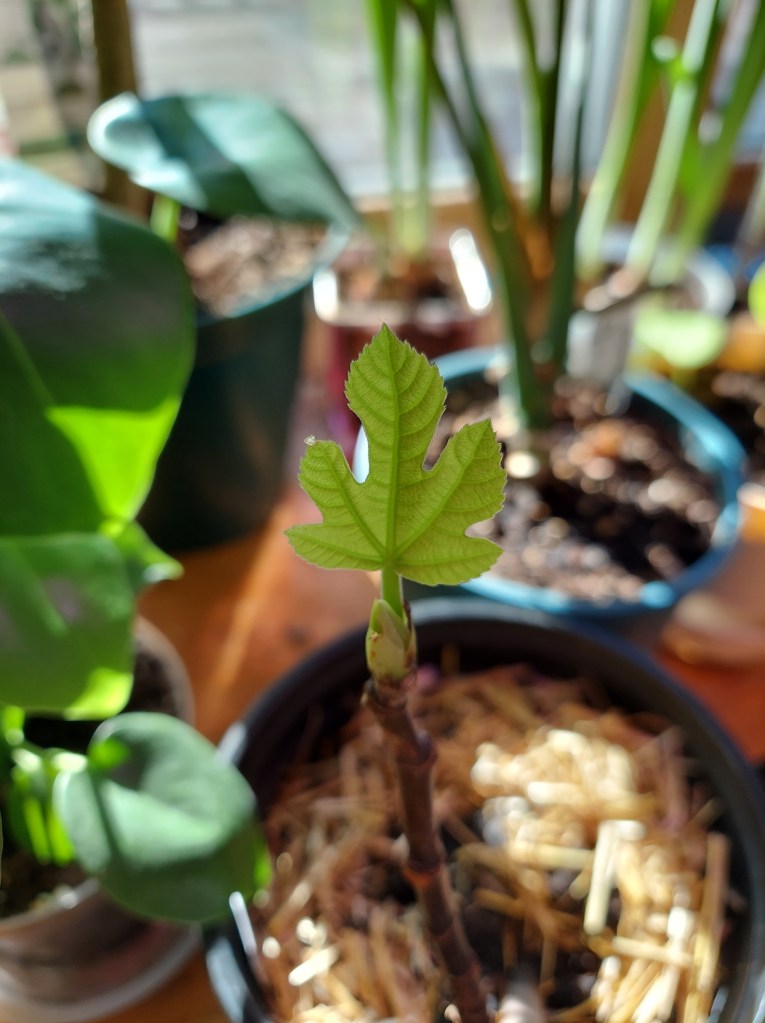
I also repotted my actively growing ficus plant. It has put out several leaves this winter and I wanted it to have more room. I found a cool pot I really liked at work, and bought it with this plant in mind.
Here it is unfurling its most recent leaf. This photo was from a couple weeks before transplanting, with the early morning sun hitting the kitchen window.
I didn’t take a before photo of the pot, but it was similar in size to the monstera. I also re-staked the Ficus because it is leaning a bit and not growing straight up.
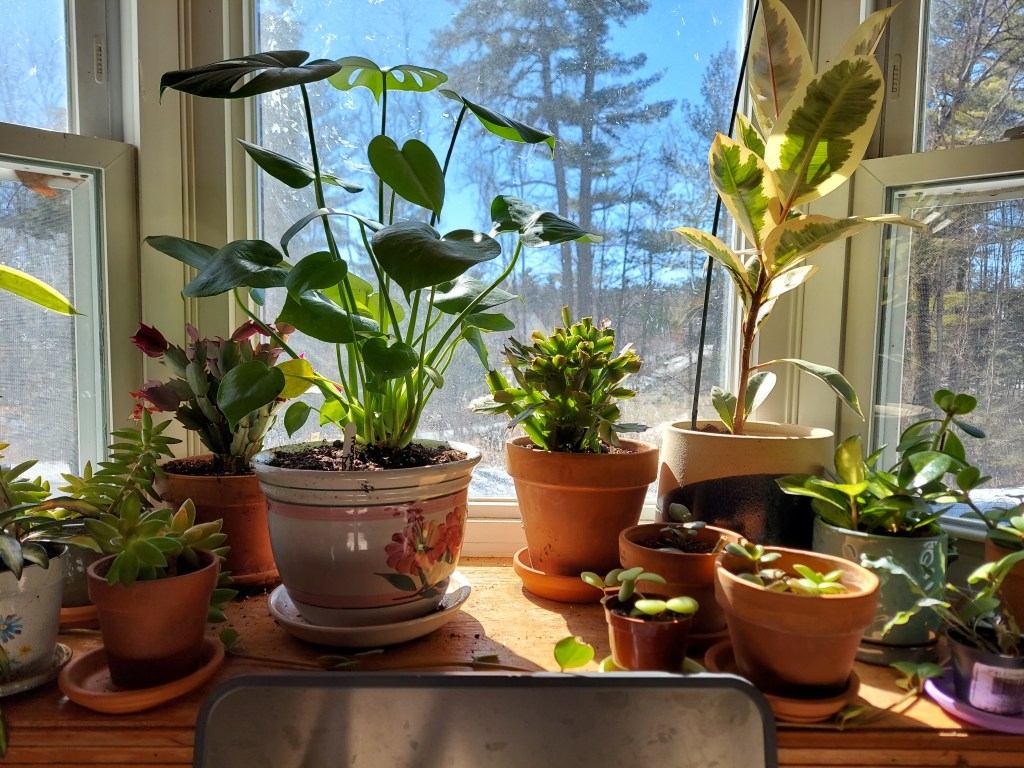
Both plants now on the kitchen windowsill. The monstera had been on the floor in the family room but I wanted to add some more height to balance out the Ficus. Hopefully it will adjust to its new placement and put out more growth this spring.
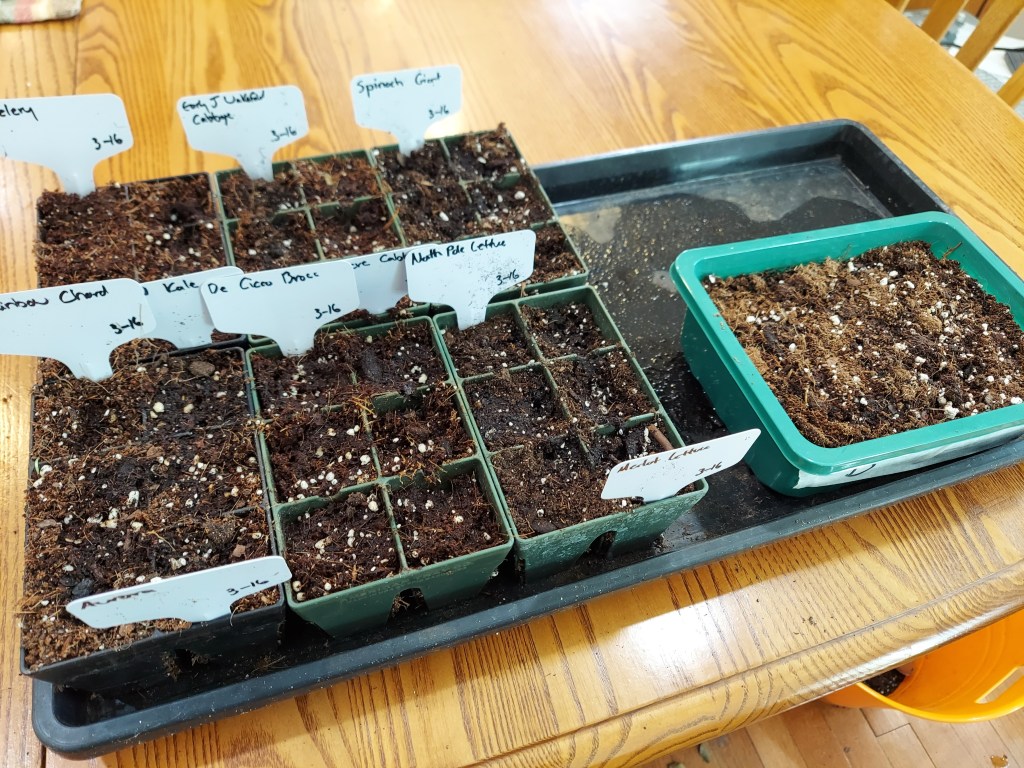
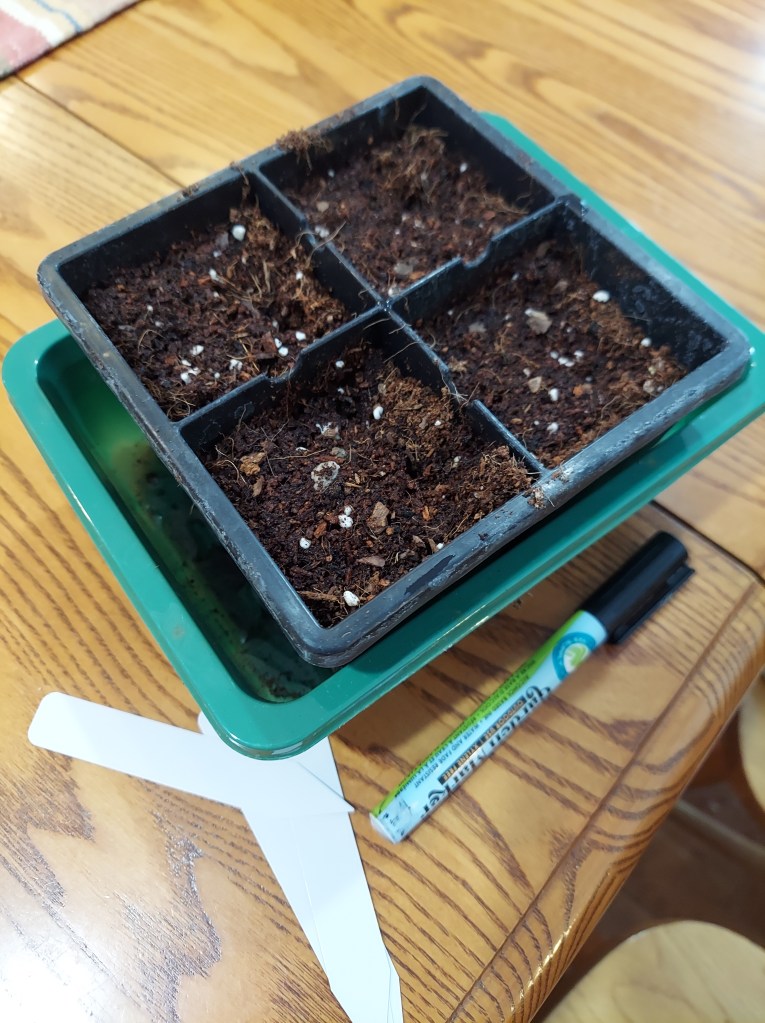
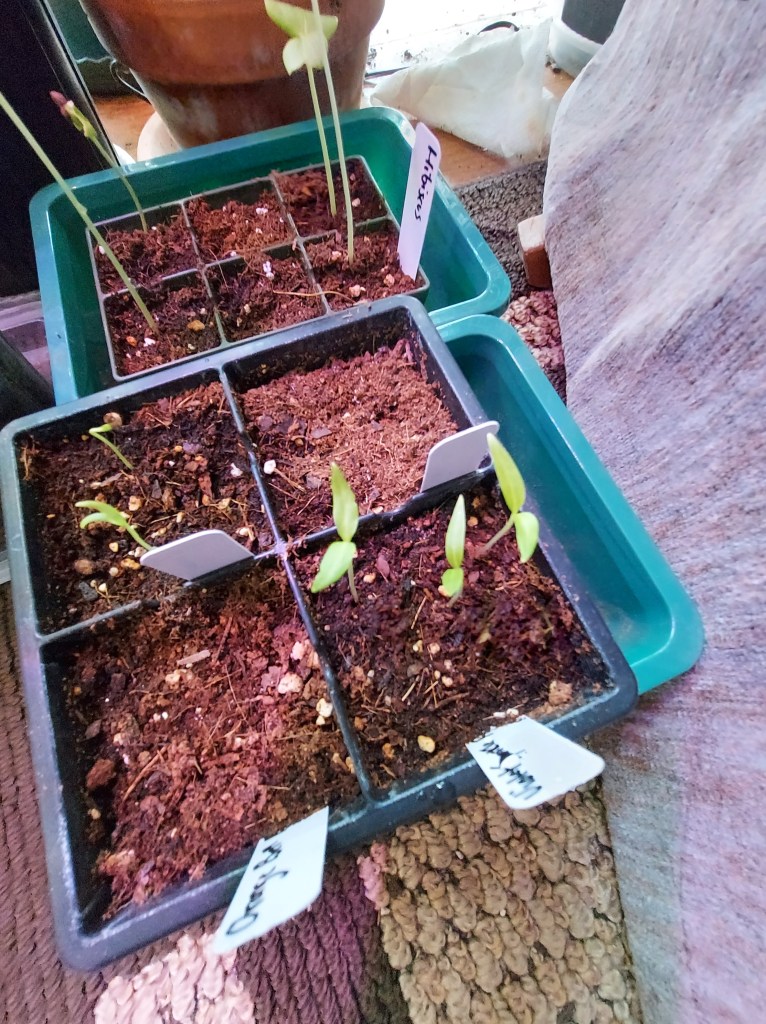
I also started a bunch of cold weather crops, mostly leafy greens and brassicas. Celery, broccoli, kale, chard, spinach, cabbage. A mini-tray of pea shoots as well, because I really like them on sandwiches and salads this time of year. They provide a nice crunch and very nice pea flavor when its too early to get fresh peas from the garden. It may be too early to garden outside, but I am preparing for the season and enjoying all my houseplants.
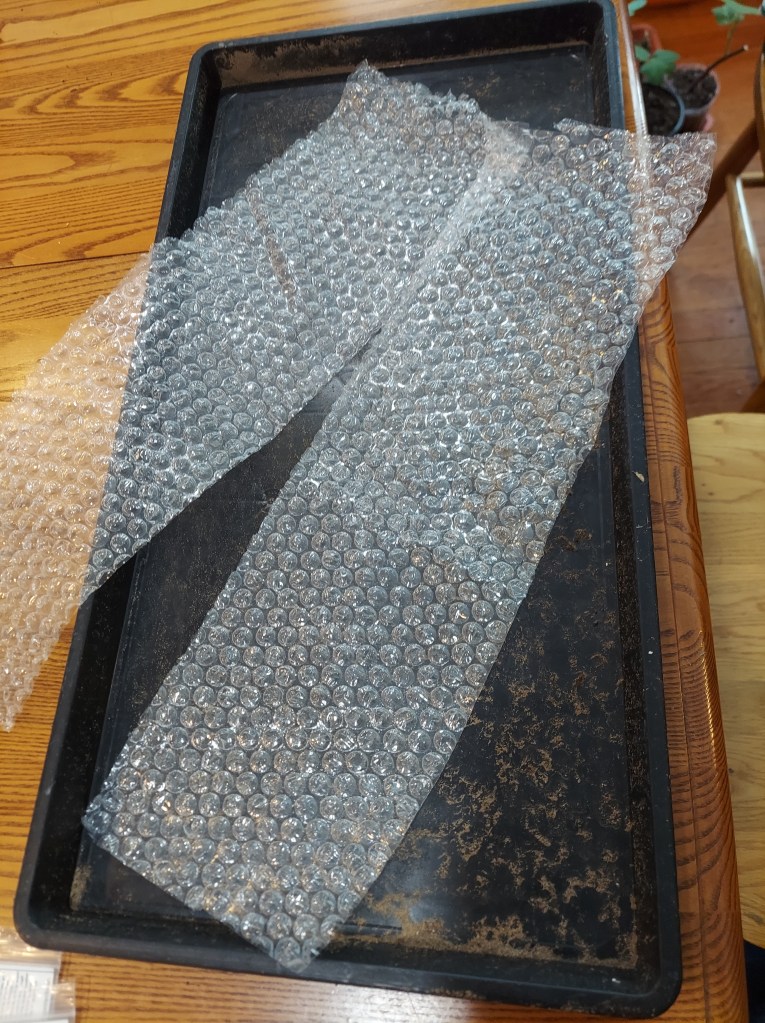
In mid-February I decided to try a new method of seed starting that I had seen on the internet. The new method is called a “seed snail” and is basically a rolled up bundle of potting mix with seeds. It is supposed to save on space when starting seeds, and also be beneficial for root development because it has a long, narrow section of potting mix held between two non-porous layers.
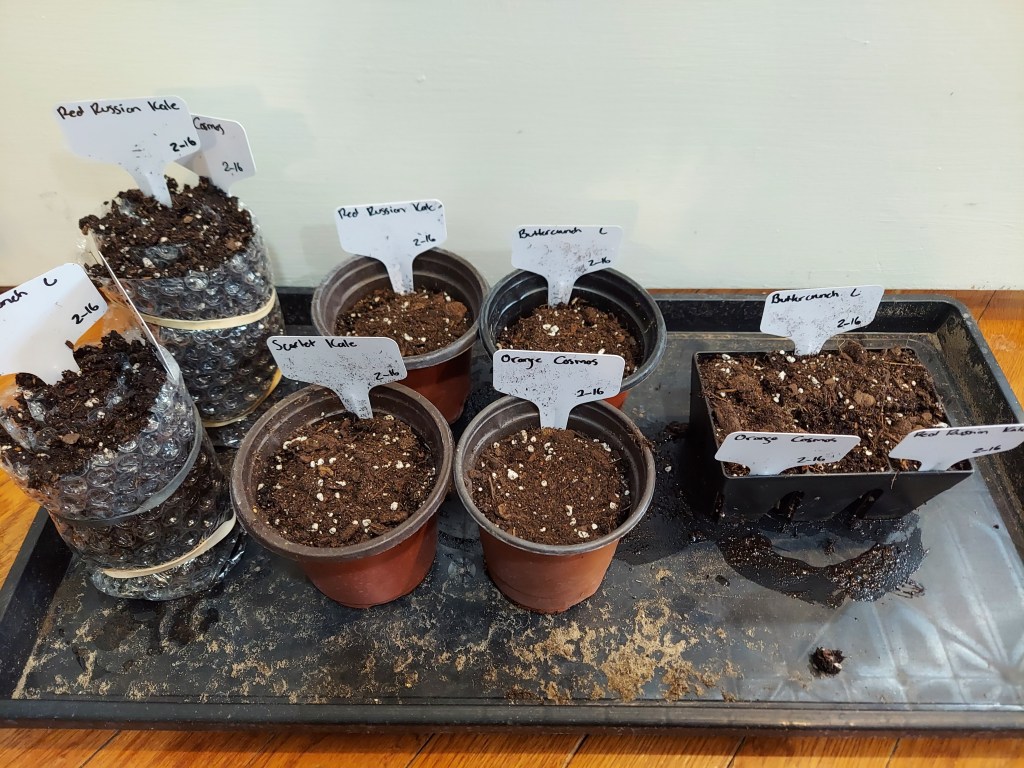
To start out, I cut up some bubble wrap into two sections, roughly 5×15 inches in size. I then got some potting mix nice and damp and picked out what seeds I wanted to try. I went with three different types of seeds, and in order to test out the seed snail I also started the same seeds in normal 3 inch pots and in an Epic 6 cell (standard seed starting pack).
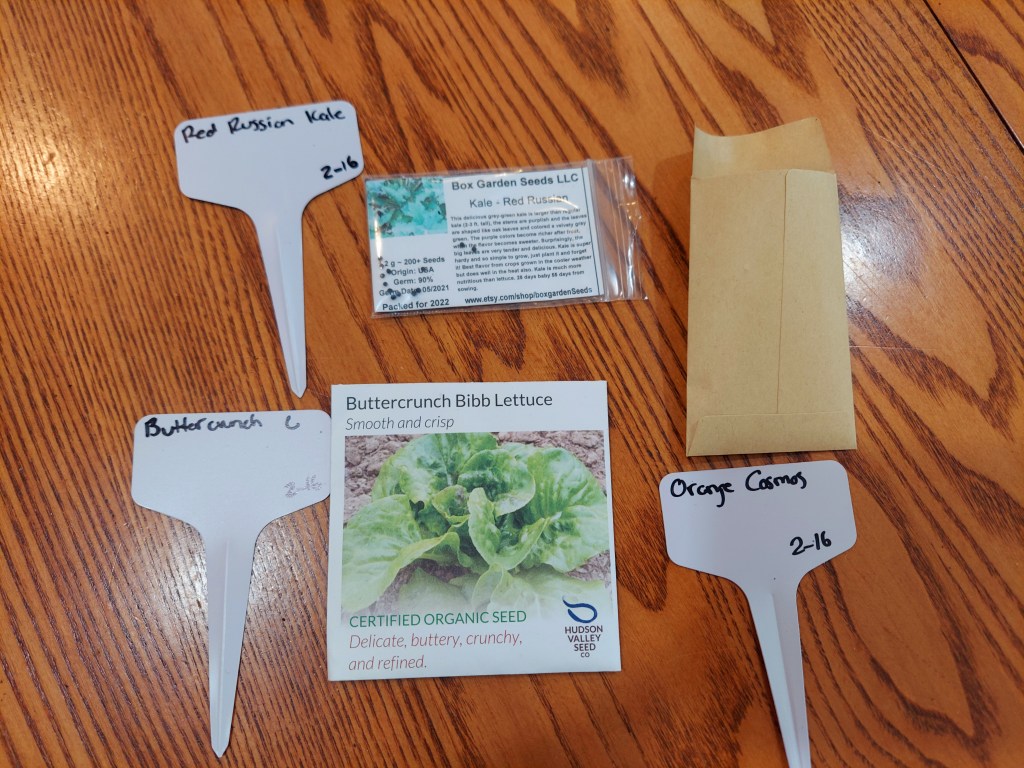
The seeds I started were Red Russian Kale, Buttercruch lettuce, and my own home saved orange cosmos. Each type of seed went into each growing environment.
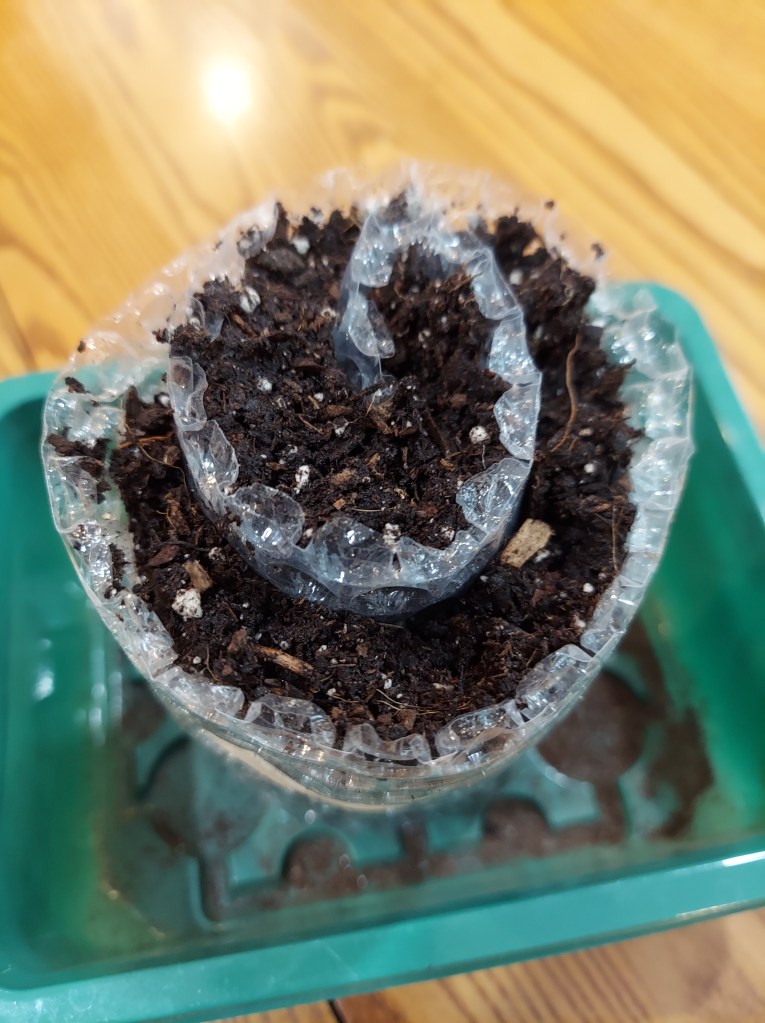
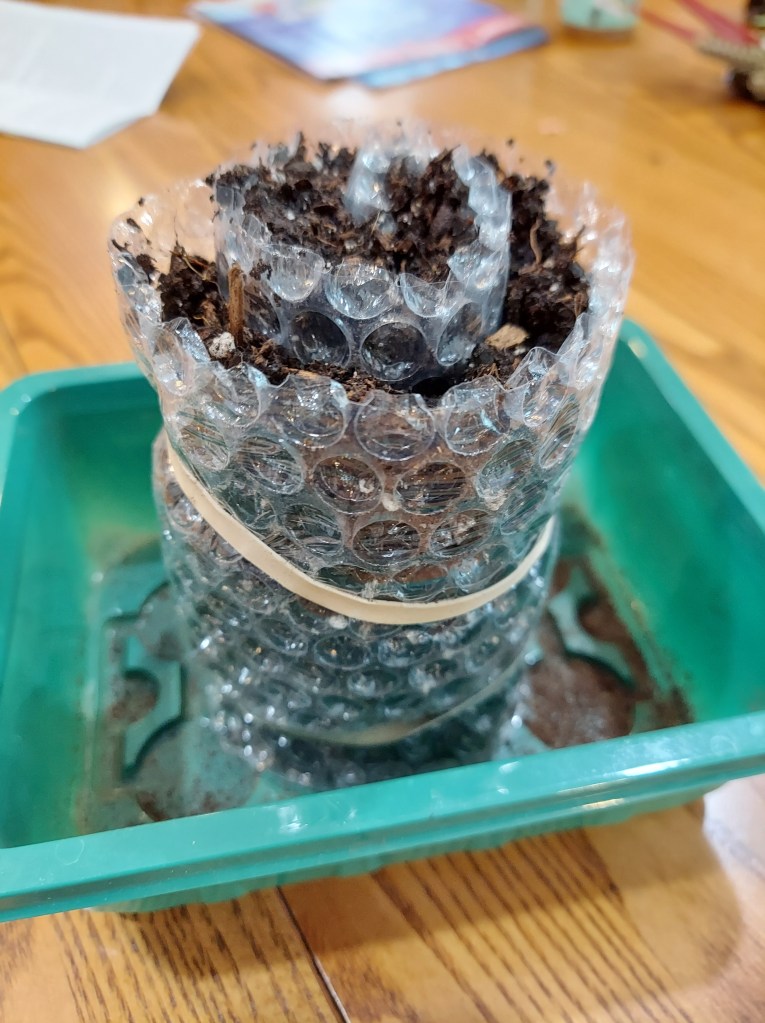
I spread the damp potting soil across the length of the piece of bubble wrap and then carefully rolled it up. I used two rubber bands to hold the end in place. I then carefully placed two of the types of seeds around each swirl and added a pinch of potting mix over top to cover them.
I then stuck in the labels and placed them on the tray with the “control” seeds in the more traditional pots. Everything will be going on a shelf by the window and I will also utilize a grow light so they all have the same environment.
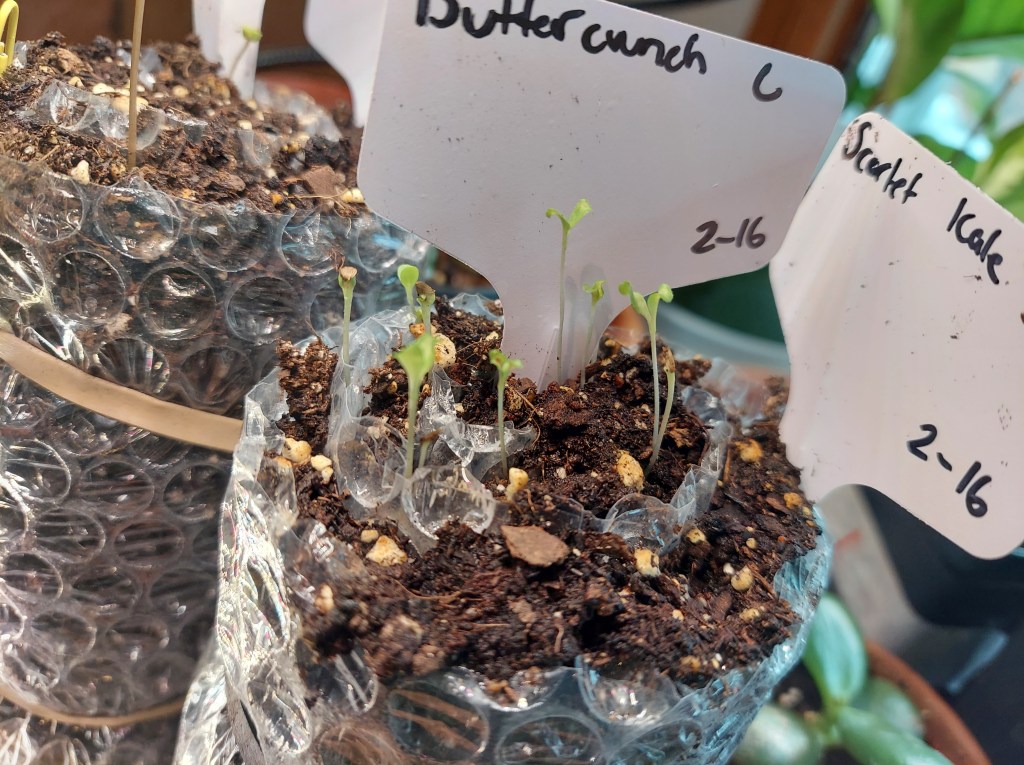
I’m curious to see if this method works. The seed snails are taller than the pots, and since the seedlings will have a narrow space to grow in that should force the roots to head down to search for more soil. It’s reportedly easy to transplant seedlings out of, since you can unroll it and see the roots. Could be less damaging than having to dig up/dump the 3 inch pot and tease seedlings apart. Not sure what the results will be but I’m going to give it a try.
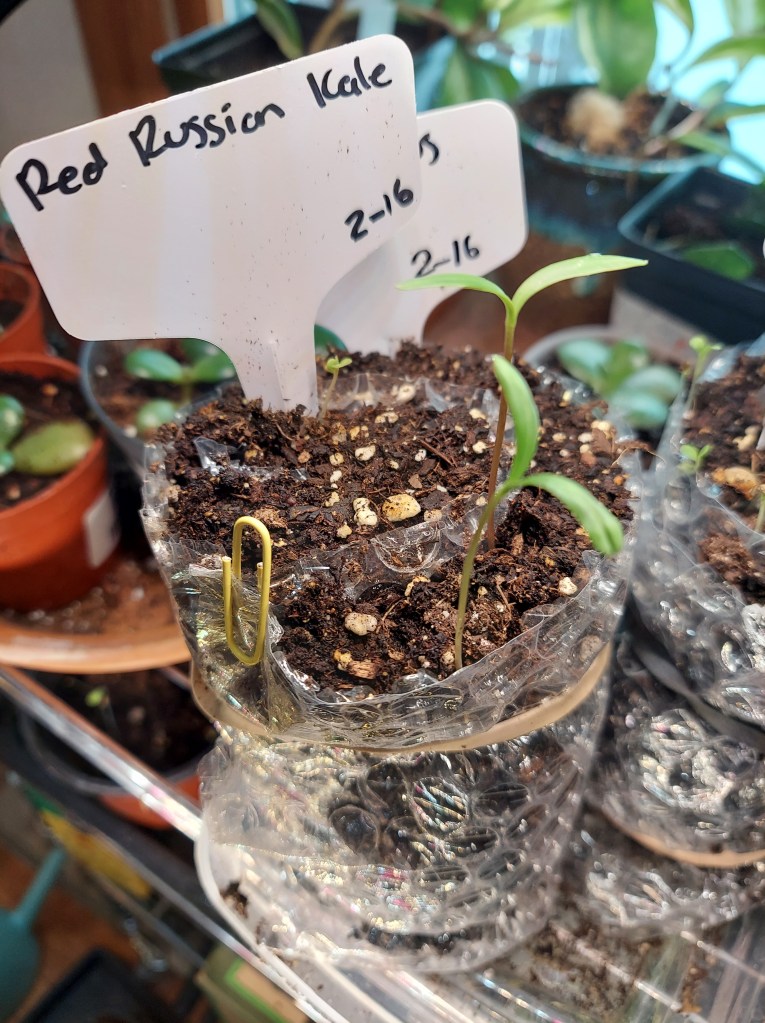
As of Feb 24 some of the seeds have sprouted, the lettuce and cosmos are doing well. The kale is currently lagging behind, not sure if the seeds are too old, but only a couple have come up so far.
Tiny lettuce seedlings
Home saved cosmos seeds are looking nice and healthy.
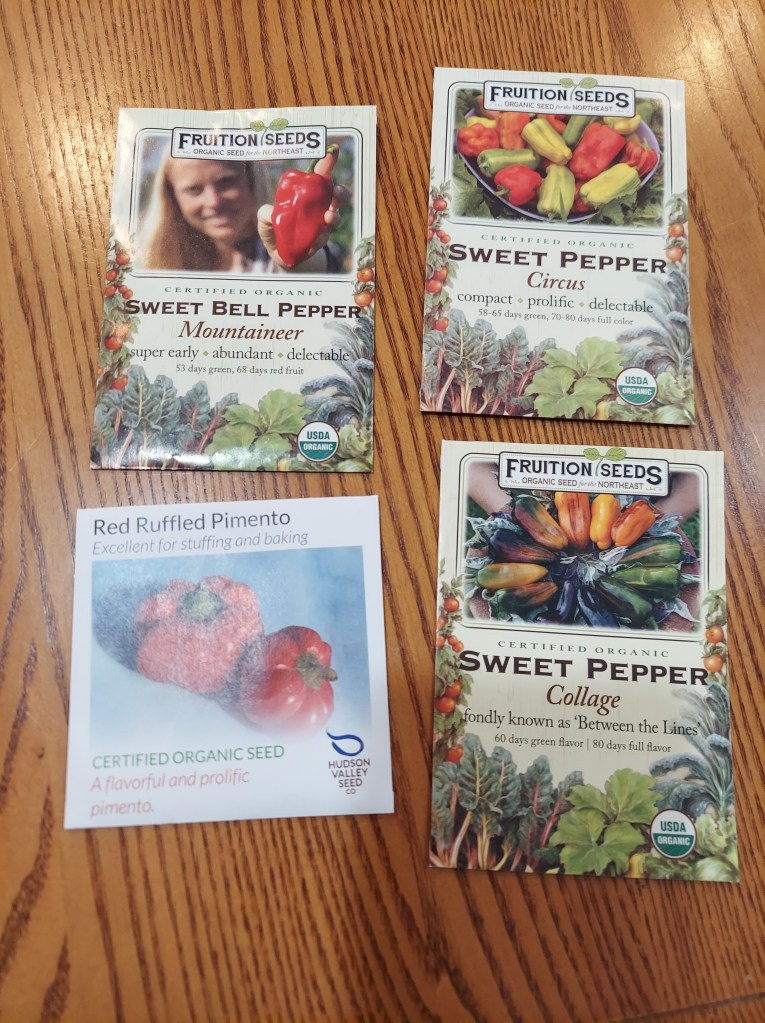
Midwinter is a good time to make plans for the upcoming gardening season, especially to figure out what I want to grow and to purchase seeds. I did a pepper germination test in mid-January to see if a couple of types of older seeds were still viable. I just sowed between 4-6 seeds of each of the 4 varieties in small pots and waited to see what came up. Two of the four types sprouted, so if I want to grow the other two varieties, I will need to purchase new seeds. The good news is I now have a few sprouts that will start my pepper collection for this upcoming season. They are both small sweet pepper varieties. For any seeds that are more than a few years old either doing a germination test, or sowing extras is recommended.
Pepper experiment time!
Pepper seedlings a few weeks later
My fig cuttings are doing quite well, I had a high success rate for propagation. I love seeing all the tiny leaves that emerge from sticks that were dormant a month ago. Many of my older fig trees which are in the basement are also waking up and unfurling new leaves. Some of the houseplants are even showing new growth, so that is a sign that they are enjoying the slowly lengthening days. It may be freezing outside, but spring is on the way.
Peppers like a warm environment so I started the seeds inside small greenhouses on a heat mat. This way they were warm and humid. The heat speeds up germination and ensures more of the seeds do sprout. I’ve had pepper seeds poking through in as little as a week using this method.
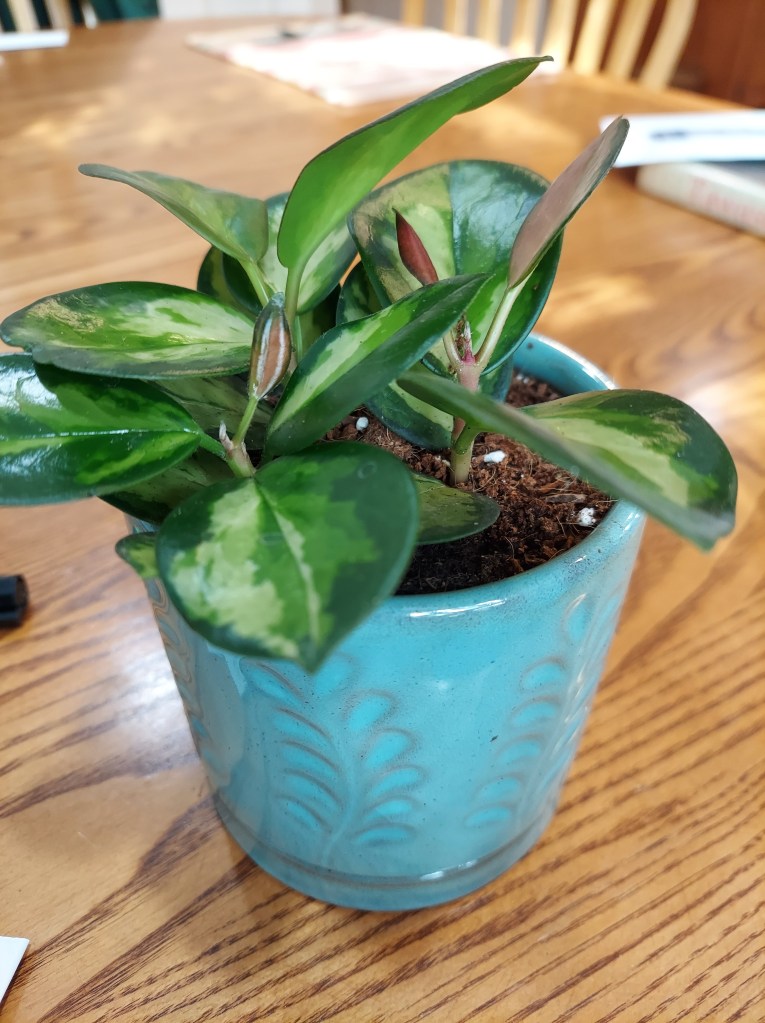
I have also repotted and taken cuttings from a few of my houseplants. Winter time isn’t ideal for this, but the houseplants were putting on new growth, and roots were coming out of the bottom of their pots. I spent a couple hours last week repotting them all, including two hoya and two pothos.
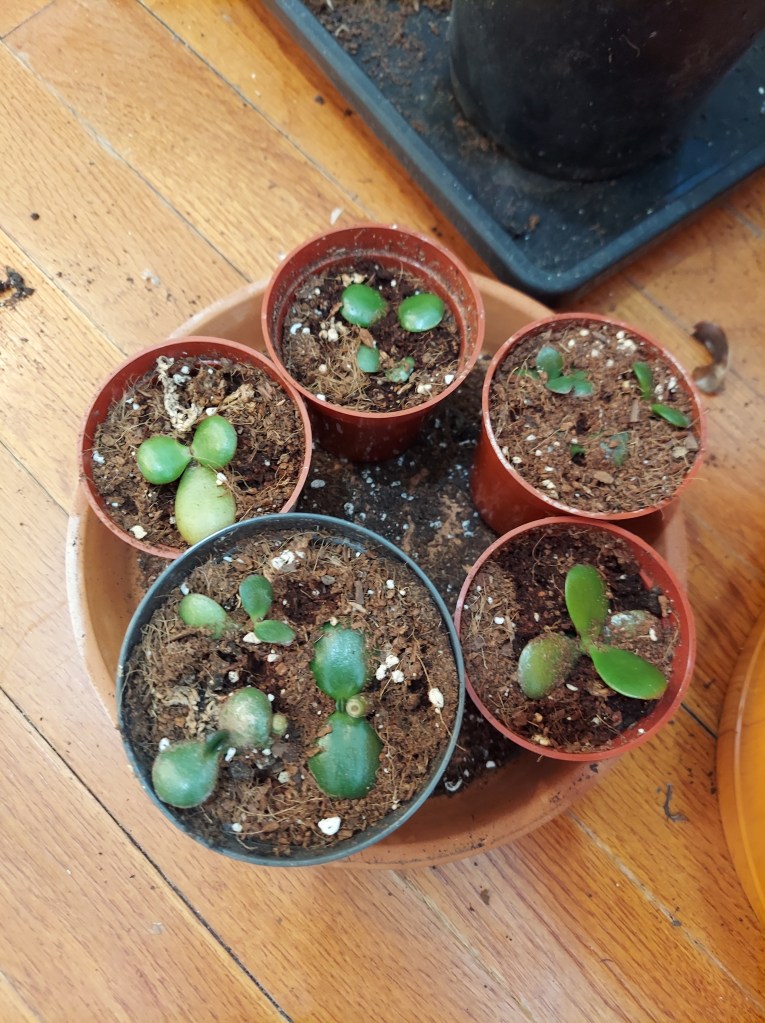
I had successfully taken cuttings from a jade plant and so I planted them in a few small pots to grow on.
I started my first main sowing of pepper seeds last weekend and expect to see sprouts later this week. I sowed the following varieties:
I plan to start a second set of seeds this week, all different varieties. Once these are all up and I see how many potential plants I have growing, I will start any final seeds, to potentially fill in gaps.
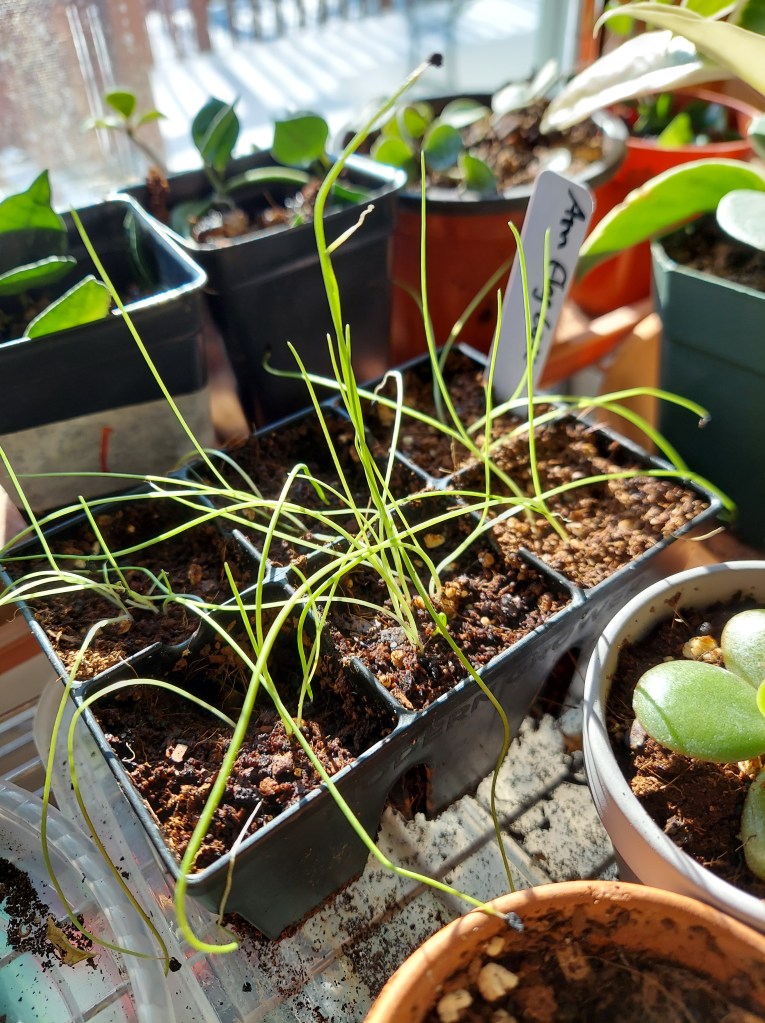
I have already started a set of leek seeds and they have been growing for about a month now. Allium family seeds (leeks, onions, shallots, scallions) are very slow growers. I managed a few small leeks last season, but I want to try again. I bought onion starts last year which worked, but I did not get large onions. This year I am once again going to try from seed. I also plan to start celery seeds soon as they are very slow growing seedlings as well.
Multi-sown leeks living amongst the houseplants for now.
I have purchased my first small bag of potting mix which I used this weekend to pot on my small hibiscus seedlings. My homemade seed starting mix is quite lightweight and well draining, but once seedlings get a little bigger, they can use more nutrients. I plan to start feeding them with a diluted houseplant liquid feed after they are about a month old. I’ve not done this before, but want to see if it helps the seedlings grow stronger and larger.
My grow lights are set up on the bottom shelf by the back glass door. This way the pepper seedlings will get as much light as possible for the time of year. I’m also utilizing white cardboard at the back of the shelf, to try and capture and reflect the light back onto the seedlings. I did this last year and I think it helped them stay a little more balanced with their growth. I’m still rotating the pepper seedlings every couple of days so they don’t grow lopsided.
We just emerged from a lengthy cold snap where I live, and I am very much looking forward to spring and nice warm days.
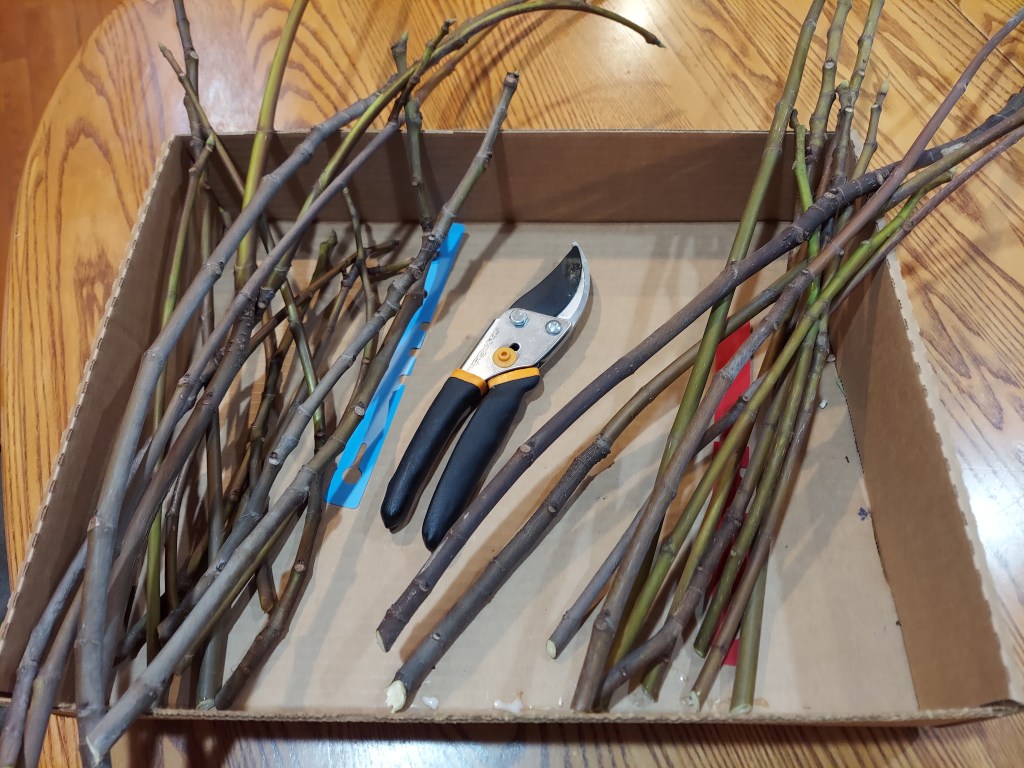
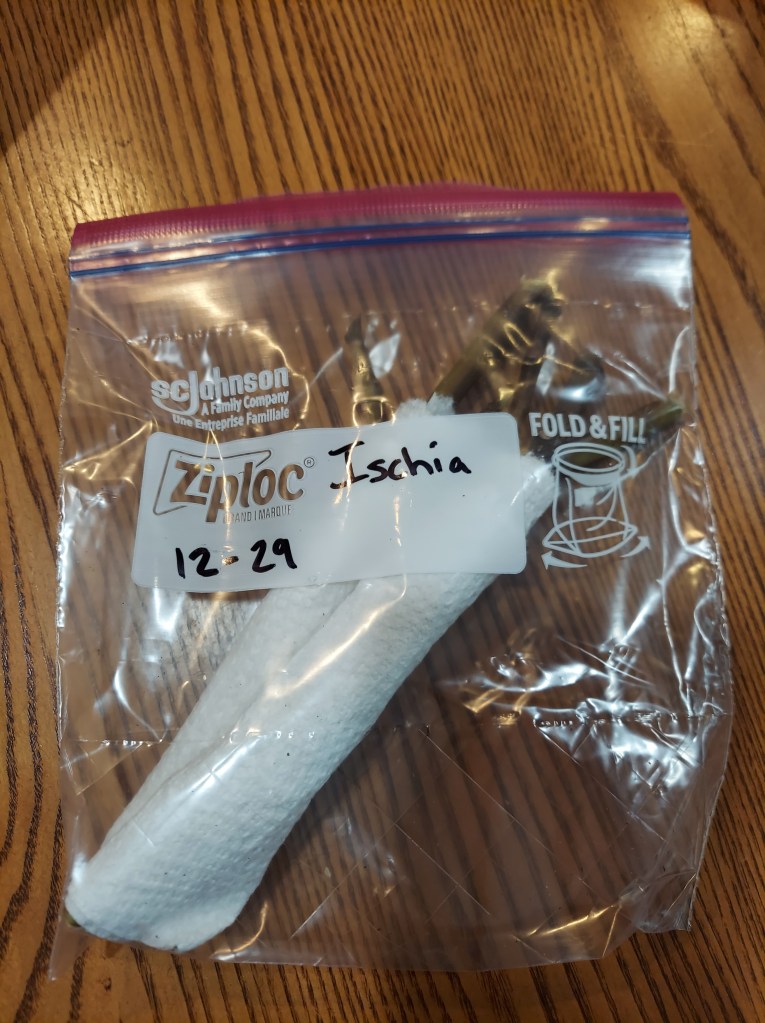
The time has come again to propagate figs from my potted trees. Winter is a very good time to take fig cuttings because the trees have gone dormant and are not focusing on new leafy growth. Fig trees can grow a lot over one year so pruning the trees back can provide plenty of cuttings to propagate from as long as you know what to look for. You want to root slightly older wood that has turned slightly gray or brown and is no longer bright green. I took these cuttings on December 29, and it will be a lengthy process to see which ones develop into full viable baby trees.
When I take cuttings for propagation I make sure each cutting is about 6-8 inches long and has at least 3 nodes (bumps where new growth will develop). I cut just beneath a node on branches that had grown in the past year. I removed branches that were either growing at odd angles, too close to the main trunk if they came directly from the soil, or growing inward towards the center of the tree.
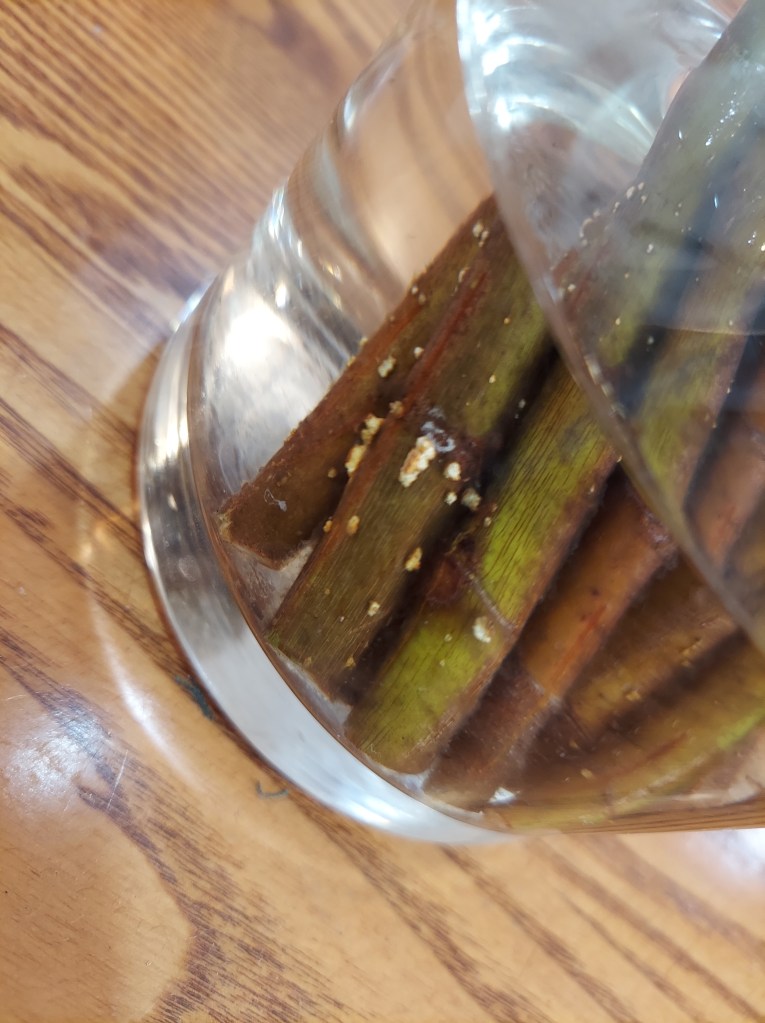
Since I have two types of mature trees, I marked each type with a colored tag so that I could tell them apart. Green Ischia are on the left, Chicago hardy are on the right. Once I cut the branches off the trees I took them up to the kitchen to get them started. I decided to do three different methods of propagation since I had about 60 total viable cuttings. I put about a dozen in a cup of water to see how well they handled the propagation method that required the least amount of work.
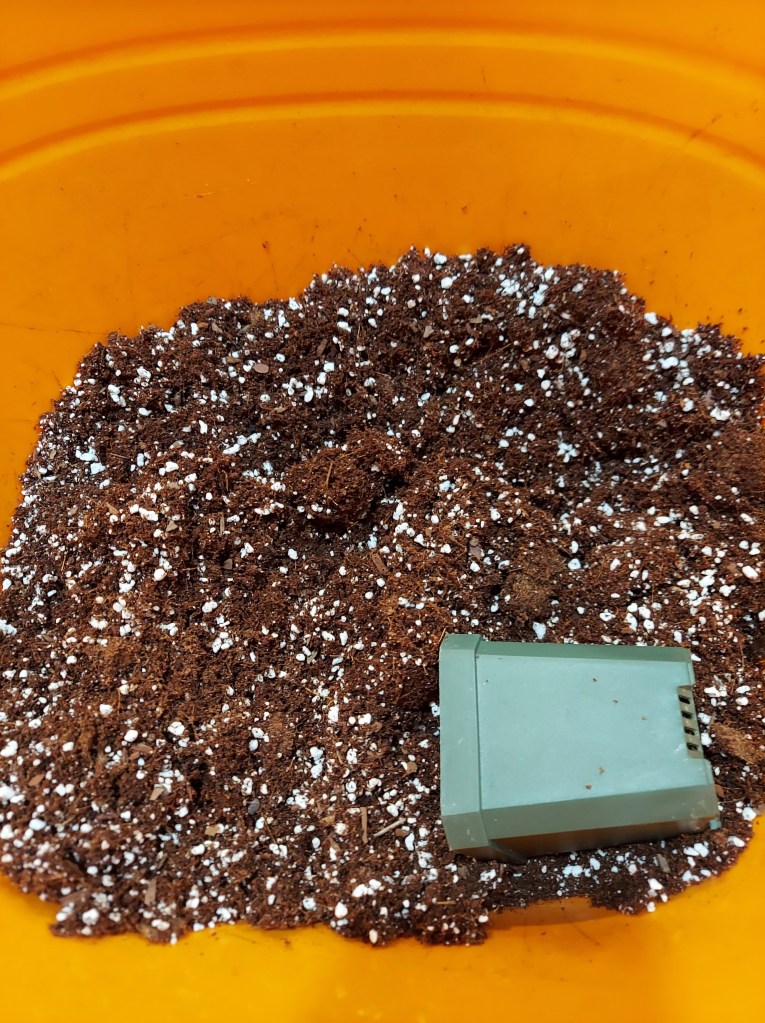
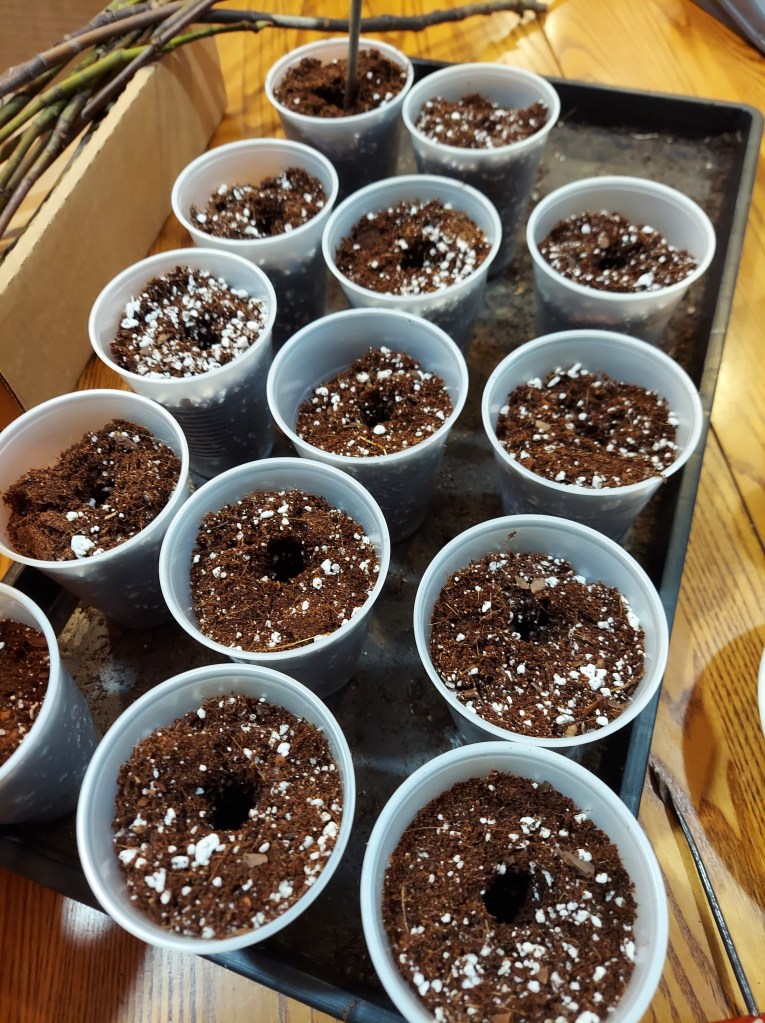
Before I cut the figs I made up my preferred soil mix for cuttings approximately half coco coir, one quarter perlite, and one quarter pine bark fines. This provides good drainage. Most of the cuttings went into small plastic cups. I like clear cups because then I can monitor the moisture level and I can watch the root development.
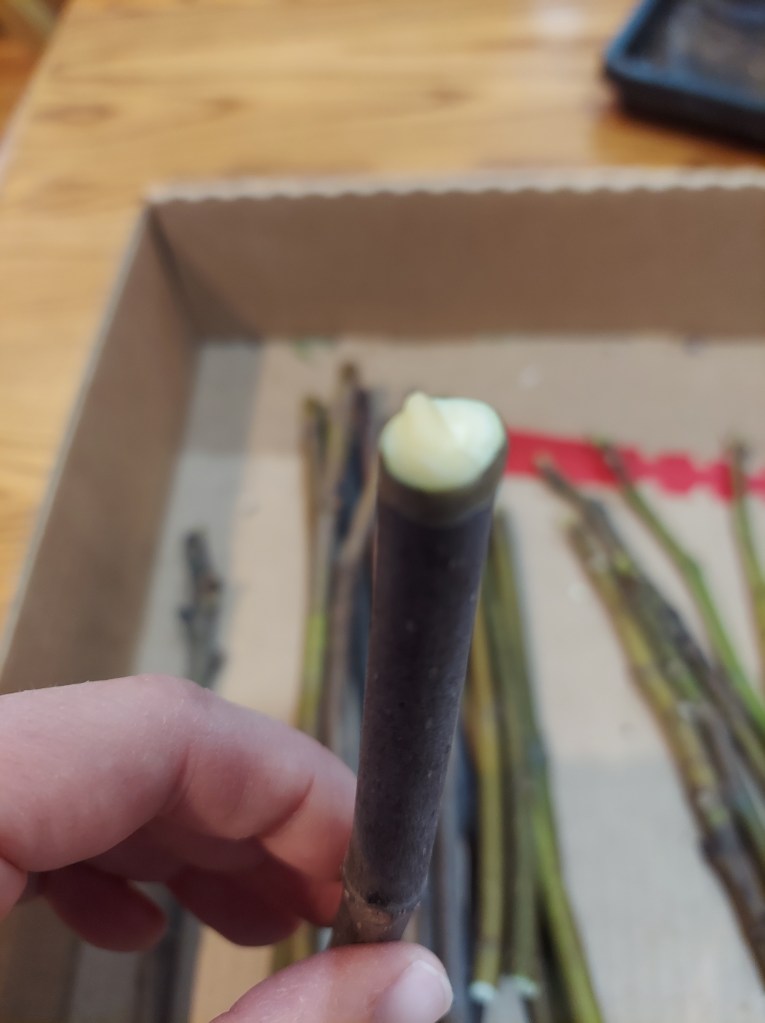
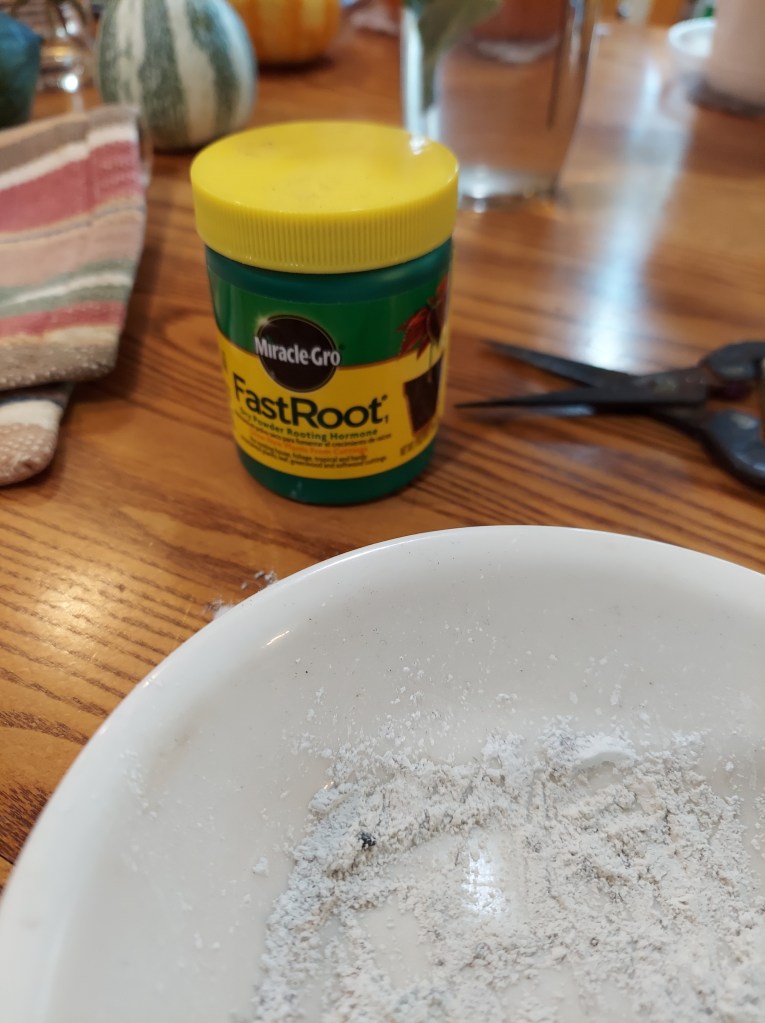
Cups of growing medium all set to go. Once I cut all the branches down to the appropriate size I dipped the tops in some old candle wax. This helps to seal over the cut and keep moisture in.
I cut little slits on the bottom inch or two of each cutting that was going in the potting mix. I then used a paintbrush to dust them with rooting powder. This step helps provide a bit more surface area for roots to develop.
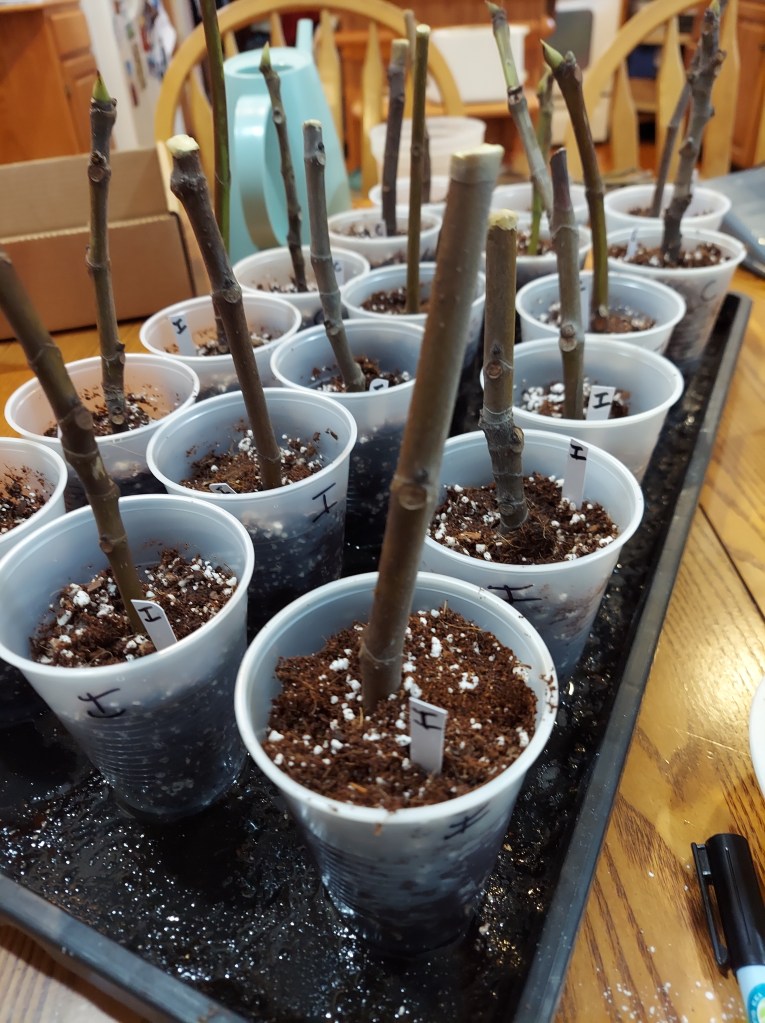
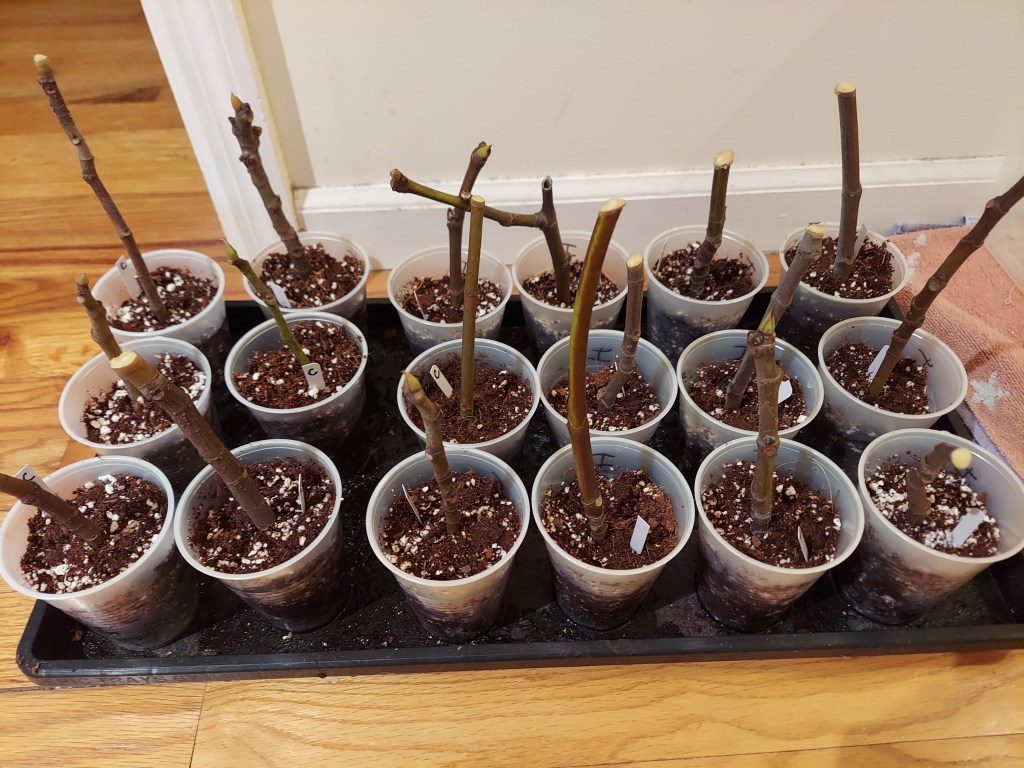
One tray of figs all ready to go on the heat mat. I labeled the cups as well in case the little plastic labels fell out. I put 18 cuttings in a plastic tote in the upstairs hallway. I have alternated between opening and closing the lid in order to keep the humidity high while also providing some airflow. I checked the moisture level and have only had to water once in the past 10 days.
For the first few weeks they do not get any additional light in the hallway. I want the sticks to focus on root growth for as long as possible. If they leaf out too quickly, they can cannibalize themselves by diverting all the nutrients to top grown and not to roots. The hallway gets very indirect sunlight.
The rest of the cuttings went in plastic bags wrapped in damp paper towel. I have had good success with this method in the past, the difficulty lies in keeping them just damp enough while preventing mold from forming. I left the tops open and checked back every couple of days. I added a slight amount of water whenever needed.
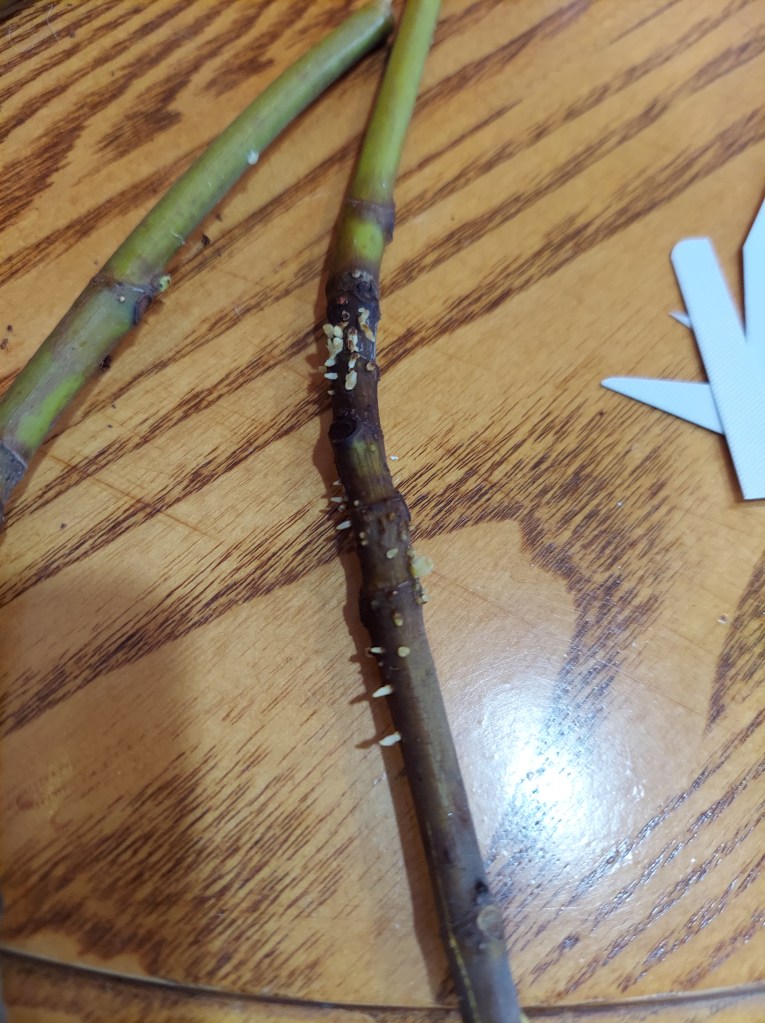
Water propagated cuttings, the white dots are the beginning of root formation. Some of them are developing along the cuts that I made at the base of the stems.
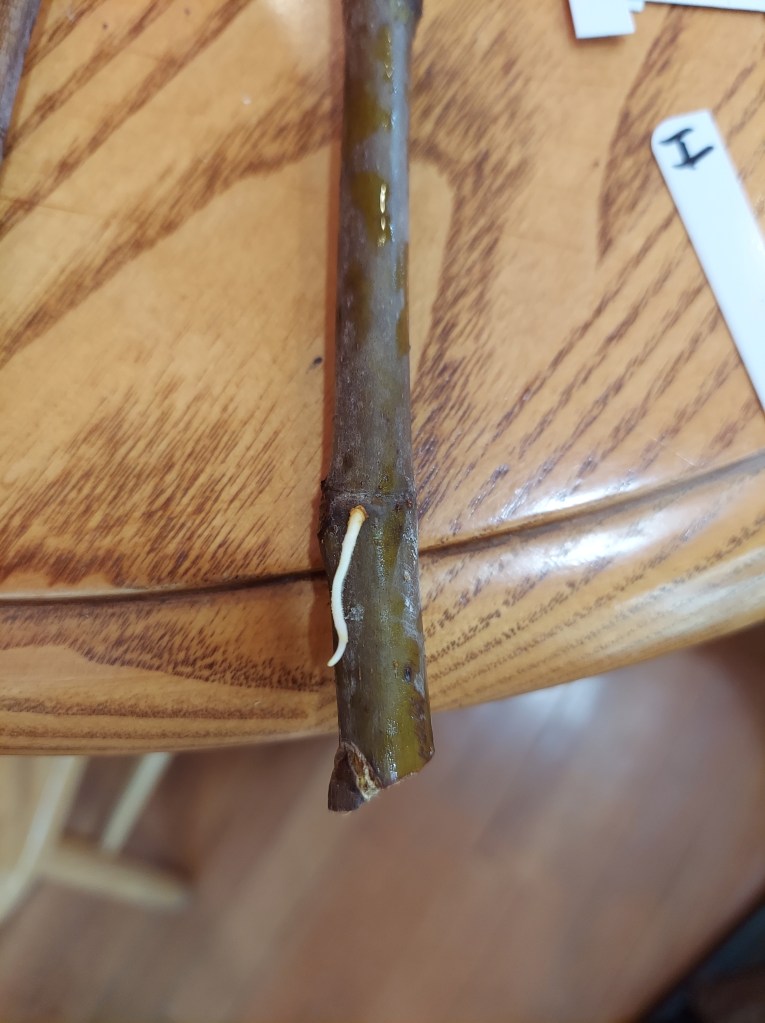
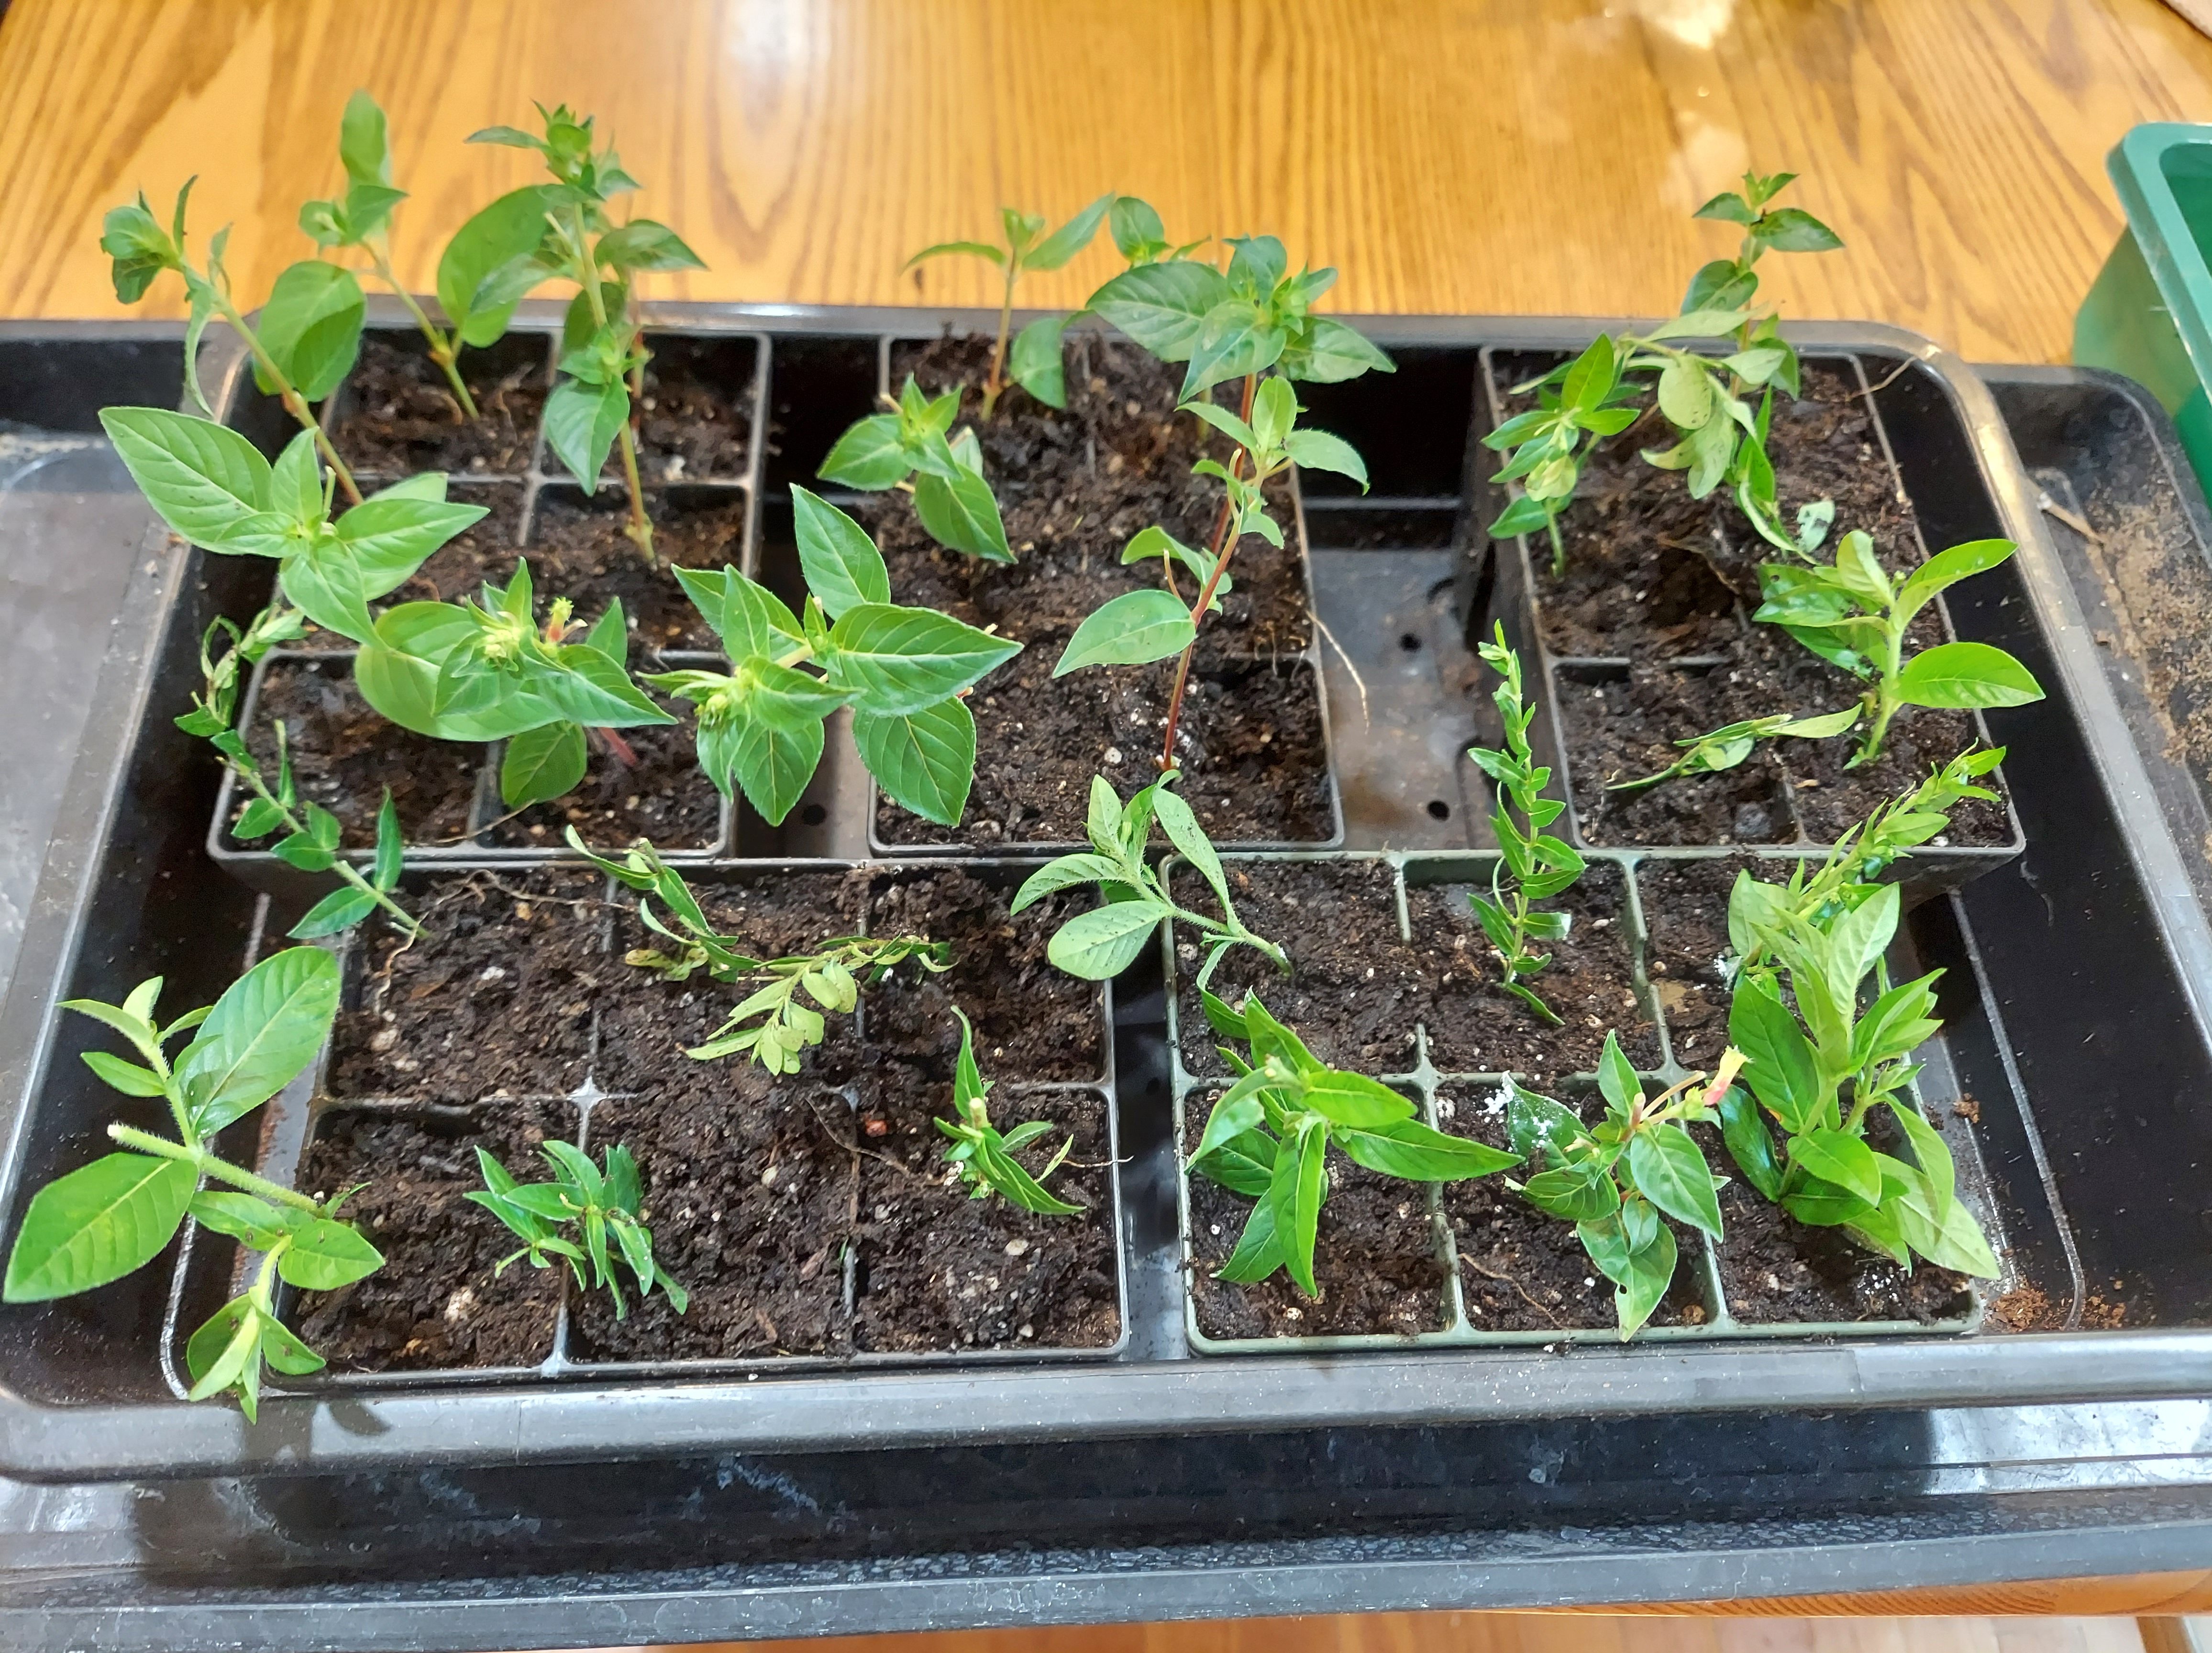
As of January 9, several of the cuttings in both the water and the paper towel method had started to show roots. It was time to move them into soil. I carefully unwrapped the paper towels and checked each batch of cuttings. In total I found 6 that had started to root, or were budding out and needed to focus on root growth.
This cutting had the most developed root out of all the paper towel cuttings. It’s about an inch long and definitely ready to be moved to soil. I utilized the same method as before for this follow up round of clear plastic cups inside a small tote.
A second viable cutting with lots of potential. It has small rootlets forming all down the length. I had to angle it to try and get as much as possible below the soil line of the small cup.
All total I potted 12 cuttings, 6 from water and 6 from paper towel. A few were budding and one had a full leaf unfurled, hopefully they make it.
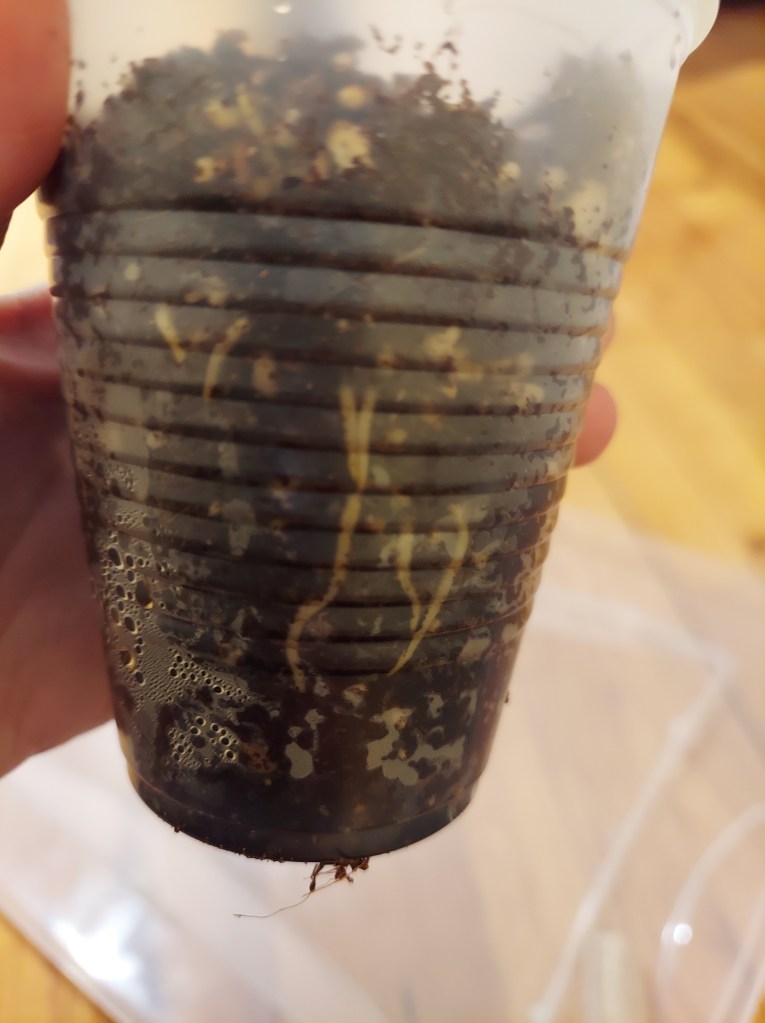
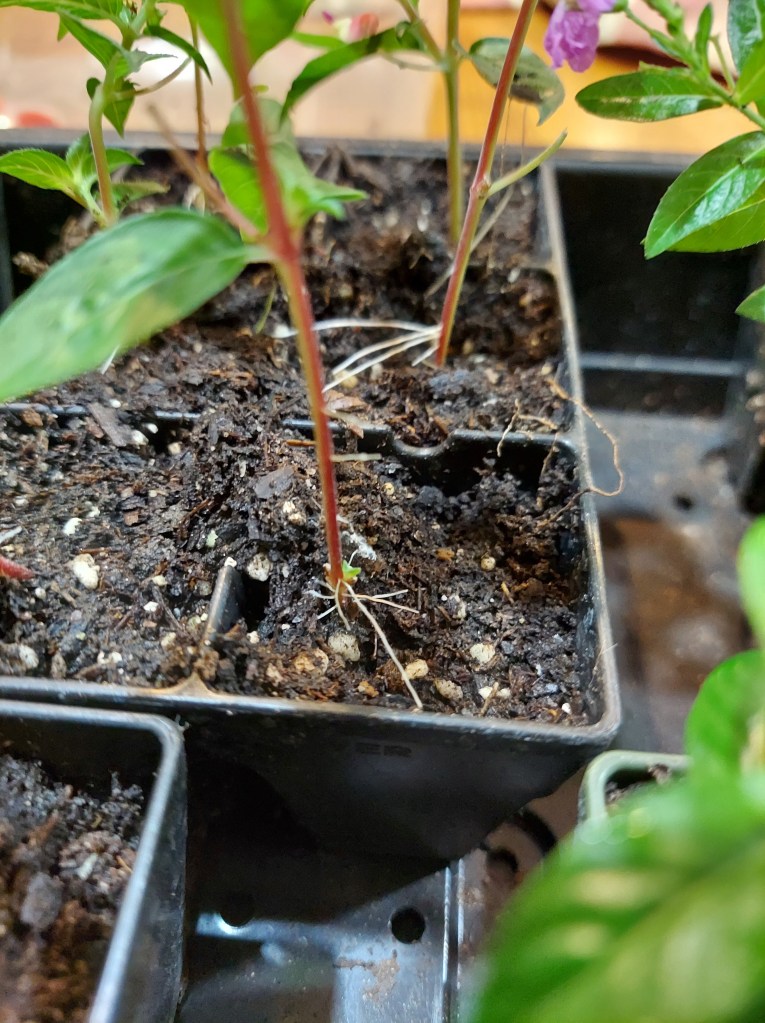
I also checked on the cuttings in the larger tote that just went straight into soil. Happily 3 of them already have visible roots on the edge of their cups after less than two weeks of growth.
Can’t wait to see how many more of them show visible root growth over the next couple of weeks!
Winter has arrived in New York, and I find that this quiet season is a good time to reflect on the previous gardening year. Snow is blanketing the ground, and all the perennials are hibernating during the cold. A few of the fig trees have started to wake up in the basement, but most of the plants are resting. It’s too early to start seeds but it is a good time to plan for the year ahead.
The first fig tree has awakened from hibernation. A second tree joined it a week later and they are now with some houseplants beneath a grow light by the back door.
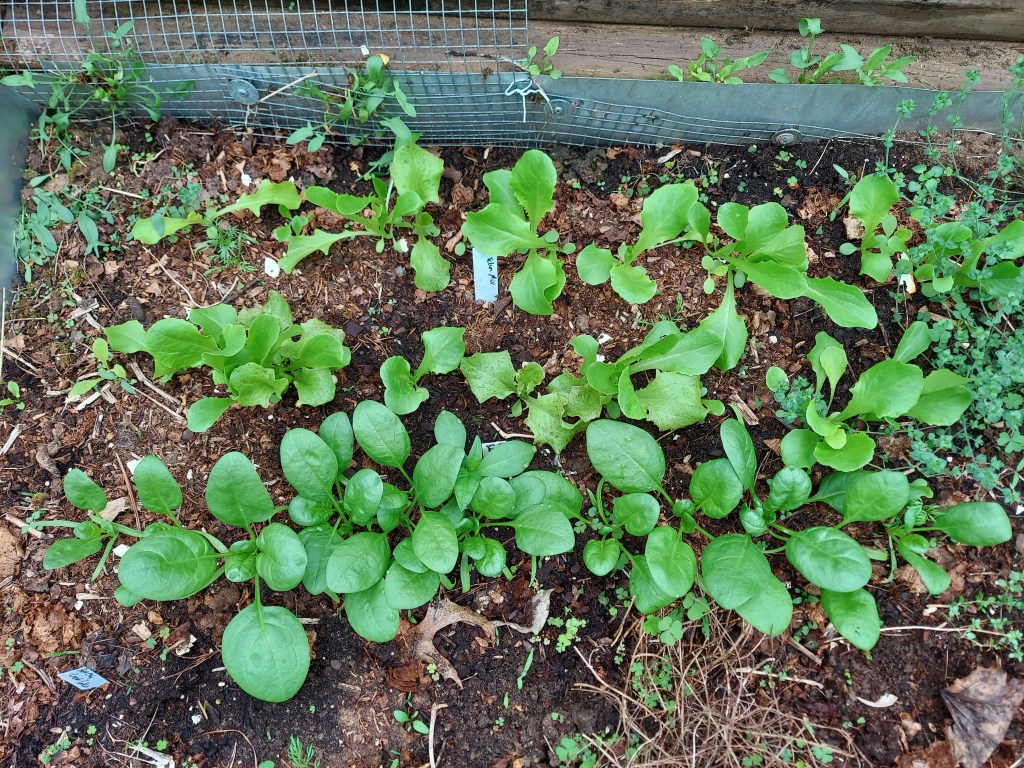
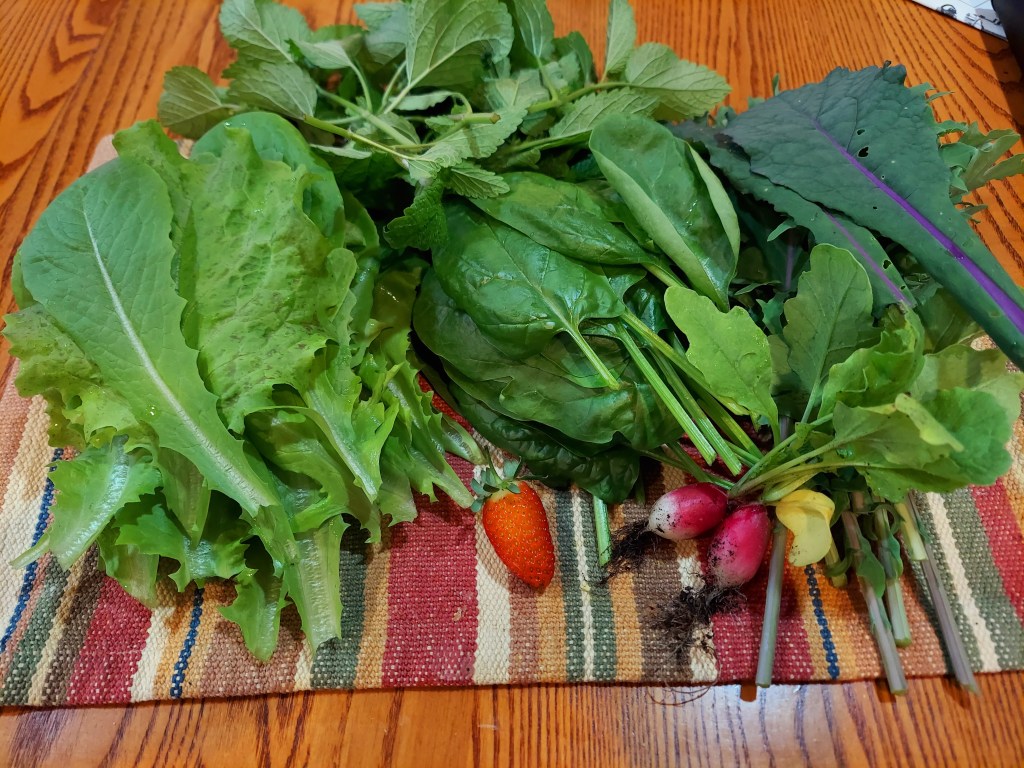
Last year was a gardening challenge. The spring weather was very difficult, and we had a slow start to the year. Early spring was cold and cloudy with tons of rain followed by near drought conditions. Glad we use sprinklers to water, otherwise a lot of the plants would not have made it. I did have a very good lettuce crop in the greenhouse during the wet, cool spring. We were self-sufficient for salads for the first time which was nice. I did enjoy growing a leafy green mix, all the different leaves made for pretty combinations in the salads. I managed to grow spinach that was large enough to harvest too.
2 rows of baby salad leaves and 1 row of spinach. I direct sowed these in one corner of the greenhouse, and left them until late May when I transplanted out the cucumbers.
Nice late May harvest, from both inside and outside of the greenhouse.
The summer plants did pretty well overall, but we had a major pest problem when the woodchuck moved in under our deck. It took a full month to catch it, and it destroyed my squash, lettuce, and most of the kale plants. The voles also continued to be a nuisance. They didn’t eat whole plants like the woodchuck but did do damage to flower and leafy greens. I had a particularly hard time trying to get pole beans started off at the base of the deck.
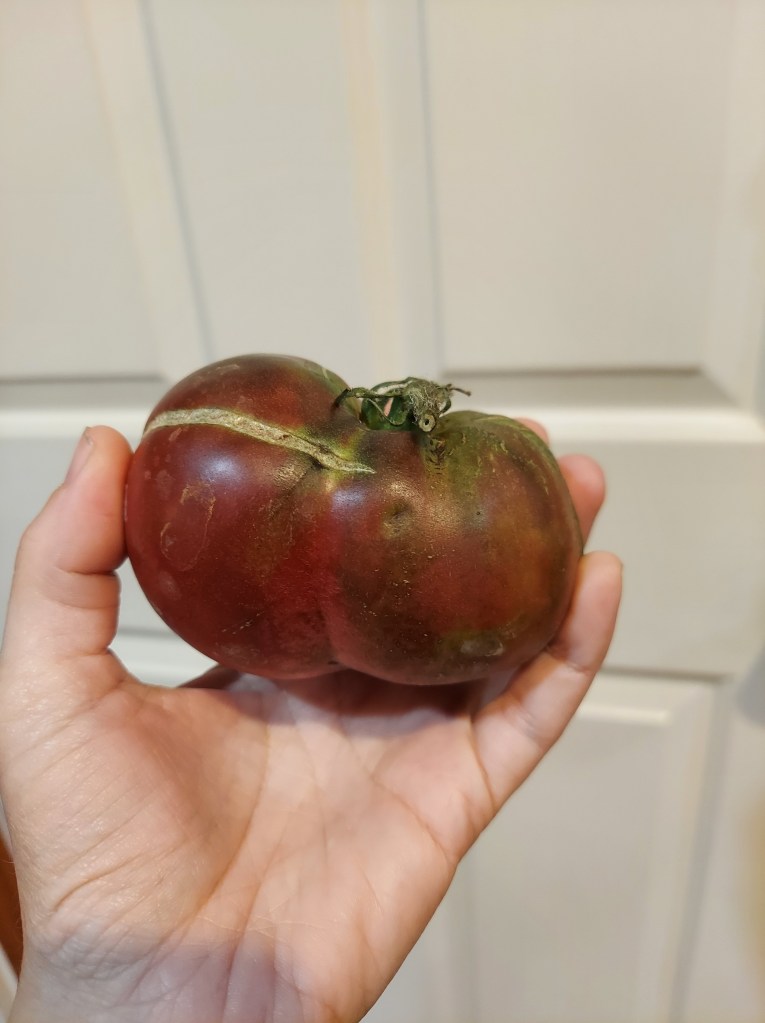
Biggest harvests: compost pumpkins, total weight was 68 pounds! Tomatoes also grew like crazy, tons of “weed” plants from last year’s compost that I allowed to grow. I also successfully grew the heirloom variety Cherokee purple for the first time, so that was cool. In total I grew 73 pounds of tomatoes. I made tons of pasta sauce and also gave away a bunch of tomatoes to family and friends.
First Cherokee purple, harvested in late July
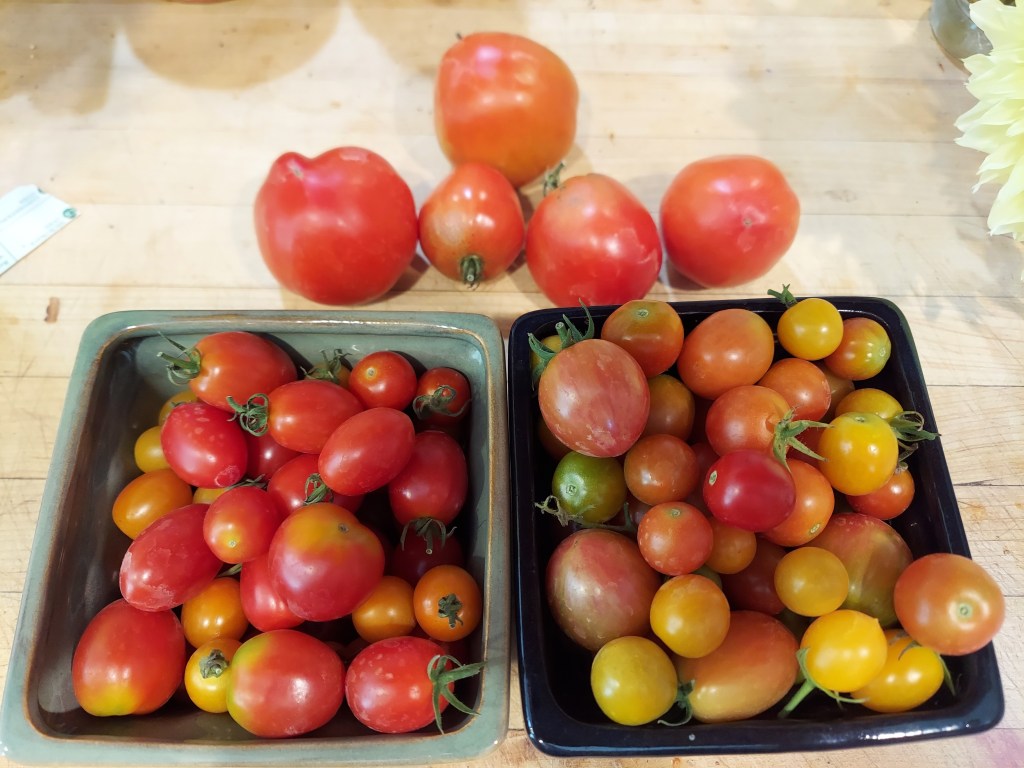
Typical single day harvest, late in summer
We successfully grew about a dozen small ears of corn this year, and I definitely want to try again this season. They tasted really good, and we were able to use the stalks for fall decorating.
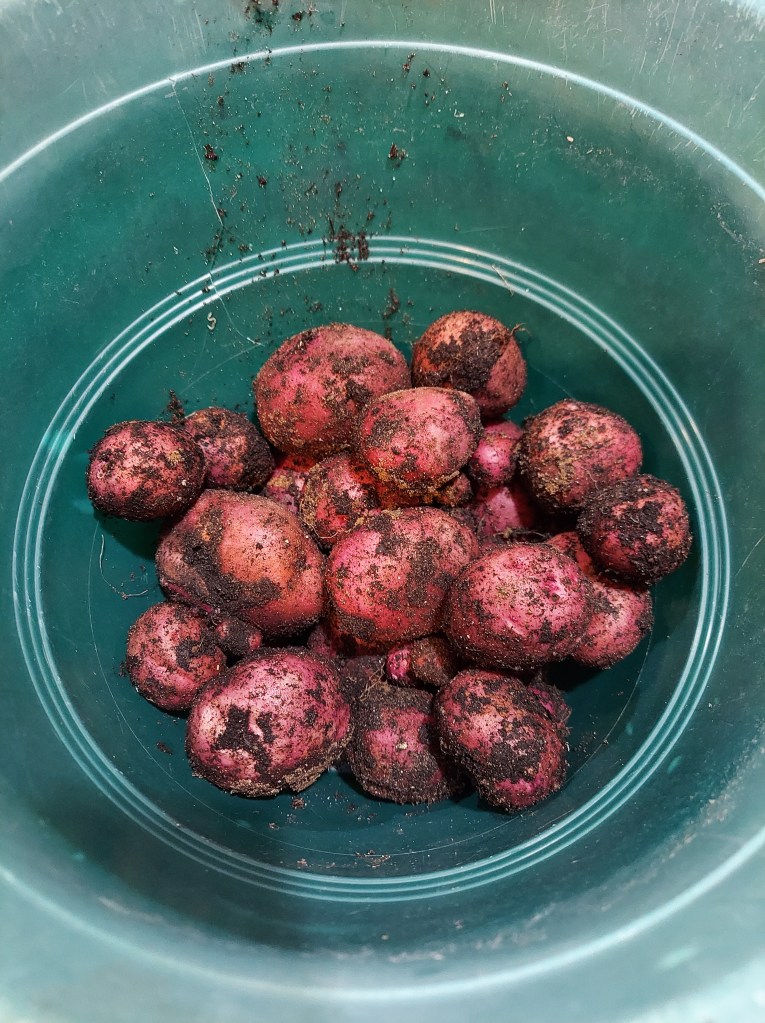
I bought seed potatoes and had my best harvest ever from 5 grow bags, 8.5 pounds and several were regular sized. My first attempt a couple years ago was underwhelming, so I was happy it worked out this time around. The two types of potatoes provided enough for multiple meals for my family.
I grew onion from sets and was not impressed with the final size when I harvested them. They may have needed more fertilizer throughout the season. Will try again next year.
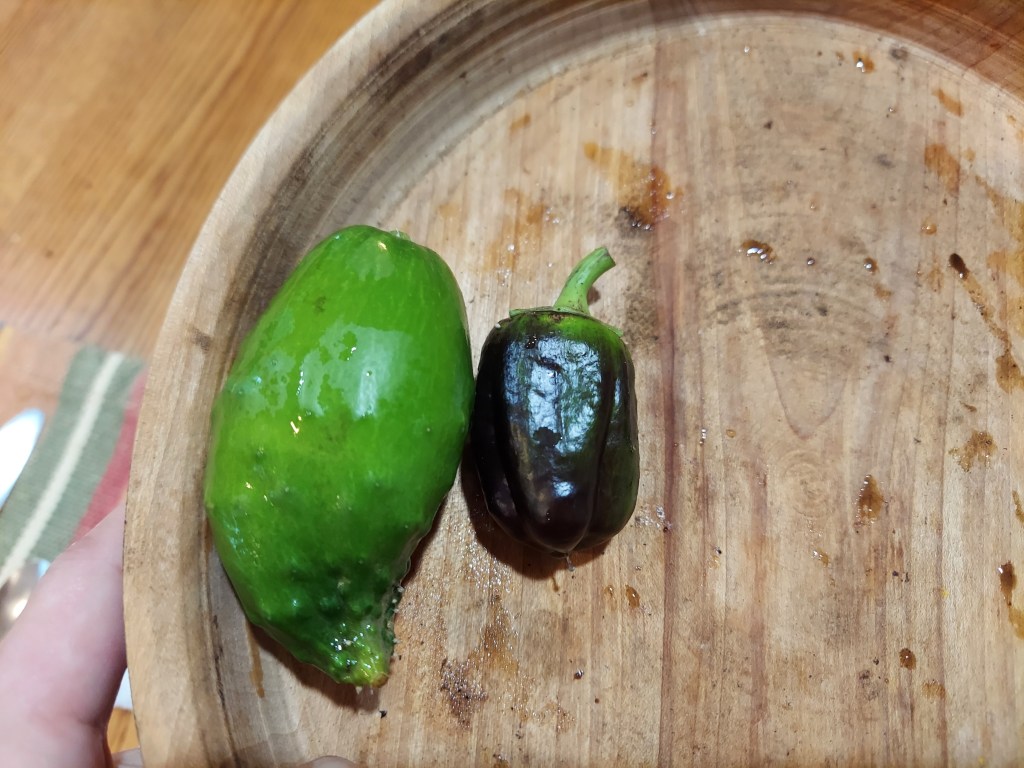
I grew a bunch of pepper plants from seed as is my usual. This year they really struggled to produce and it took until late August to get a decent harvest. Most of the bell peppers remained pretty small. I think in terms of individual production one of the jalapenos won.
Oddball produce: a short and fat cucumber next to a tiny but ripe purple bell pepper. Sometimes homegrown produce can surprise you with it’s unusual shape or size.
The blueberries were mostly a miss this year, but we just transplanted the small bushes last year. The strawberry tower did quite well all year long, I was harvesting them from late April-October. I grew over 9 pounds of garlic, the bulbs weren’t huge, but I still had a good harvest from the bed.
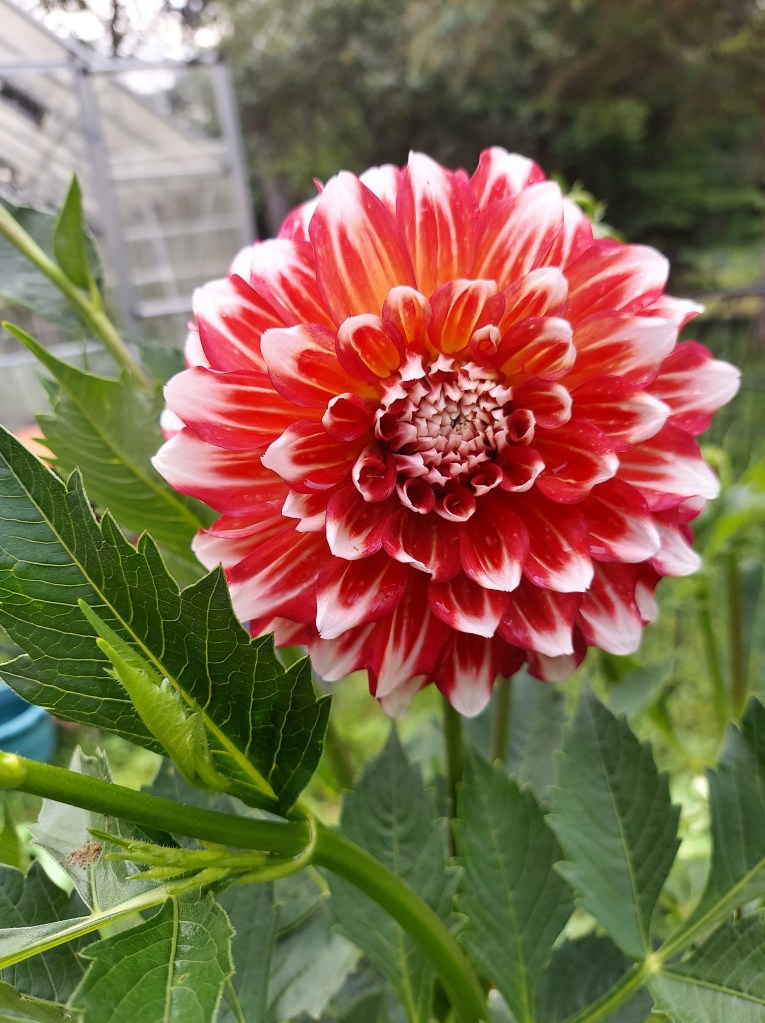
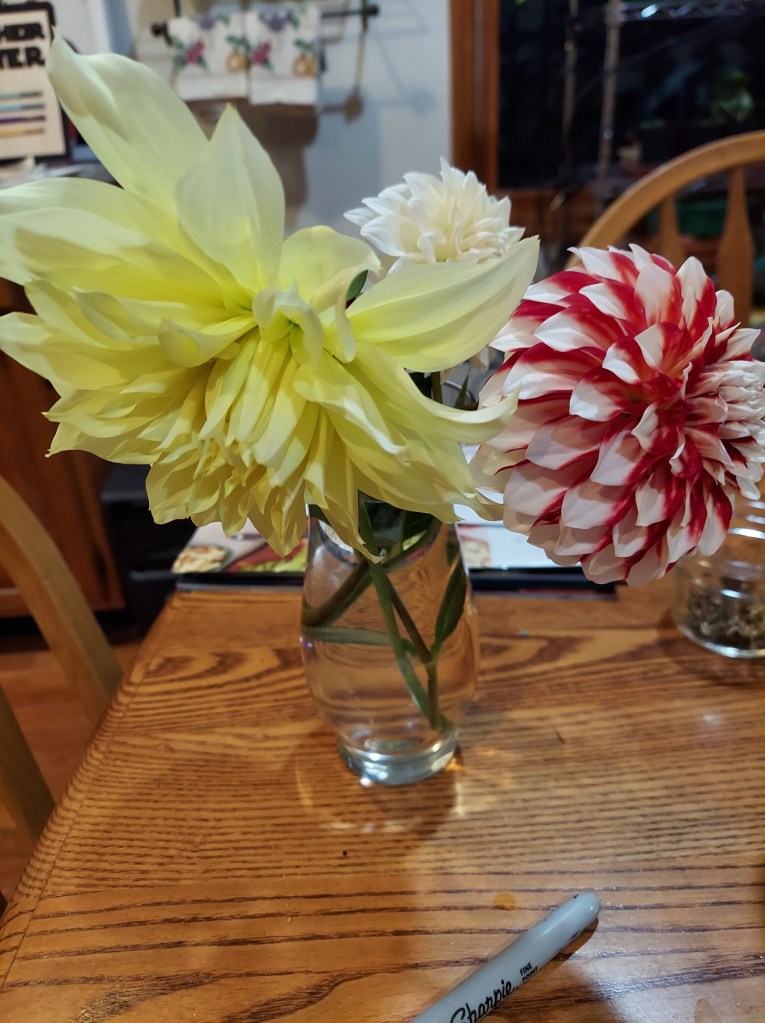
I added more flowers this year, both purchased starter plants and from seed. First time growing snapdragons; they were surprisingly pretty hanging over the edges of the beds. The dedicated dahlia bed performed far better than I imagined, and I loved cutting all the flowers for vases on the kitchen table. I also harvested my first couple of small apples off of the trees we planted last year.
In total I grew 215 pounds of produce last year from my backyard garden.
Goals for 2026:
replacing a decaying wood raised bed with a metal Birdie’s bed
better corn harvest, larger and more ears
more variety of winter squash
sunflowers, got a couple dinner plate sized Arikara two years ago, and will try again
better productivity from pepper plants
more reliably fertilize the potted fig trees for increased harvest
try other types of “cloning” plants, air layering, cuttings, and collecting seeds for the next season
staying on top of current houseplants, potting up when needed, maybe move a few out into the greenhouse in late spring
better utilize frost cover/row covers to protect early plantings
succession sowing, to keep roots in the ground as long as possible
productivity is good but so is taking time to enjoy the garden and the combination of colors and plants
For the past several years I have made my own compost. I do bokashi compost for kitchen scraps, which then go in a plastic drum to further break down before being used in the garden. I also have a large pile in the backyard where we slowly let the grass clippings, leaves, and garden trimmings break down. I allow this pile to build up over a whole gardening season and then flip it the following spring.
The contents are normally about halfway decomposed when I flip the pile, this adds fresh air to the components and allows the less decomposed items from the top of the pile get moved to the bottom. I break up any big clumps, and sometimes need to add extra leaves if any sections are wet and smelly. Then, the following spring, I spread the compost in a thin layer across the garden beds.
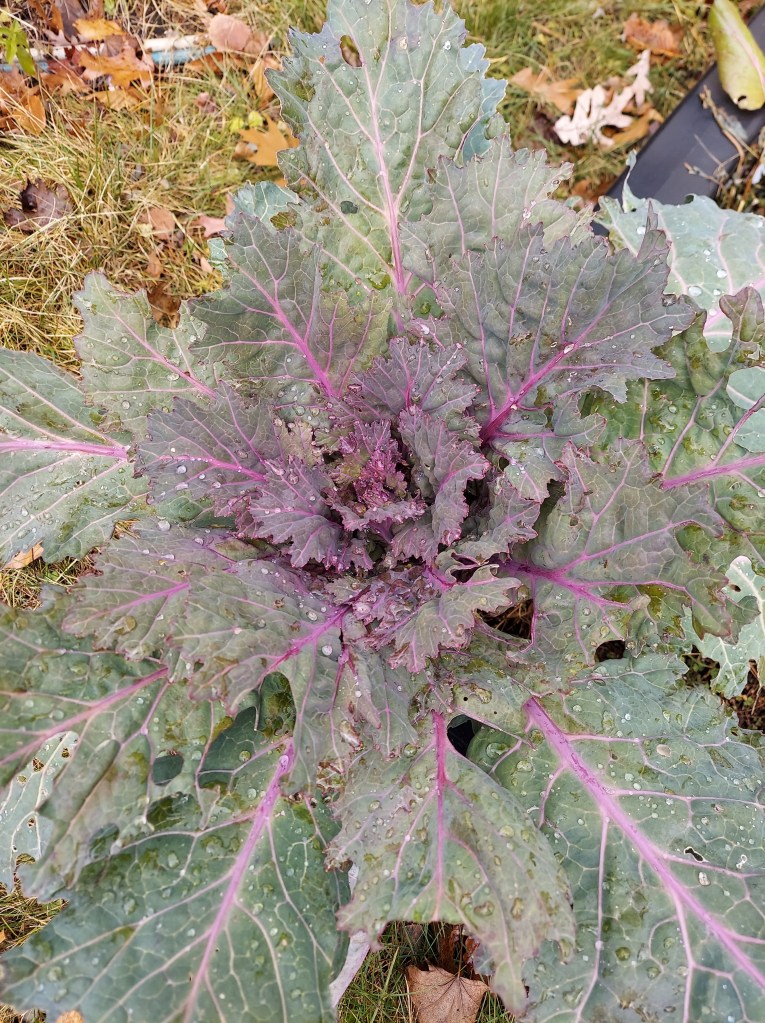
Lovely kale plant still putting out new leaves in mid-November.
A year ago we found some free pallets on the side of the road and set them up as an additional composting station. We put the pallets upright and tied the corners together with rope. I’ve used this space strictly for leaves over the past year. This ensures I have dried leaves accessible if I need to add them to the compost pile throughout the season. It has also allowed me to start making leaf mold, which is a very nice compost for adding to the garden. It only requires dried fall leaves, and there’s no requirement to balance out fresh and dried materials to keep the heap going.
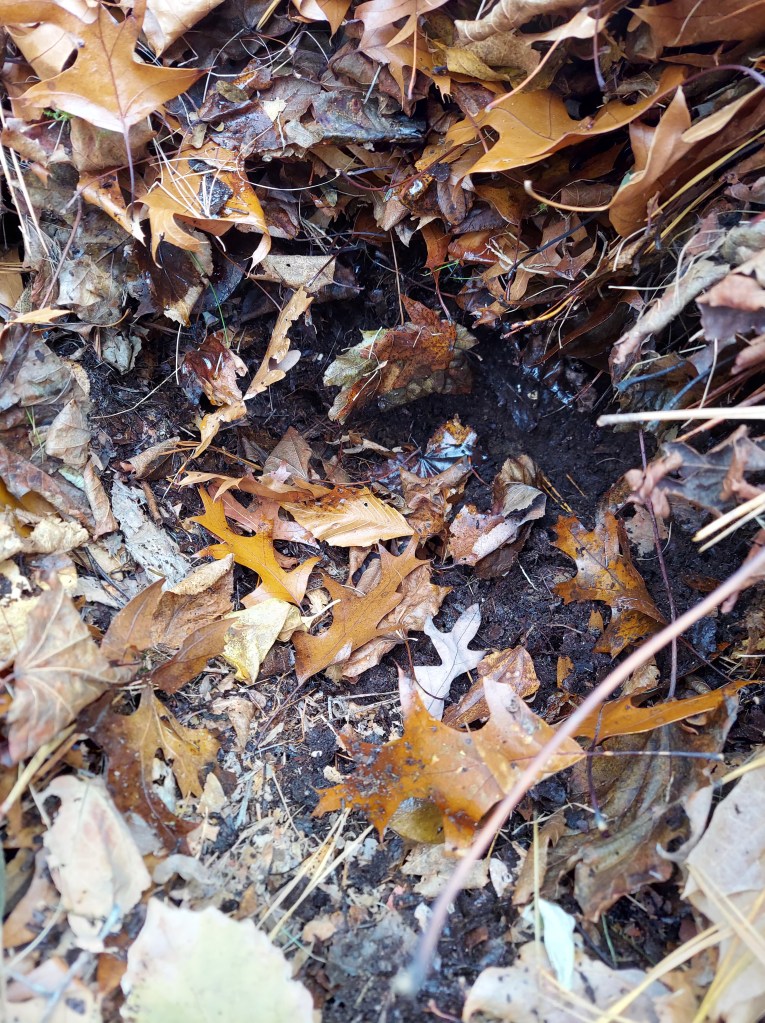
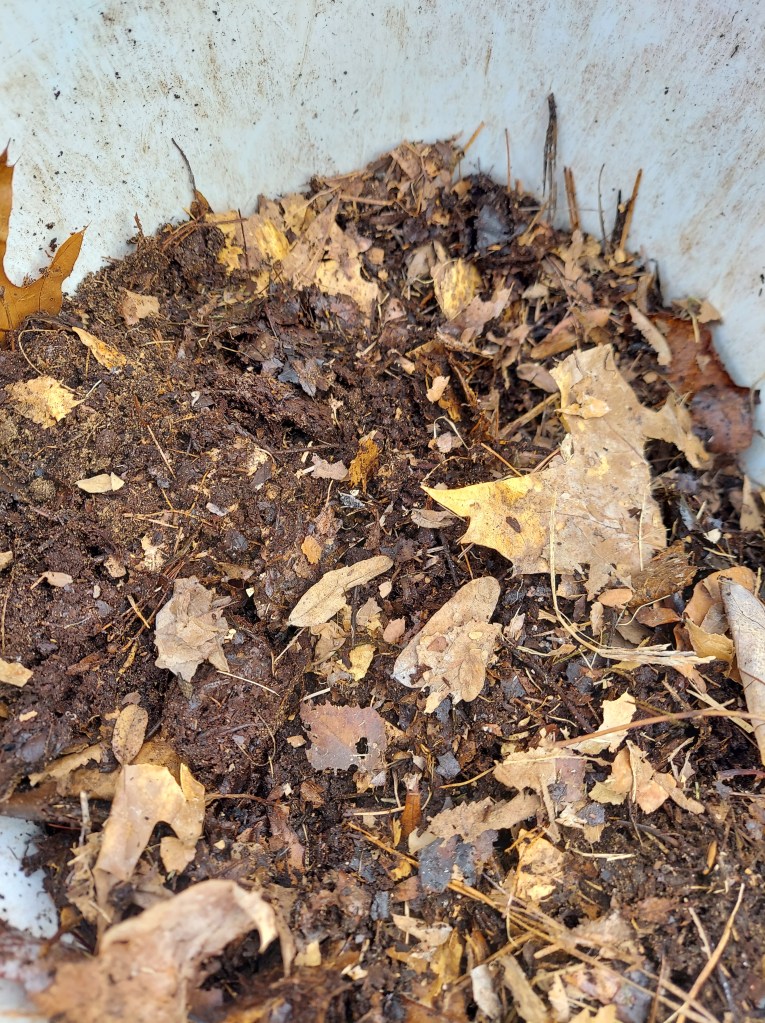
Good cross section view of the pallet compost bin. I untied one of the pallets and pulled it away from the pile. The dark brown material at the very bottom is well broken-down leaf mold. The majority of the bin is currently filled with this year’s gathered fall leaves.
In mid-November I checked the bottom of the current batch and found some nice crumbly compost. I used a shovel to fill a bucket and spread it around all 4 of my raised bed areas. I made several trips and spread a nice layer all around. This provided both a protective mulch around perennial herbs and will allow the worms to continue to break everything down in the spring.
Nice, homemade leaf mold, ready to be spread on the garden beds.
As I worked in the garden, I also removed dead plants and trimmed back some of the herbs. All of this plant matter went on top of the current compost pile, which I will flip in spring.
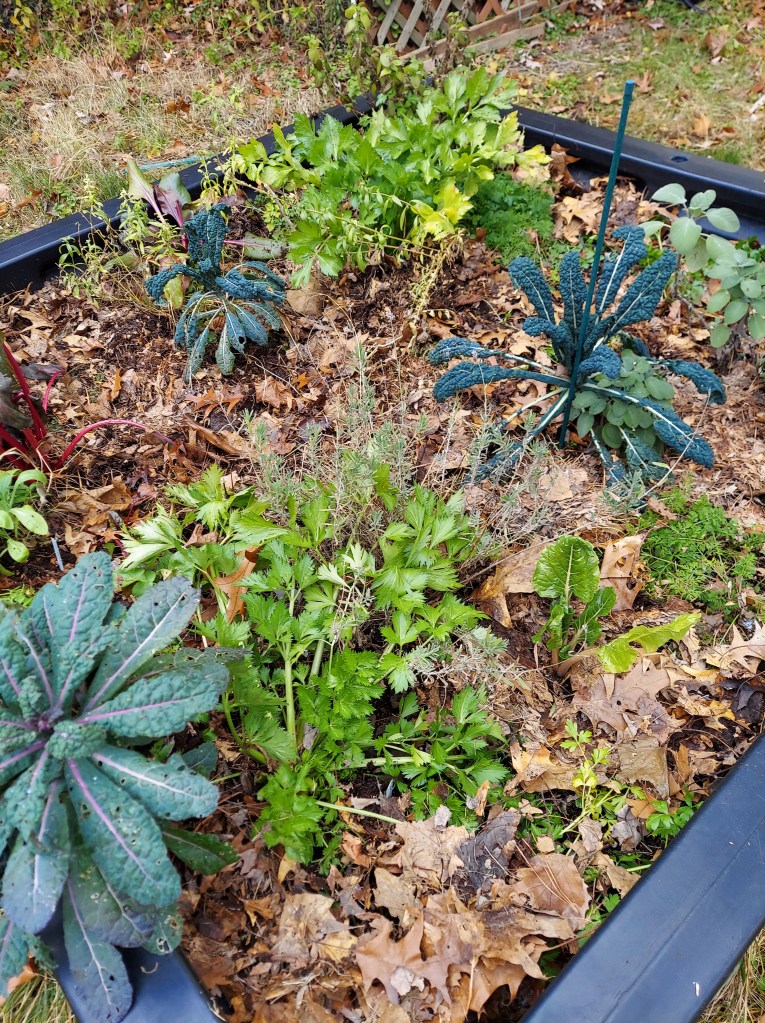
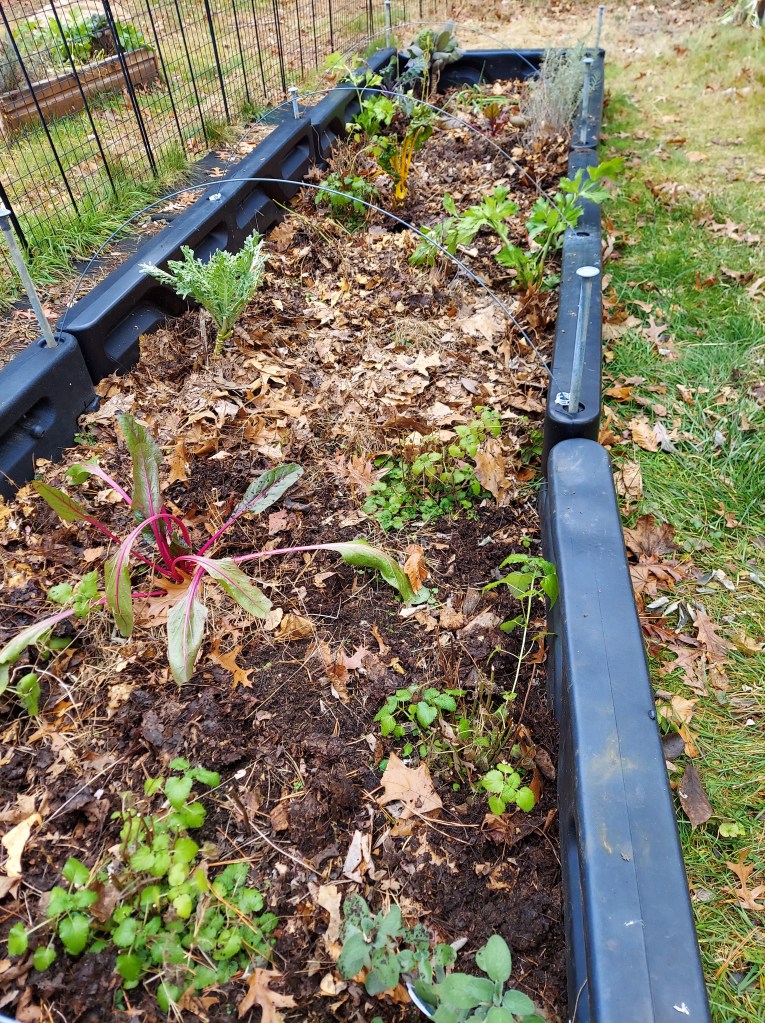
Garden bed all tidied up and mulched for winter. Multiple kale and celery plants were still growing, as were sage and chard. After I spread the leaf mold I added full sized leaves as a cozy mulch for the plants.
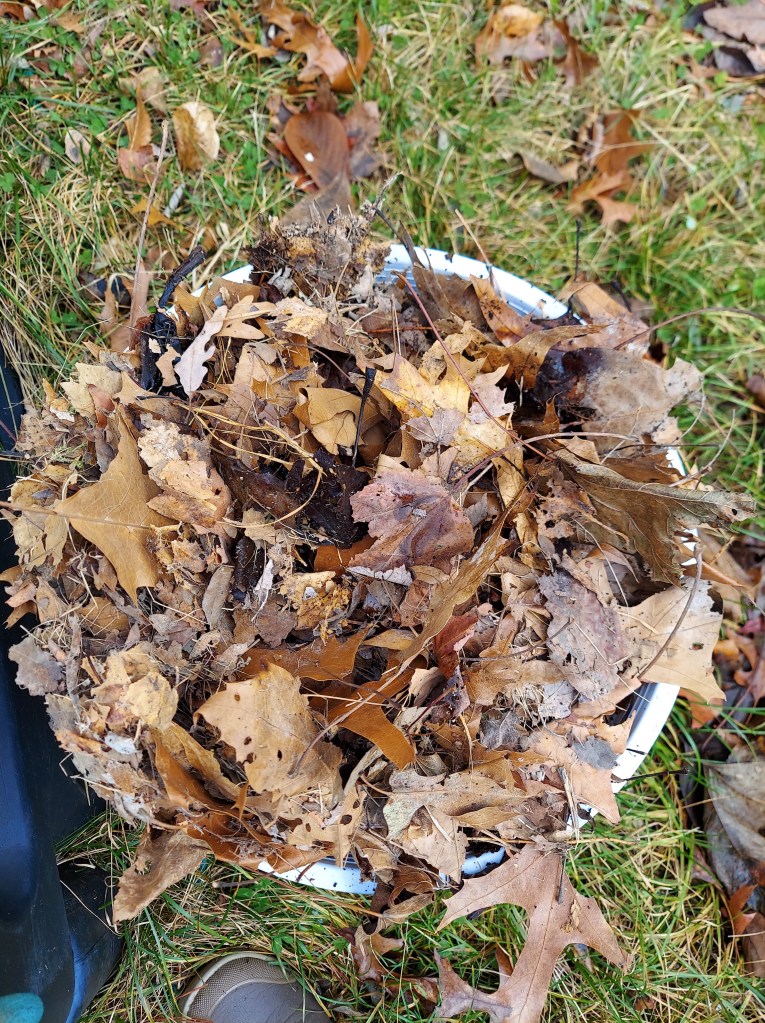
Full bucket of leaf mold along with some full-sized leaves. The larger leaves will work just as well as a mulch and be a bit like a slow-release fertilizer. The smaller particles of the leaf mold will provide easier accessible nutrients and will boost the soil life. Having both sized leaves works in tandem with how nature itself works.
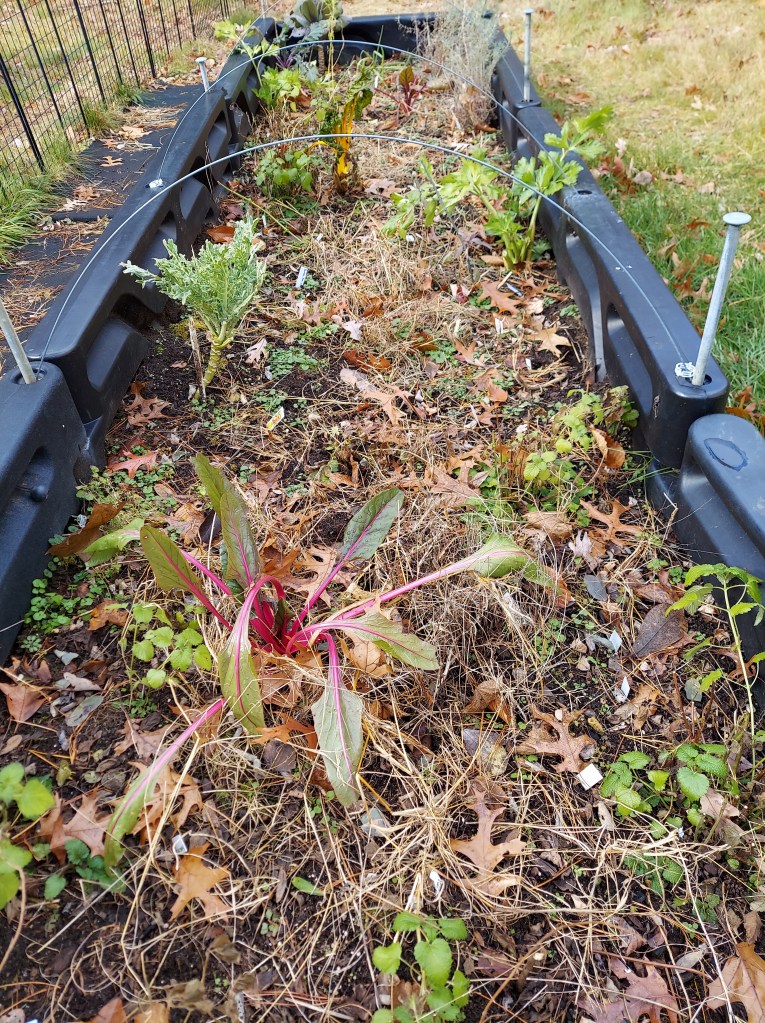
The longest garden bed, before and after I tidied things up. I removed old plant labels and any stakes that were no longer supporting plants. The three lemon balm plants were very thin and had a bunch of dead flower heads, which I removed. I also did some weeding as I went.
I’ve read that well broken-down leaf mold can also be used as a potting mix, so I may try that come spring. For now, I’m leaving the big leaf pile to just sit and do it’s thing. The current compost bin is pretty full and I think the worms and bugs may still be working in the middle of the pile to break everything down. Looking forward to next season in the garden, but I also appreciate winter’s rest. Time to slow down and focus on other hobbies while the ground is covered in a layer of snow.
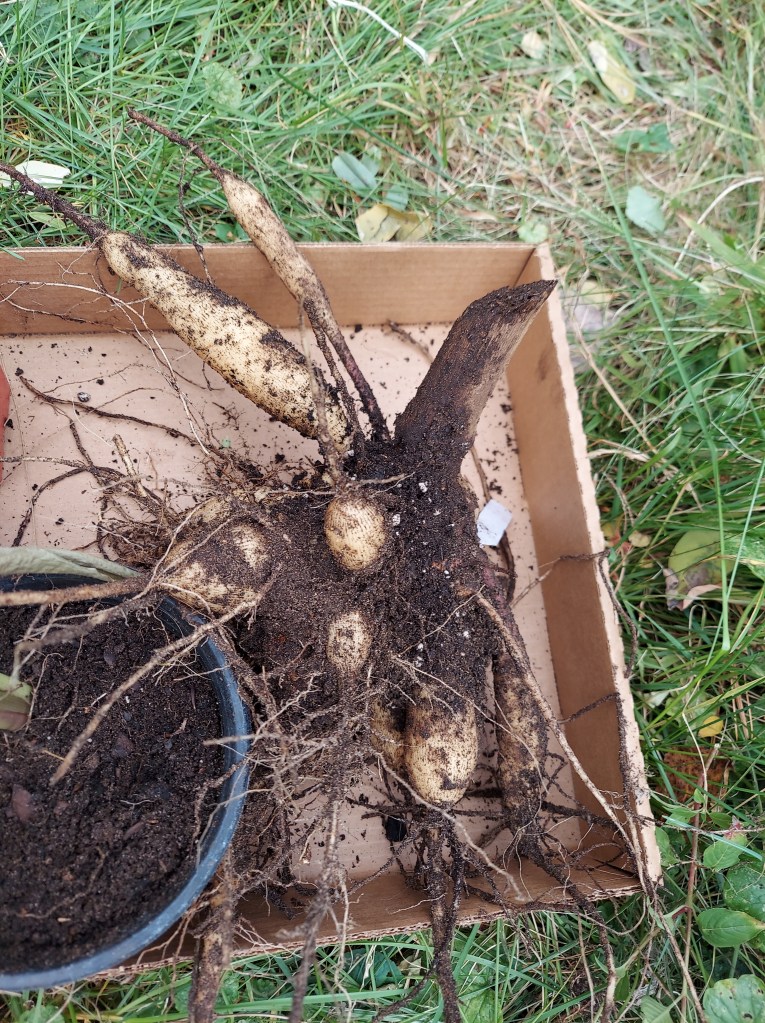
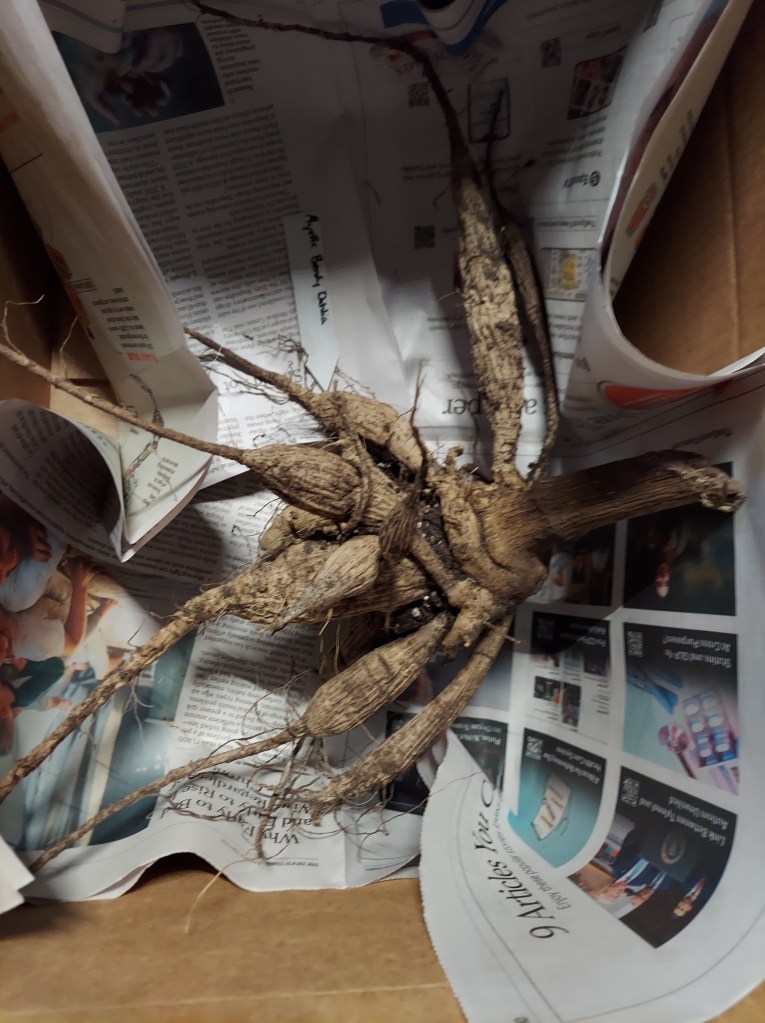
In the middle of October, I dug up my dahlia tubers to store them for winter. Dahlias are not cold hardy and thus the tubers are susceptible to frost. So once the leafy growth had been killed off by the first light frost in early October, I knew it was time to remove the stems and dig around to find the new tubers.
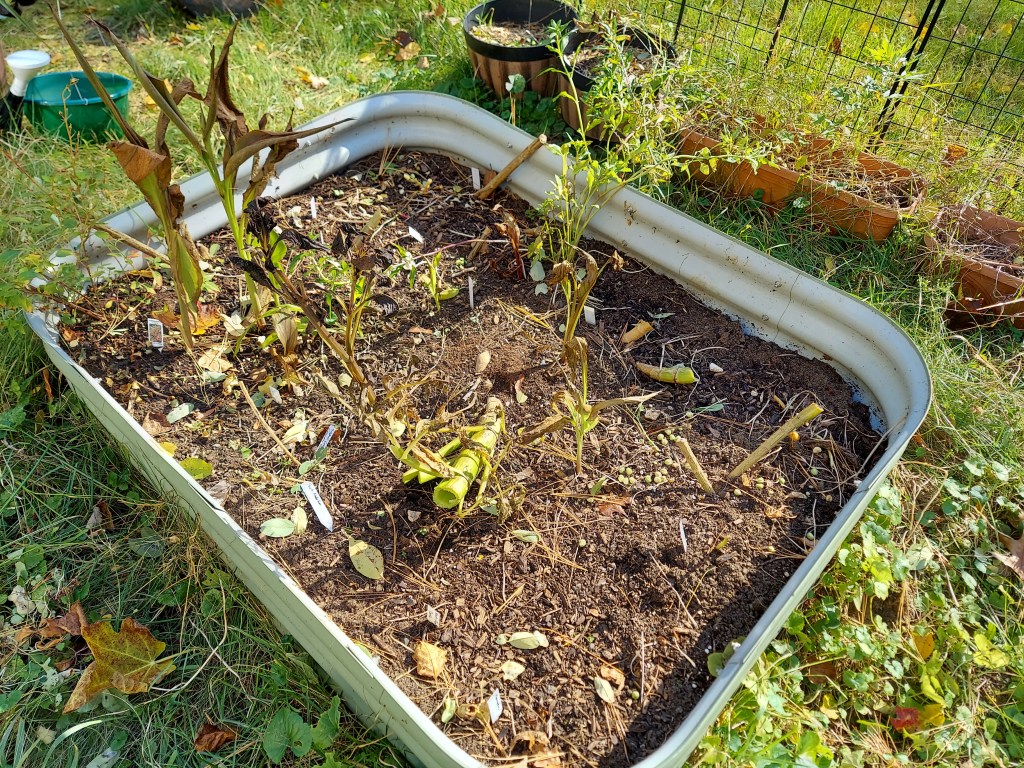
This is what the bed looked like after the bulk of the dead stems and flowers were all removed for the compost bin. You can still see some very thick stalks coming out of the ground, I left them there so I would know where to carefully dig to find the tubers.
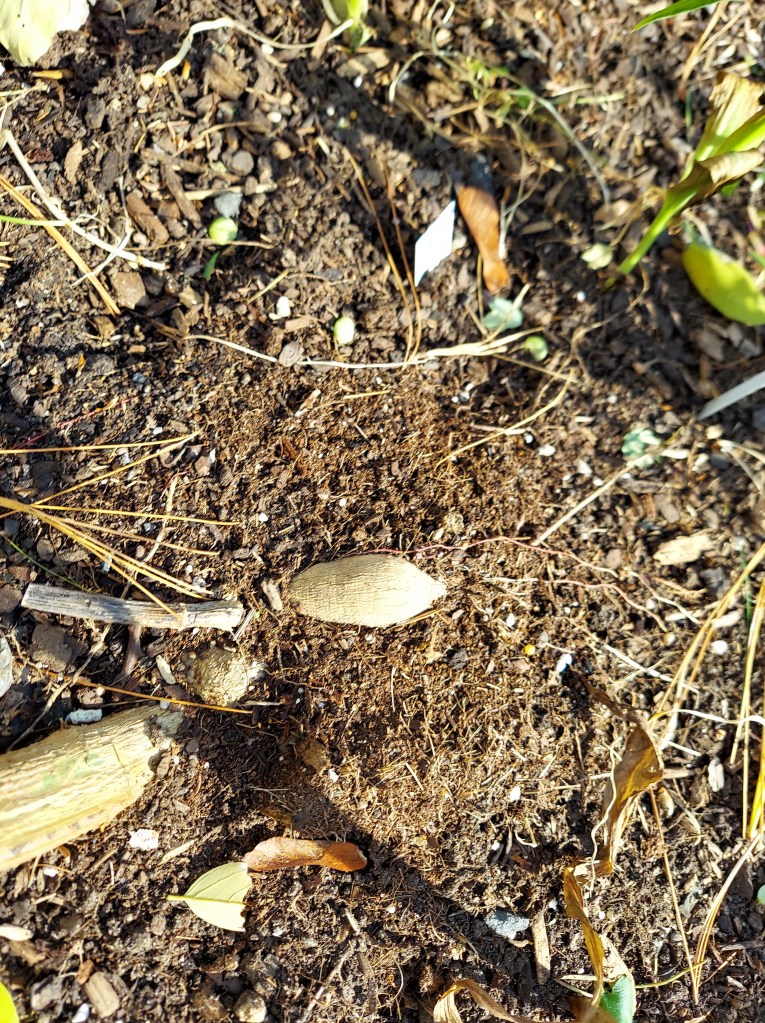
This plant actually grew sideways and started falling over under its own weight, so you can see this one tuber was exposed and above the soil line. I made sure to locate all my plant labels before I started digging so I would be able to keep the different types separated.
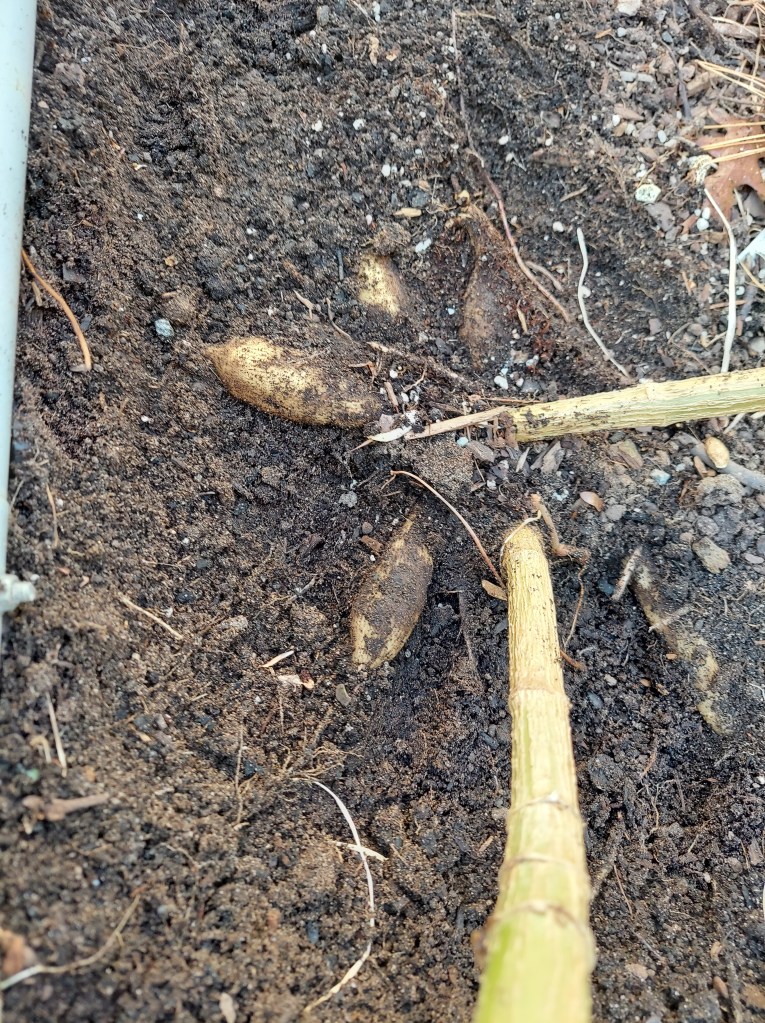
Most of the tubers were very close to the soil level, so I just started clearing dirt with my hands so as to not risk stabbing through and breaking tubers with a shovel. Once I had each clump completely uncovered then I used a small trowel if needed to leverage the roots out and pull them completely free from the bed. I grew the dahlias in a 15-inch-tall bed with hardware cloth across the bottom, so it was easy enough to find the bottom and make sure I had all the tubers.
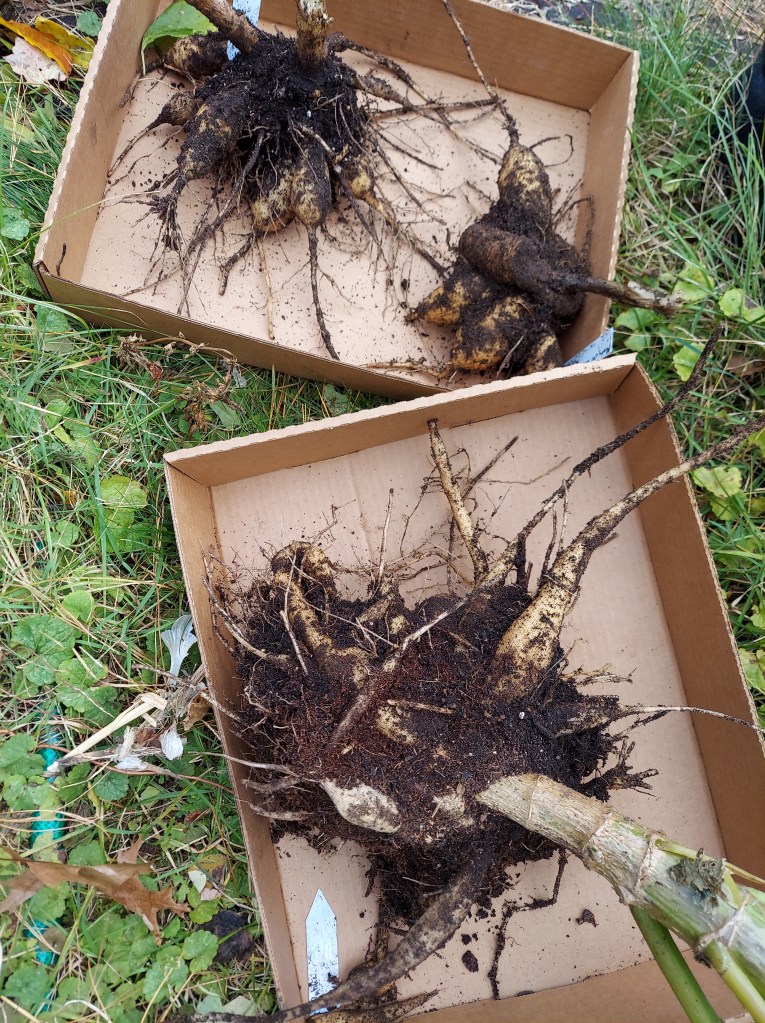
One of the smaller clumps. Each individual tuber that I planted in the spring produced a cluster of tubers around the central stem. Some grew 3 or 4, the largest probably has over a dozen. Once I dug them up from the bed I brushed off some of the dirt and put them on cardboard boxes to dry out and cure for a week in the basement.
Several more clumps, these were smaller from the extra plants that I grew in pots. I will divide them in the spring and start them off indoors to get a jump on the season.
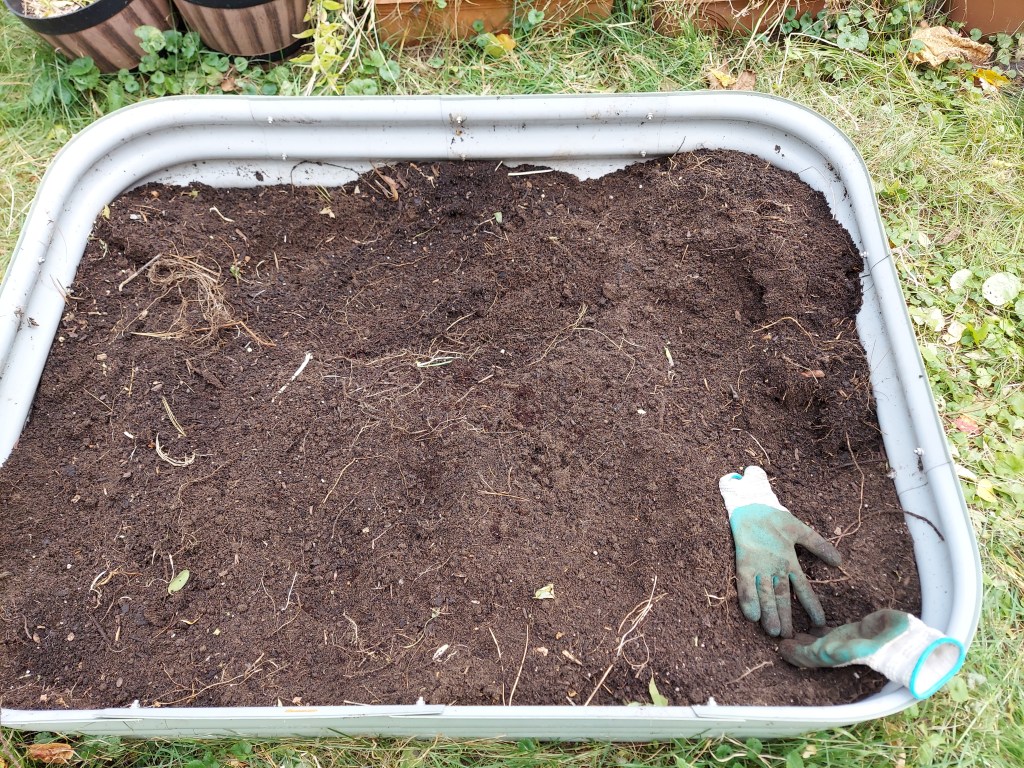
Here’s the dahlia bed after everything was dug up. I leveled it all out and added some homemade compost to provide fresh nutrients for next year.
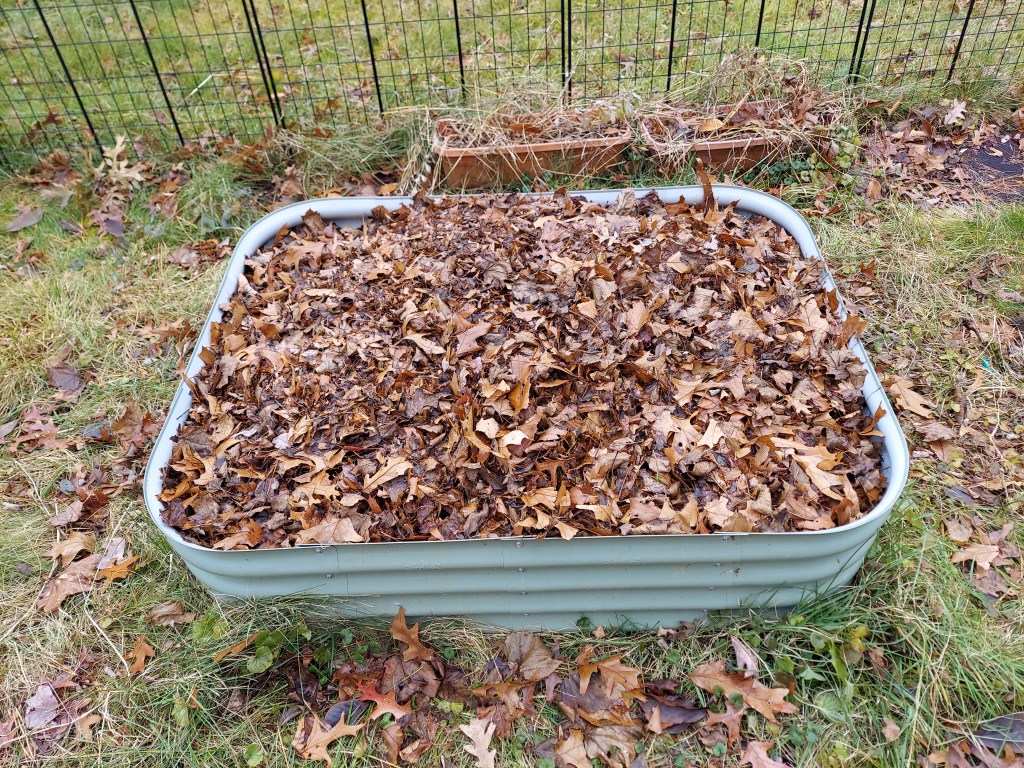
Once that was done I tucked it all in with a nice thick blanket of fall leaves. These will keep the soil insulated and should start to break down a bit before spring arrives. When I’m ready to plant I will remove whatever large bits are left to the compost pile.
After a week or so the tubers were cured and dry enough to store away for winter. I put a layer of bubble wrap in each box, them a couple sheets of newspaper as insulation. The plant labels went into the boxes so that I will be able to identify them come spring.
Once I positioned each clump so that they fit inside the boxes, I added a thick layer of shredded straw and made sure to shake it around to fill in all the nooks and crannies. The boxes were then taped up and put out in the garage, on an interior wall. I will check them in a couple months to make sure they are ok. This method worked well for me last year, so I hope it works again this year.
The second project I had for the end of September and early October was saving seeds from many types of flowers in the garden. I enjoy collecting some of the mature seeds from my garden and then replanting them the following spring. Many types are very easy to save and often involve just snipping off a spent flower head. A single flower can typically provide enough seeds for the following year.
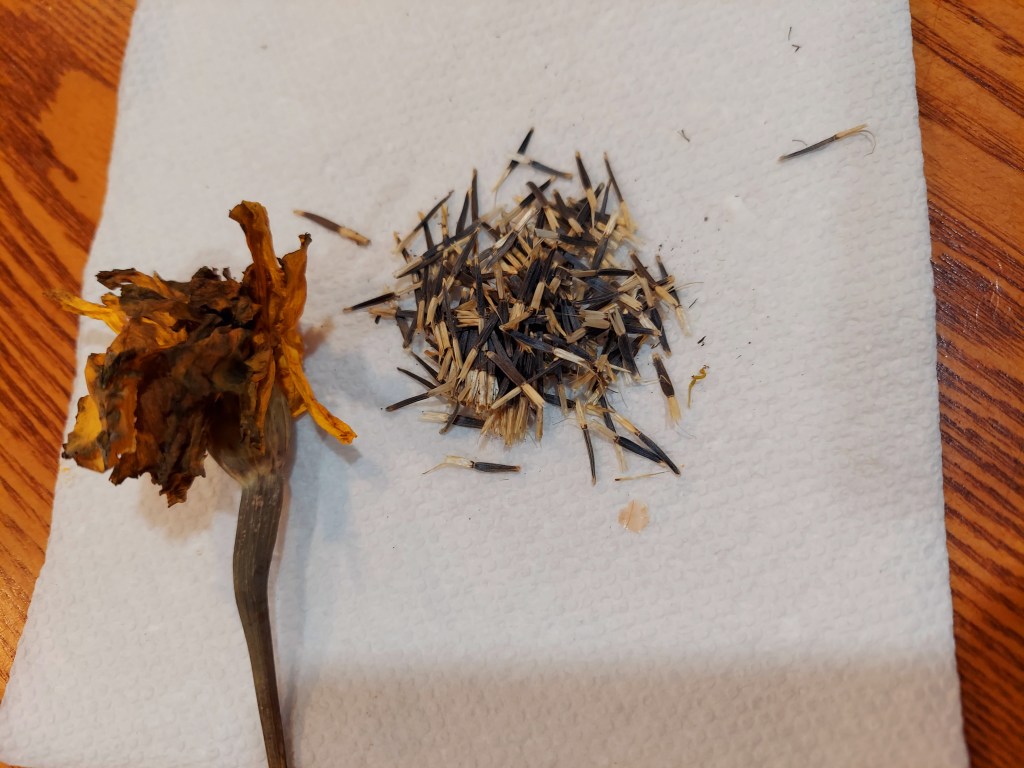
One marigold flower head provided all these seeds. It’s very easy to pull them away from the base, make sure to remove the flower petals too. I let them sit in a single layer for a week to air dry, then store them in little craft envelopes. Make sure to label them so you know which variety/color you saved.
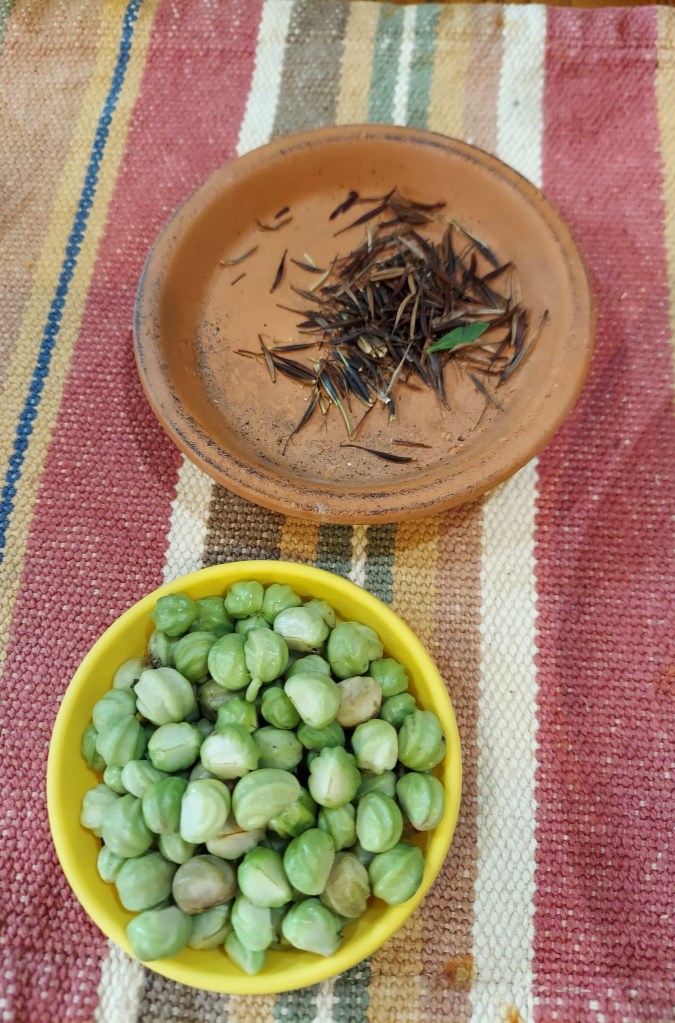
I use whatever bowls or trays I happen to have at hand for seed saving. The top seeds are sulpher cosmos, which make cute little orange or yellow dye flowers. The bottom are nasturtiums; they look like little brains. The nasturtium seeds were collected green because I was going to dig up the bed. They needed to cure and shrink before they could be stored. These were all gathered from the cut flower bed before I cleared it. I’m sure a good number of seeds fell into the bed over the course of the season, so I’m hopeful a few will sprout in the spring without me needing to plant.
Here are some dried nasturtium seeds ready to be stored away til next year, and a few marigolds as well.
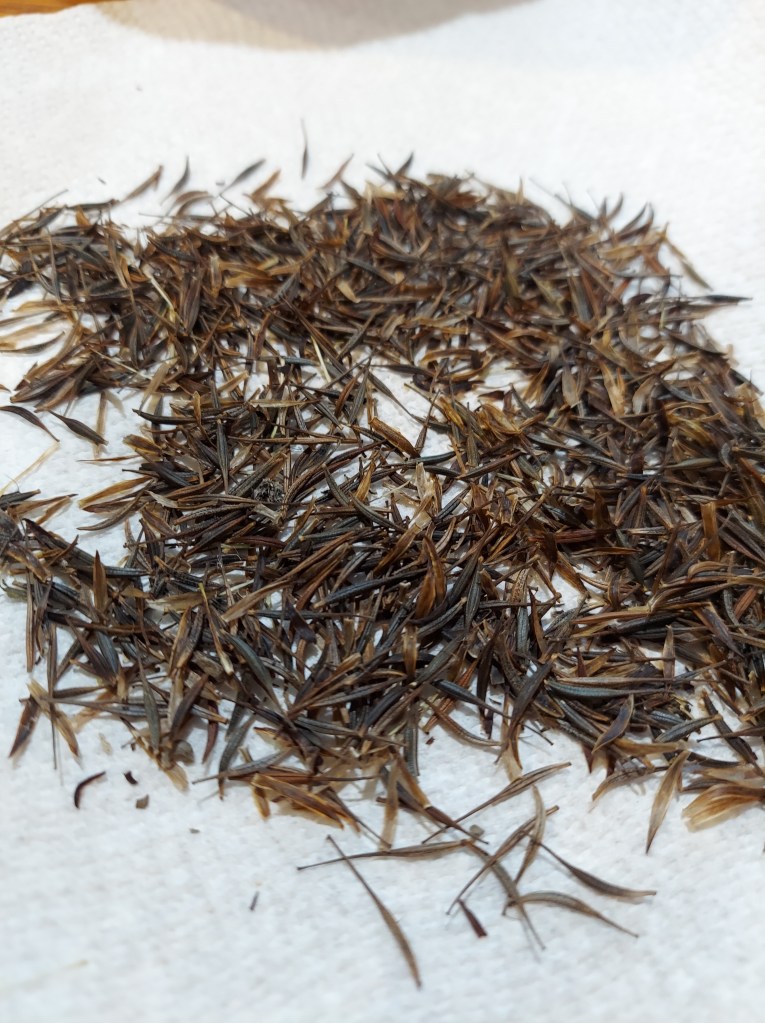
More cosmos seeds than I will ever need! All off of a couple of plants that I grew on the border of the dahlia bed.
I grew multiple types of calendula this year, and had several clumps of plants. They were very productive over the season and I was able to save a bunch of seeds. I also purposefully scattered some of the seeds beneath where the plants grew to see if they come up in the spring. This jar contains seeds from several types including yellow, orange, and pink.
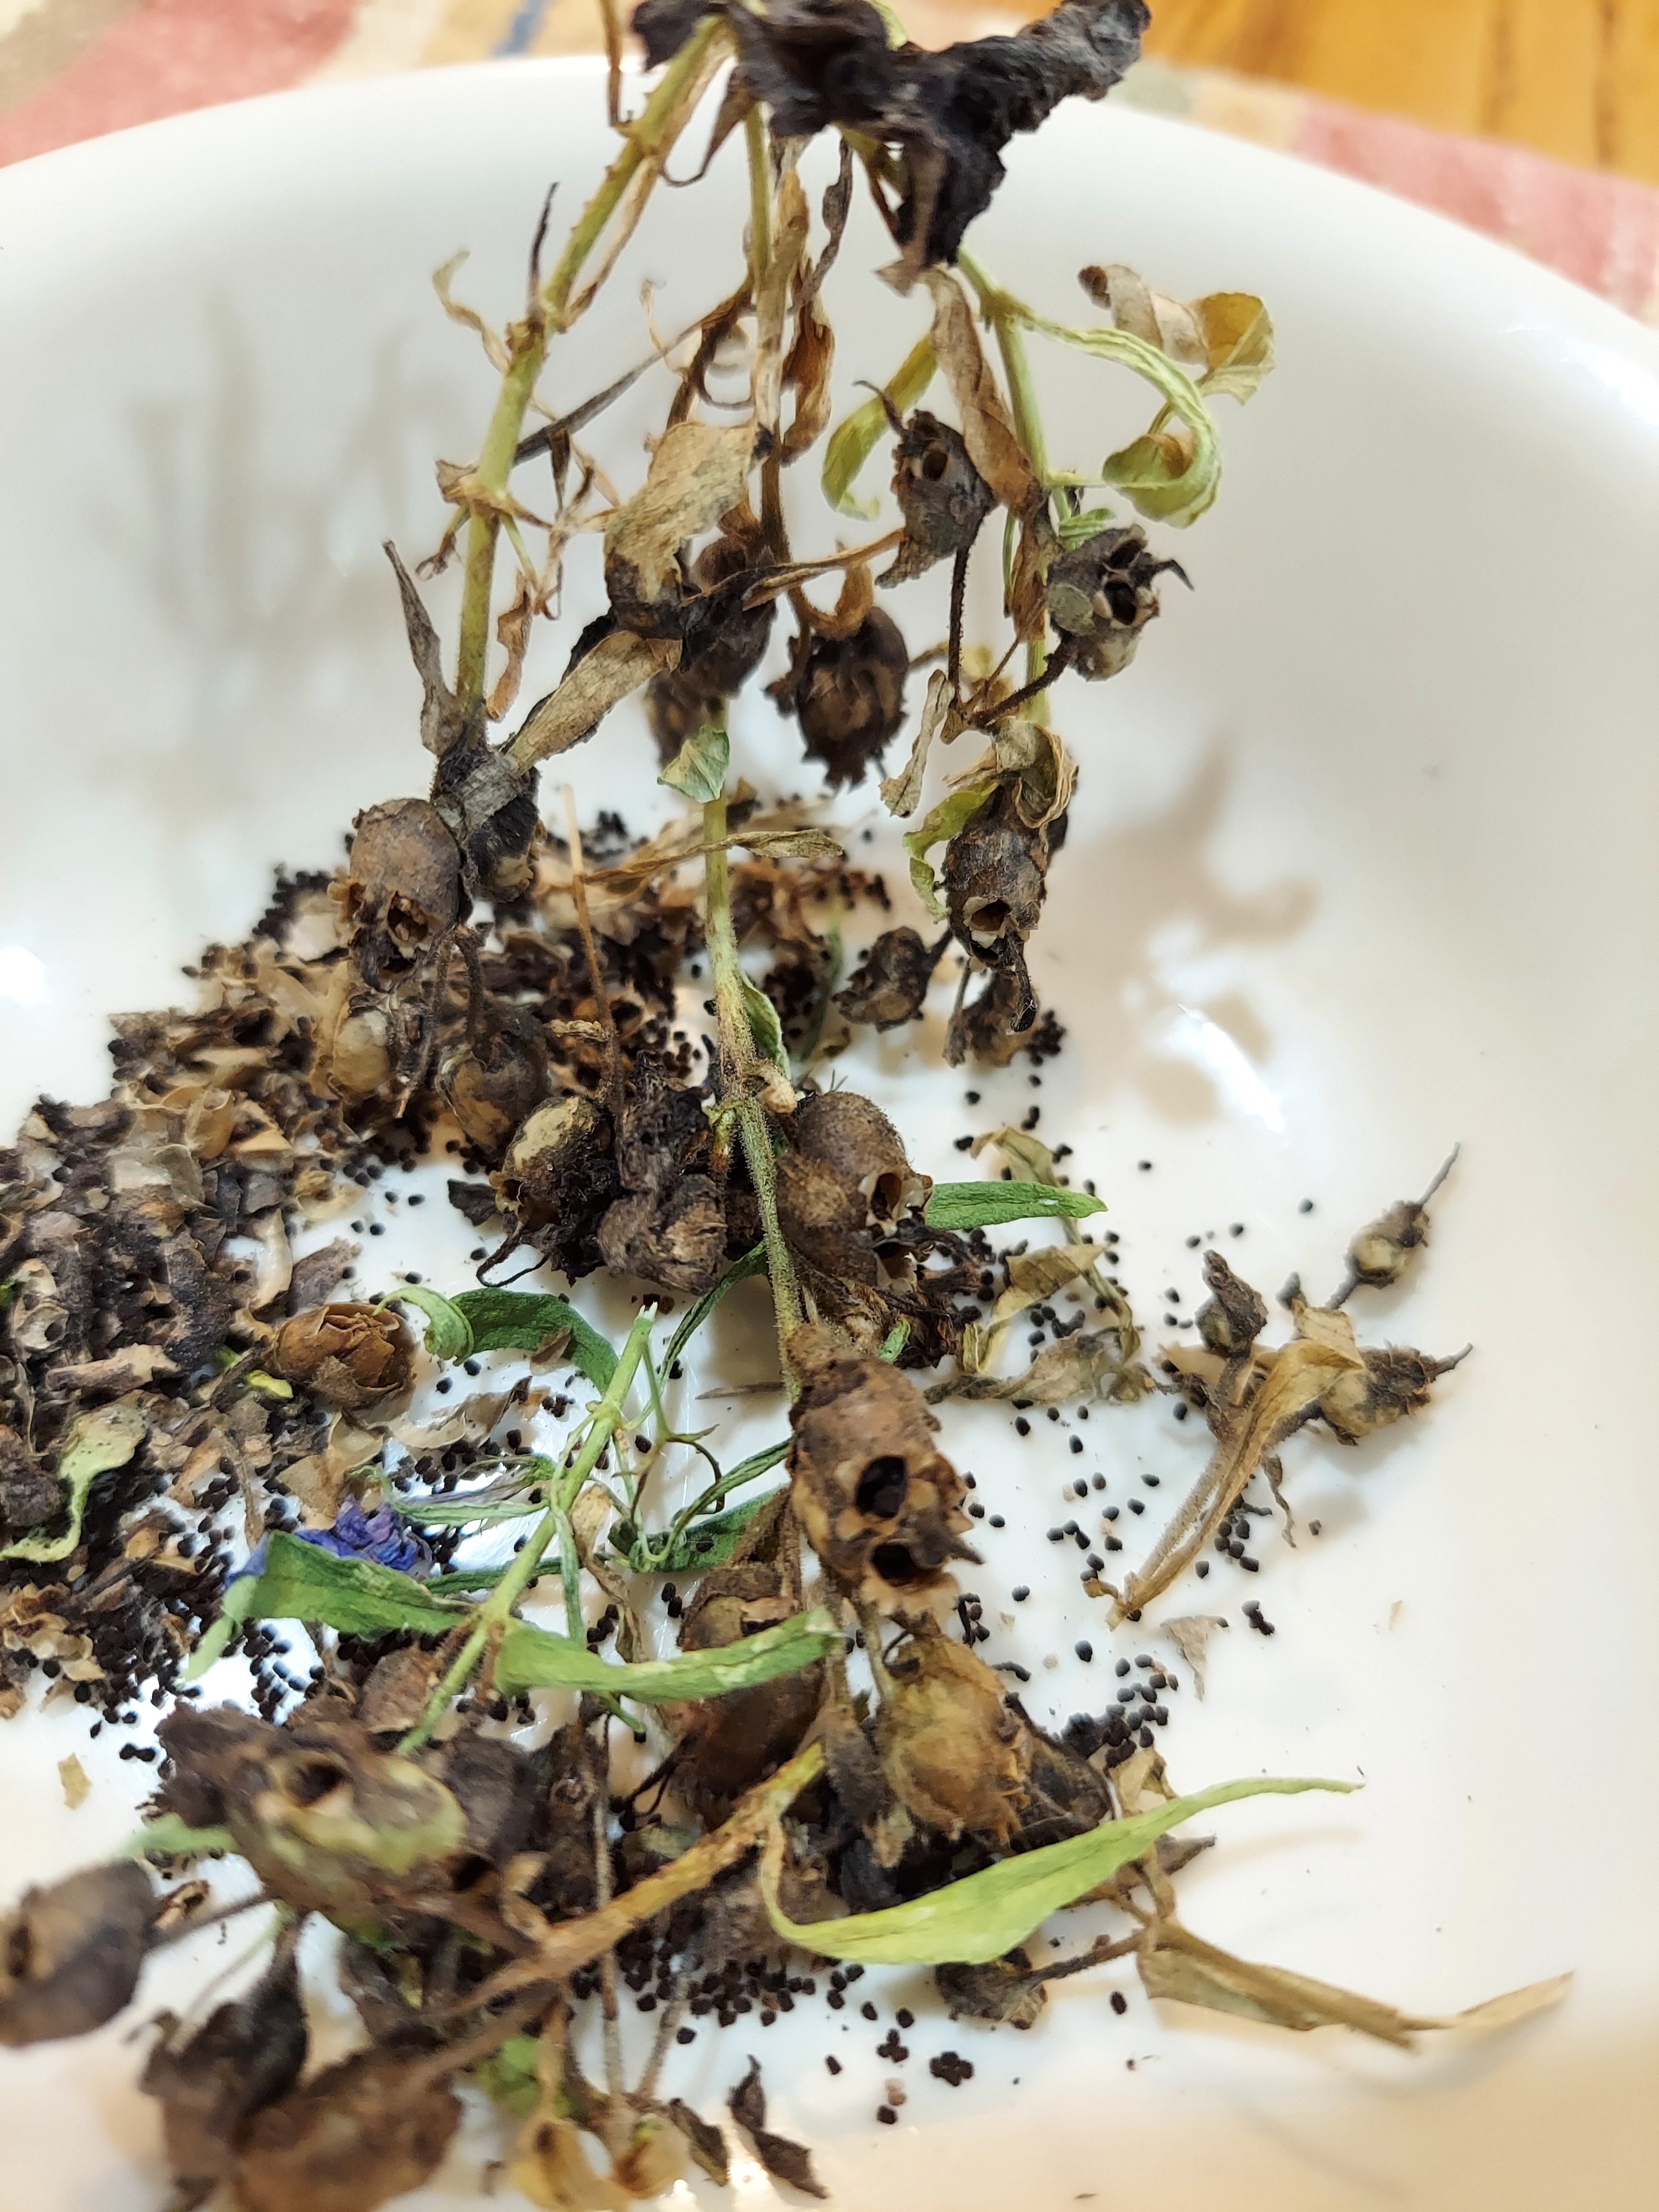
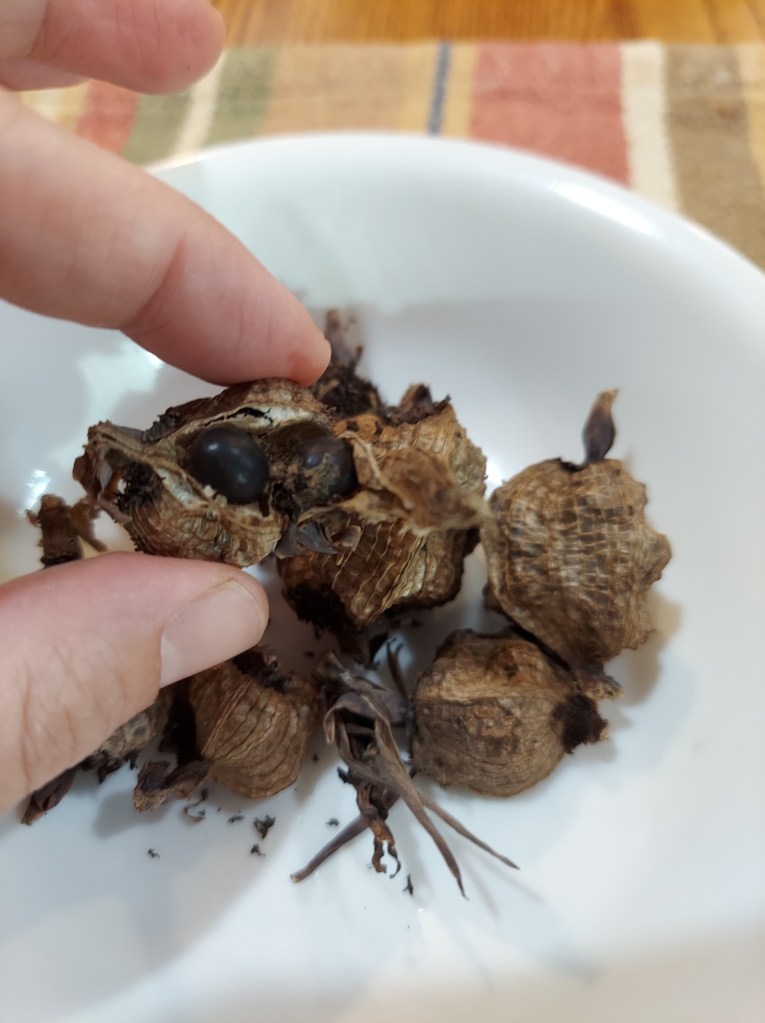
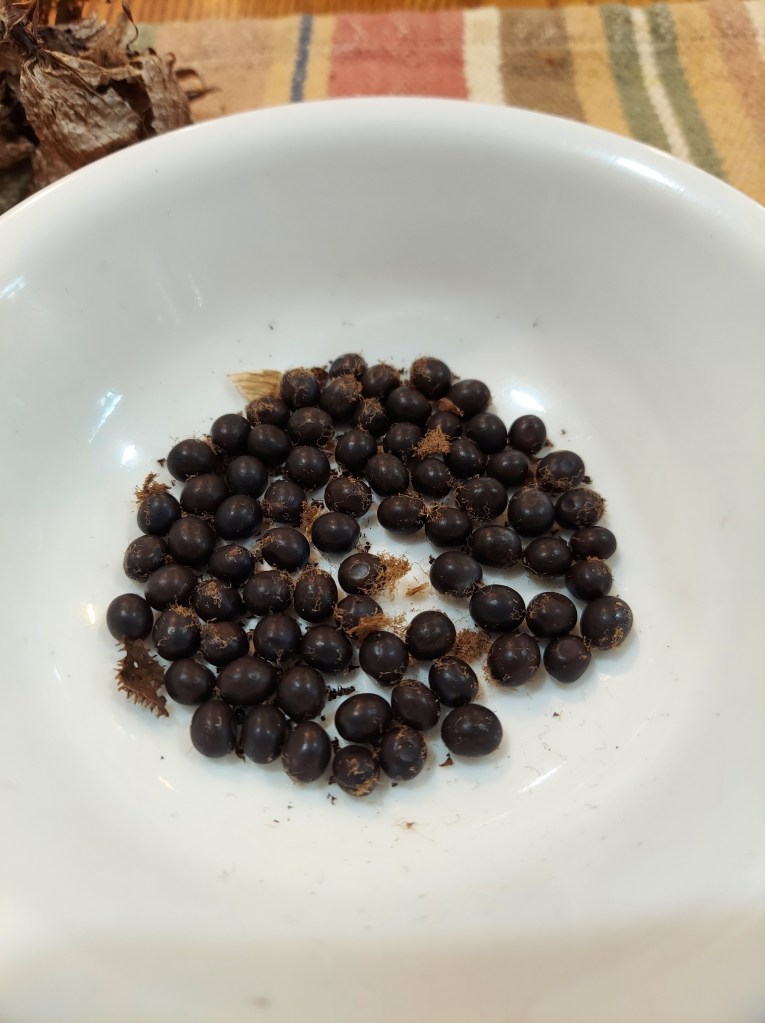
One of the new types of flowers that I grew this year was dwarf snapdragons. I really liked how they looked scattered throughout the garden, and their vertical flower spikes were really pretty. I saved a bunch of the seeds, but these were harder to gather up. First off, they are tiny little specks, you can see them in the bowl. Second, in order to save them, I had to shake or crush the seed pods, which look like skulls! It made for an interesting experience. This is once again a mix of colors all in one bowl; I had red, yellow, white, and pink. They were pretty easy to grow from seeds this year, I had a packet of mixed colors, so I want to do more of them next year. I will probably direct sow and start some off in seed cells.
Each year I save a bunch of canna lily seeds, they develop in these large bulky seed pods. They turn from green to brown and when they feel papery thin is when to harvest them. Each pod contains anywhere from 8-20 seeds.
Collecting the seeds is easy, but germinating them in the spring is a bit tricky. They are rock solid and bounce around when dropped. In order to penetrate the seed coat they need to be cut or scarified in some manner. Last year I grew some from seed and my dad had to use a hack saw to slice a thin gap for the water to be able to get in. Canna lilies are pretty easy to propagate via division of the tubers, but if you don’t want to deal with live plants or dried tubers all winter long, then starting from seed is an option. We dug up all of our plants and put them in the basement, so I should have plenty of mature plants to put back out in the spring.
Bean and pea seeds are also easy to save, as are sunflower seeds, as long as you can protect the flower heads, so you get to the seeds before the wildlife. I tend not to save squash or melon seeds because they cross pollinate very easily amongst themselves which can result in strange hybrids. There are ways to do it, but it is more complicated. In past seasons I have saved lettuce and indigo seeds as well. It can be a fun project to try out, and it enables me to be a bit more self-reliant. I know seed packets are pretty cheap, but there’s just something cool about planting seeds I harvested and stored myself. Makes it a more full-circle process.
The gardening season effectively ended here in NY in October. We had our first hard frost early in the month, then had a few more weeks of milder fall weather. Most of my tasks for the month involved clearing spent plants, moving the fig trees into the basement, planting garlic, and building up the compost pile as much as possible before winter arrives.
I harvested the last of the dahlia flowers before the plants were killed off by the fall frost. In total I cut 240 dahlia flowers over the season, from 9 plants. They were more prolific than I expected, and the plants also got way bigger. I will need to utilize a more robust trellising system next year. I grew an assortment of zinnias and large marigolds that I also used as cut flowers for the kitchen table. My newest rose bush produced several lovely flowers and put on a lot of growth. I’m looking forward to seeing how much more it grows next year.
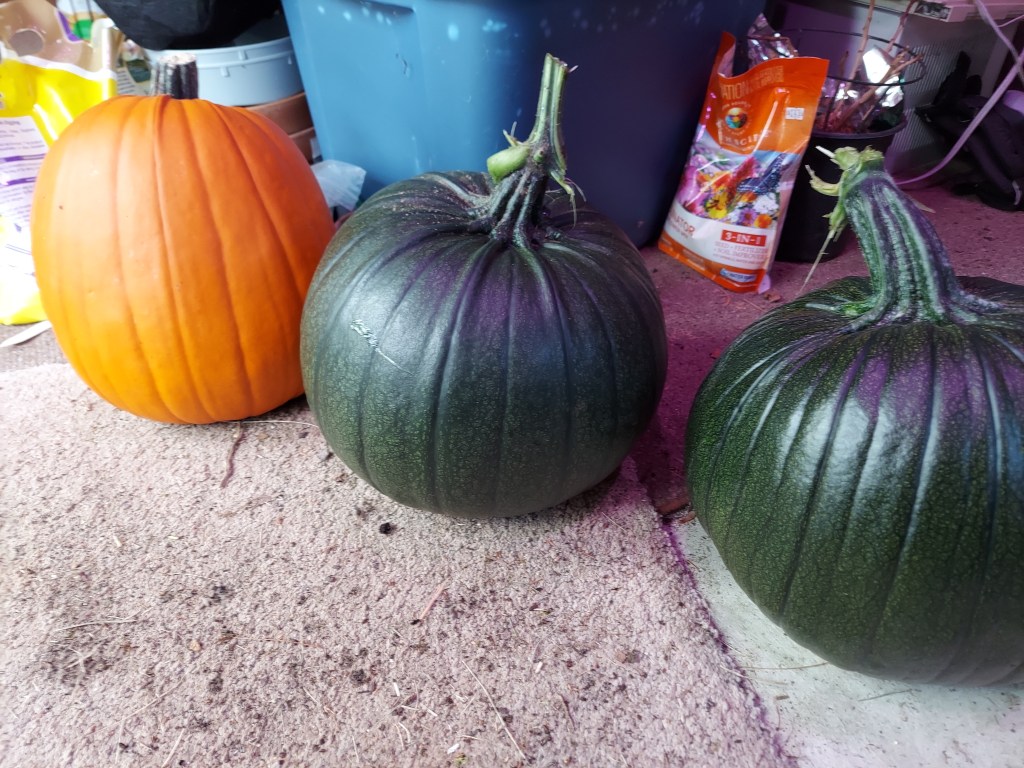
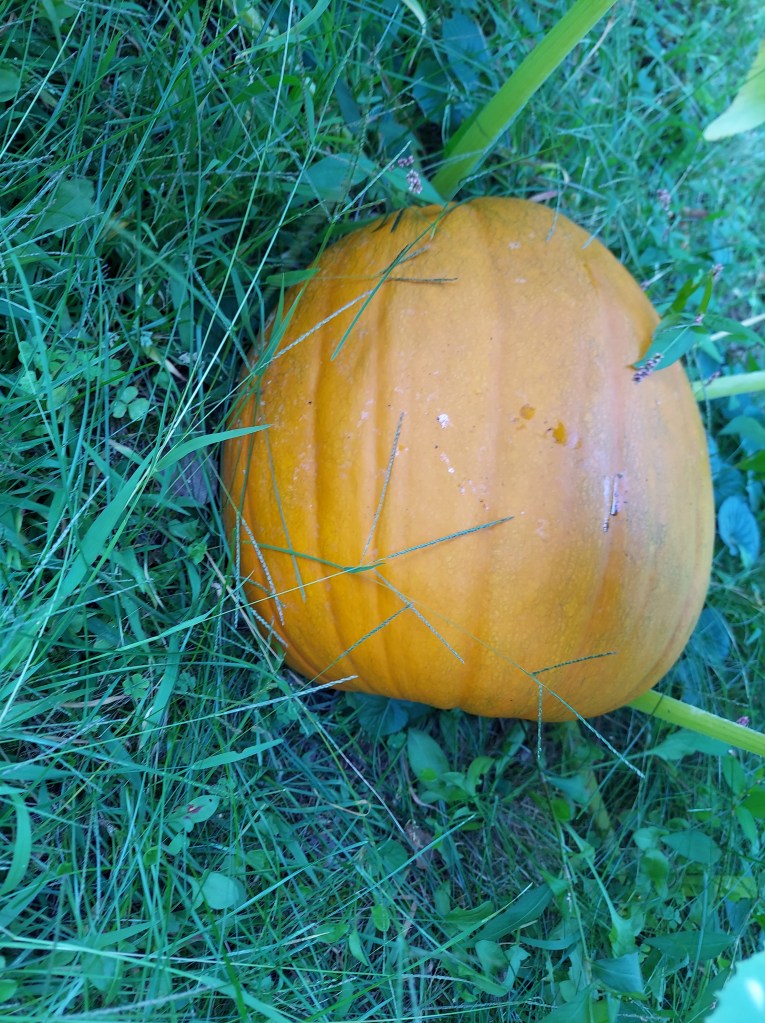
My three homegrown Howden jack-o-lantern pumpkins. We harvested the two green ones right before the frost hit and used them to decorate the front porch. In total I grew 69 pounds of pumpkins! 3 large jack-o-lantern, 2 medium pie sized, and one tiny decorative blaze. We also used the corn stalks along our front porch, I enjoyed having my own homegrown fall decorations.
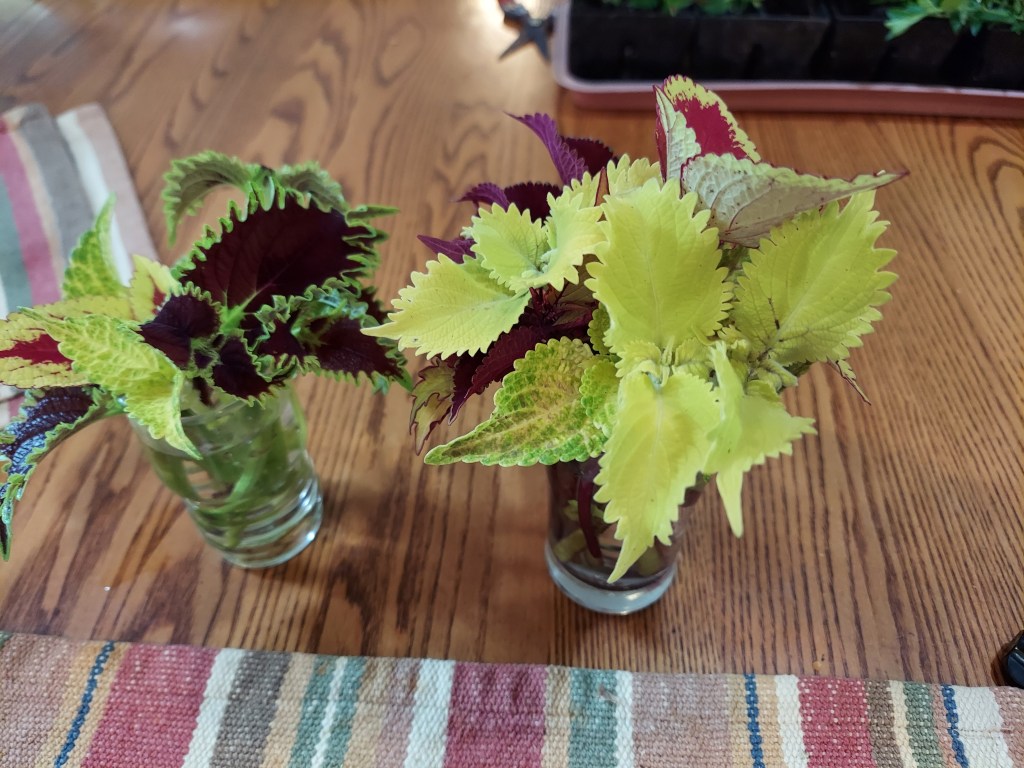
The coleus plants were also killed off by the frost, but I took a bunch of cuttings beforehand. They have been relatively easy for me to root in water, and last year I managed to keep about 10 plants growing over winter. This gave me a jump start on the season and saved me from having to buy seedlings.
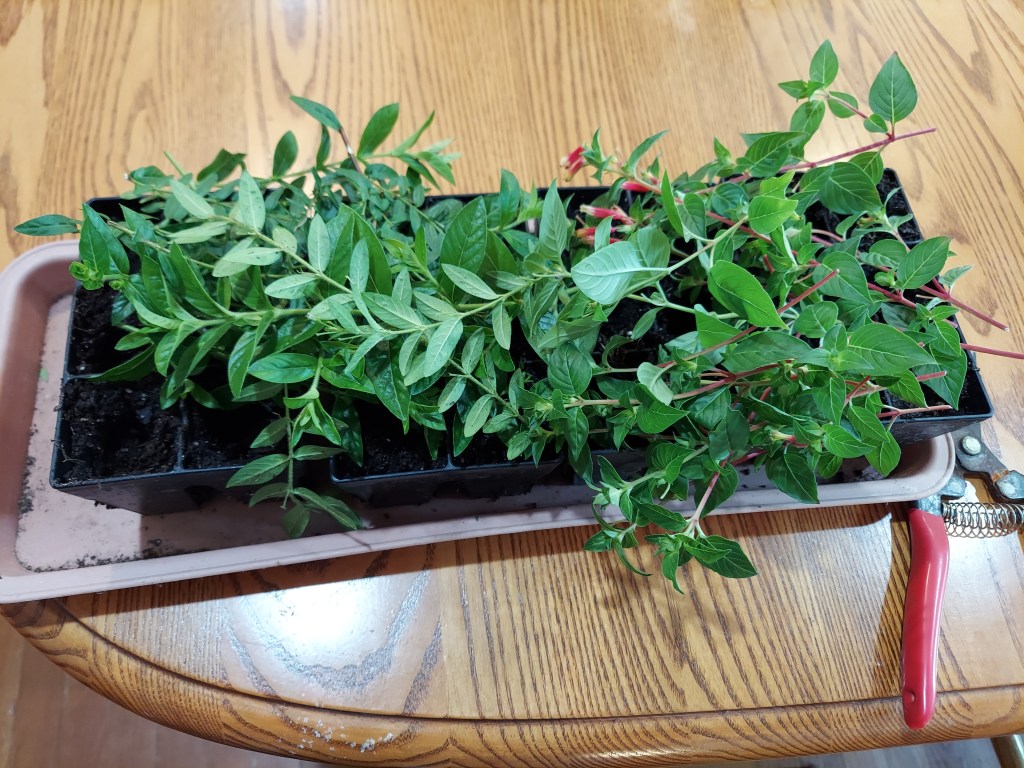
This year I purchased 1 Mexican heather and 1 cuphea plant from work to grow. They both did really well and were great for the pollinators. I saw humming birds quite frequently making use of the long flowers. I read online that these are both fairly easy to propagate via cuttings so I took a bunch before the frost.
I removed the leaves from the bottom of each stem and then coated them in rooting powder before carefully putting them in seed cells full of soil. I put them in a mini greenhouse for several weeks and watered occasionally.
Here they were all ready to be put in a mini-greenhouse. The extra humidity helped them to root faster.
Here’s how they looked at the end of October, nice root development. I transplanted about half of them which had visible roots up to 3-inch pots so they can continue growing.
Before the frost hit I also moved a bunch of plants into the basement. All the potted fig trees had to come in. They had been slowing down and had already lost a lot of their leaves by early October. But I didn’t want them caught out in the cold weather. I also moved in some pepper plants, and I dug up the rosemary to try to overwinter. I’ve not had success in the past, but I’m going to try again. Pepper plants are perennials in warmer areas and it would be nice to get fruit earlier in the season if I can keep a few plants alive. They are all sitting near a window and I have grow lights that I keep on all winter. Many of the dormant fig trees are at the other end of the basement where they do not get direct light. I try to water the trees once a week.
I planted out about 80 garlic cloves in their usual in-ground garden bed during the first week of October. I put down a couple of bags of fresh potting soil and compost on top of the bed to add some fertility. In each planting hole I added some slow-release fertilizer and worm castings as well. Once they were in, we added a thick layer of fall leaves to act as a mulch.
The final three strawberries from the tower before the plants went dormant for winter.
For the 2025 season I had a total of 102 harvest days, from January-October. I grew 215 pounds of fresh fruit, veggies, flowers, and herbs in my backyard garden over the course of the year. Can’t wait to see what will happen next year!
This year I struggled to get my indigo seeds to survive past the sprout stage. I started seeds indoors to get a head start on the season, but my first two attempts died before they were large enough to divide and pot up. I finally managed to have a few seedlings that survived to be planted outdoors in early June. I had 3 clumps of plants, but they did produce a few stems and some leaves. I put them in different locations in the garden, and they slowly grew over the course of the summer.
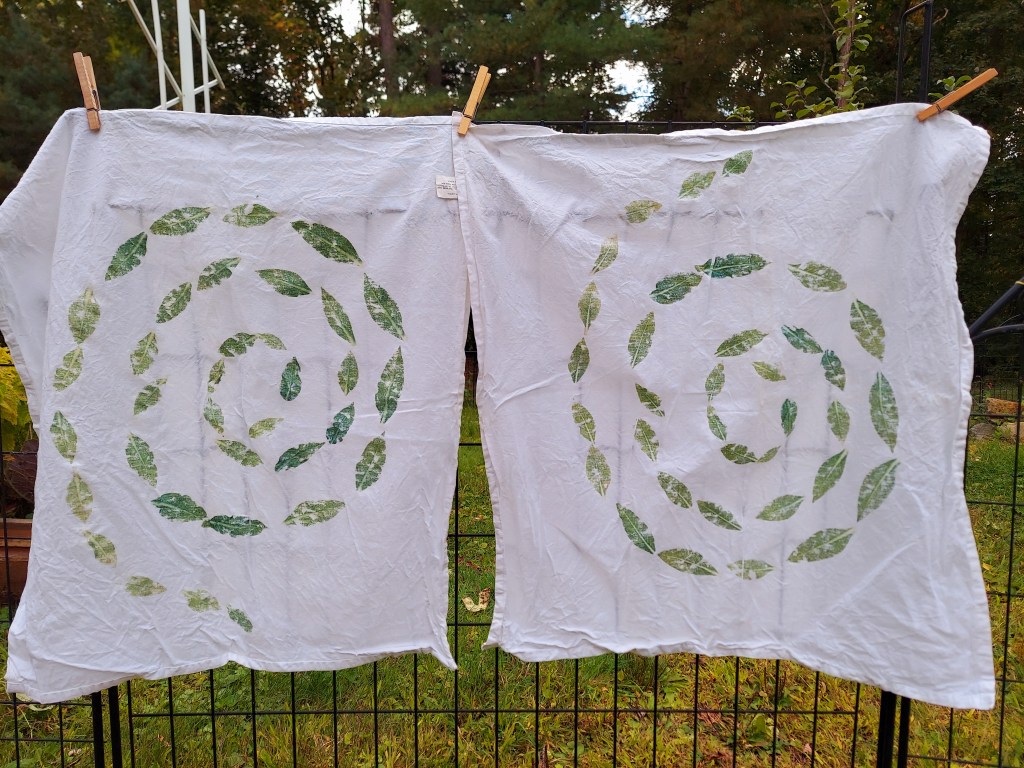
By mid-September I knew I had to harvest and use them before the plants were killed off by the frost. Since there were not a lot of leaves I decided to hammer the individual leaves onto fabric. I had a couple of plain cotton tea towels and used them as my canvas. There are many different types of leaves that can produce prints like this, I experimented last year with carrot, fig, sage, cosmos, and marigold leaves.
This type of project is pretty simple and doesn’t require any special equipment. I cut the stems and placed them in a cup of water to keep them from curling. I then grabbed a small metal hammer and a large piece of carboard to use as a backing to protect the fabric from my concrete porch.
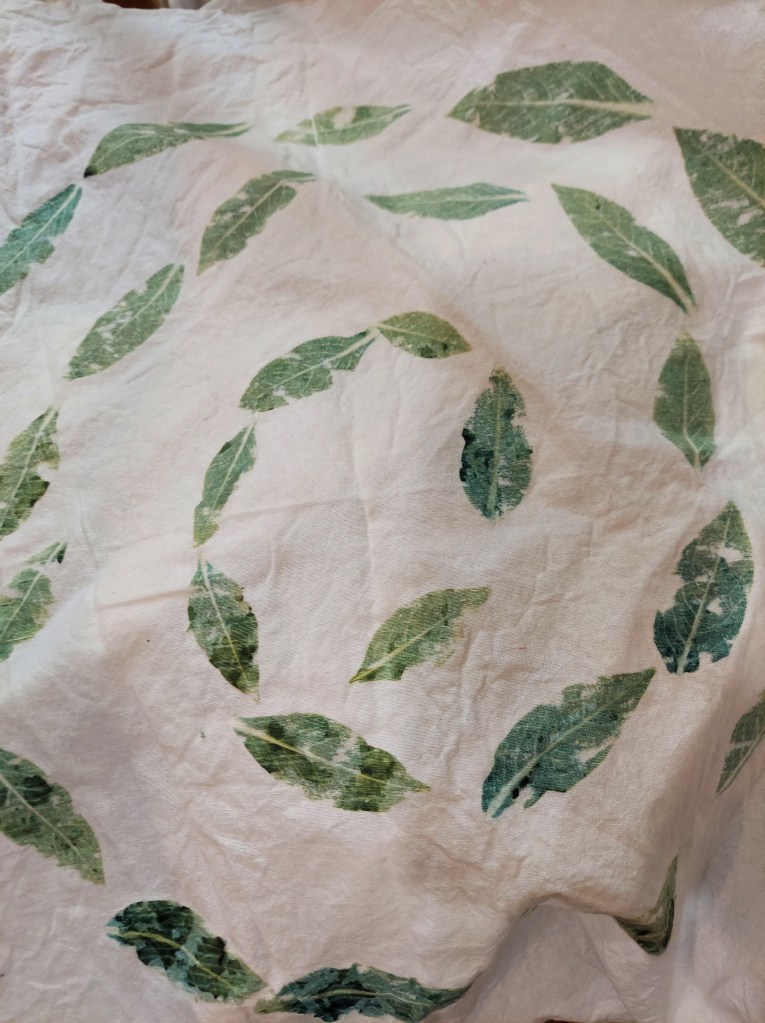
Once I was ready to begin, I carefully cut the leaves off of the stems so as to not rip and break them. I arranged them in the pattern that I wanted on the tea towel, the first towel has a mirror image, so I laid the leaves on half the towel and folded it over. You do need two pieces of fabric to hammer the leaves between, so you will get 2 prints from each leaf. You can either use the same fabric or use scrap of some sort.
Once I had everything laid out in the way that I wanted, I very carefully folded over the other half of the towel and made sure there weren’t any huge creases. I then very carefully hammered each leaf, the image began to appear immediately. You want to make sure you get the whole outline. The veins are quite visible in some of the prints. Once I finished the whole towel I unfolded it and hung it up to dry. Hammering leaves or flowers is very different from immersion dye in that it does not need to soak or sit for the image or color to transfer. There’s no excess dye to wring out.
This was the result of the mirror image print. One side will always be darker than the other, the one you are hitting directly. The side that rests on the cardboard will be a little less crisp. Some folks use wood as the hitting surface but I’m not sure how that might change the print.
Each leaf print is unique, and I hit some of them better than others. But that’s all part of the fun.
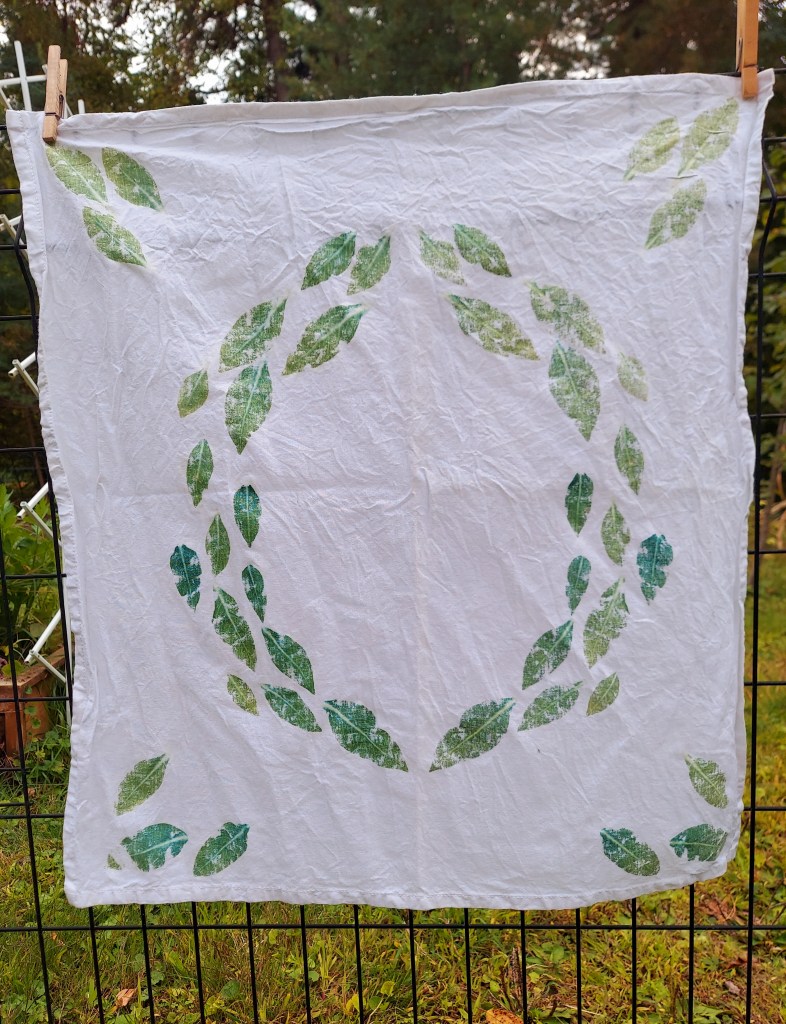
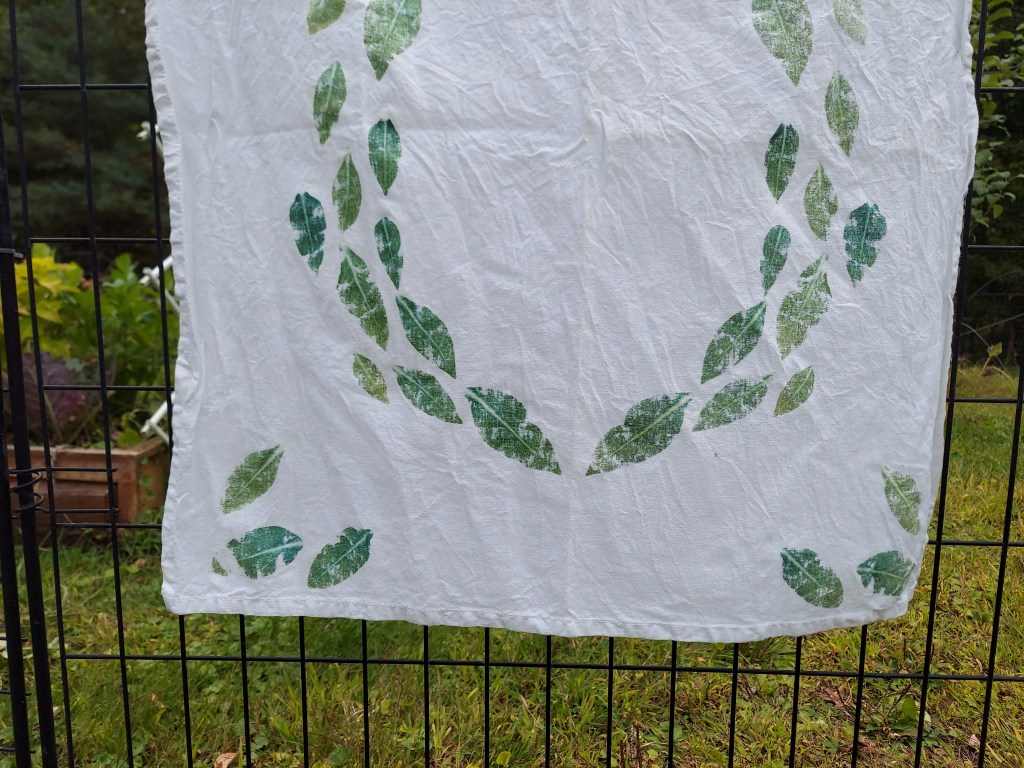
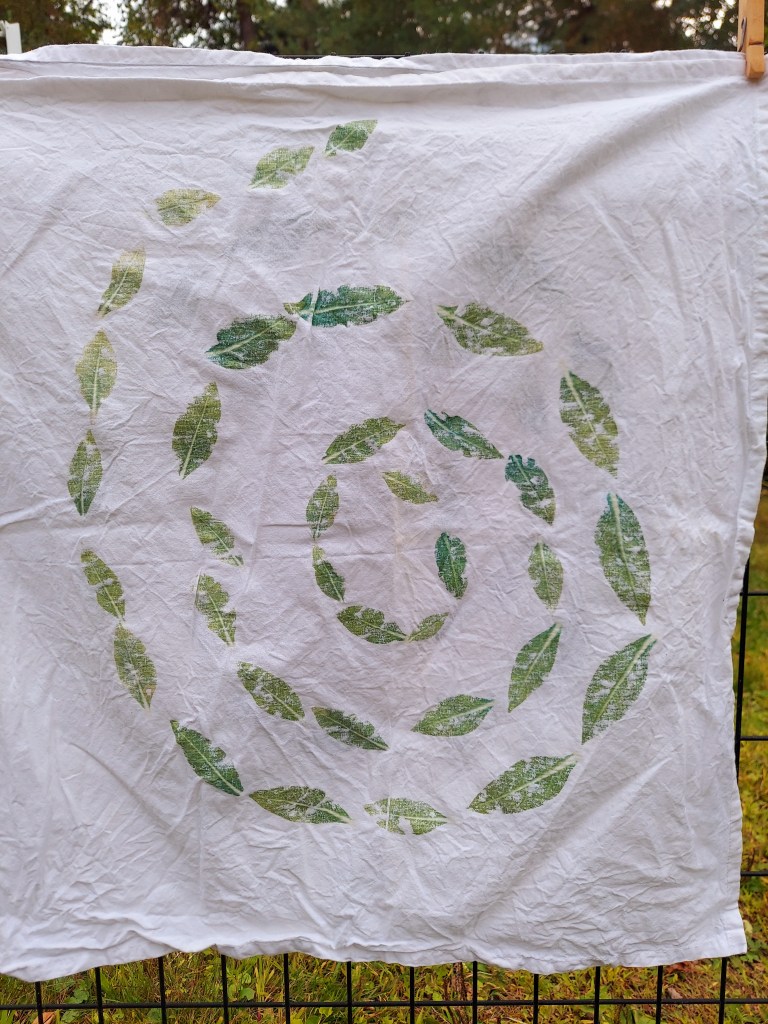
For the remainder of the leaves, I decided to do a spiral shape. I used two towels, instead of mirroring half the image. Here are the finished products hanging up to dry. Once they were dry, I then removed the leafy bits by shaking out the towels.
In total I ended up printing 3 towels from a small harvest of only about 75 useable leaves. Made for a fun afternoon project before the cold weather set in.
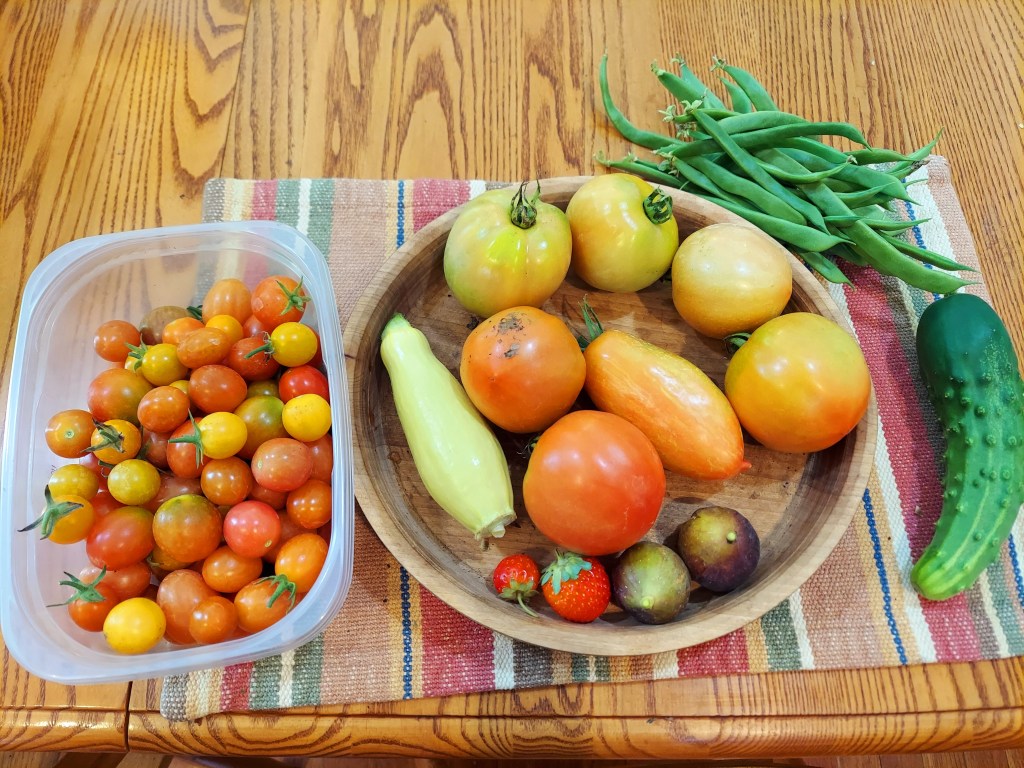
September was a busy month, the garden was very productive, and I had a hard time keeping up with everything. The summer plants were in full swing, and I harvested pounds of tomatoes. The weather was also quite nice and we had a lengthy growing season before the first frost hit in October.
A regular harvest, the cherry tomato plants sprouted up all over the place from dropped fruit from last year, and I left many of them to grow rather than pulling them out. The chipmunks liked the tomatoes too, so I ended up harvesting many of them early and let them ripen on the kitchen counter.
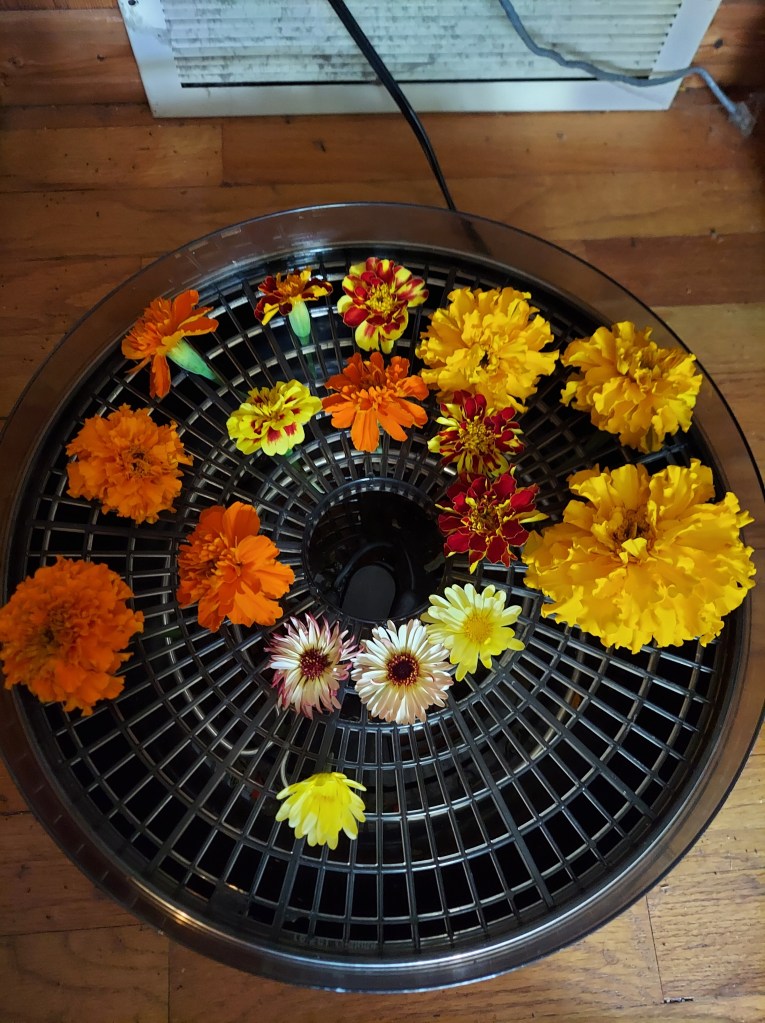
I harvested and dried a bunch of flowers from the garden, including these marigolds and calendula. I also saved cosmos and coreopsis for future natural dye projects.
I grew a bunch of marigolds this season scattered throughout the garden. A couple of the plants in the dahlia bed grew to be as tall as the dahlias!
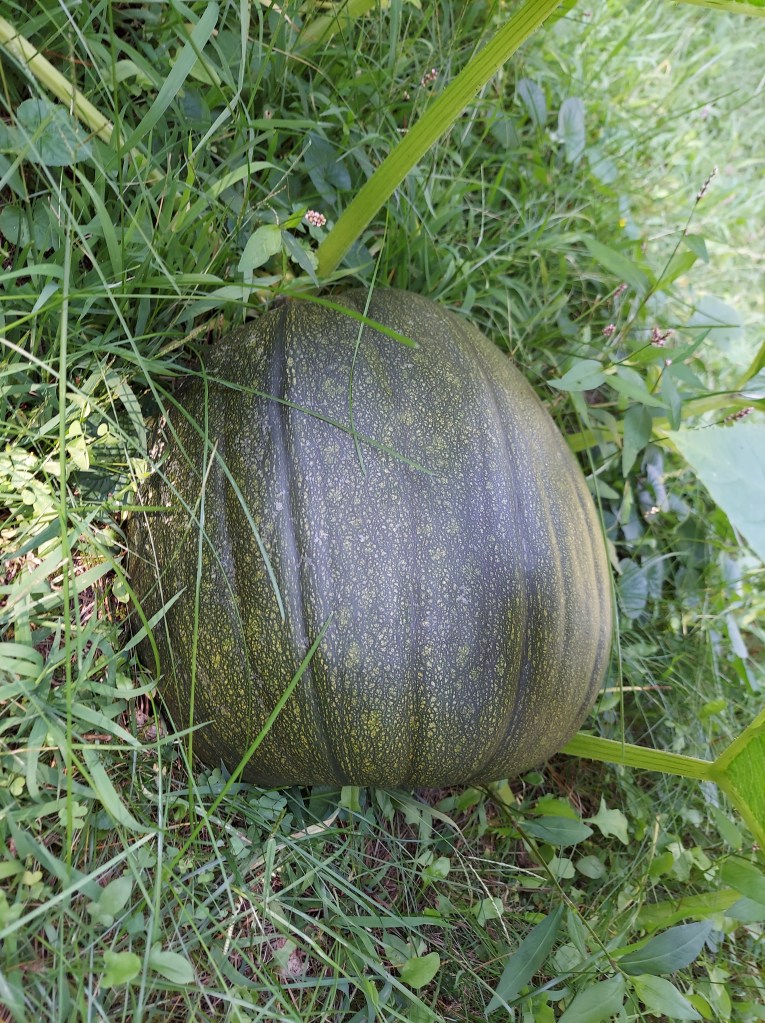
The compost grown pumpkins really came into production in September. I was worried about the lack of fruit earlier in the season, but I did manage quite a good harvest. Two of the jack-o-lantern sized ones remained green since they had a late start, but they made for good decorations.
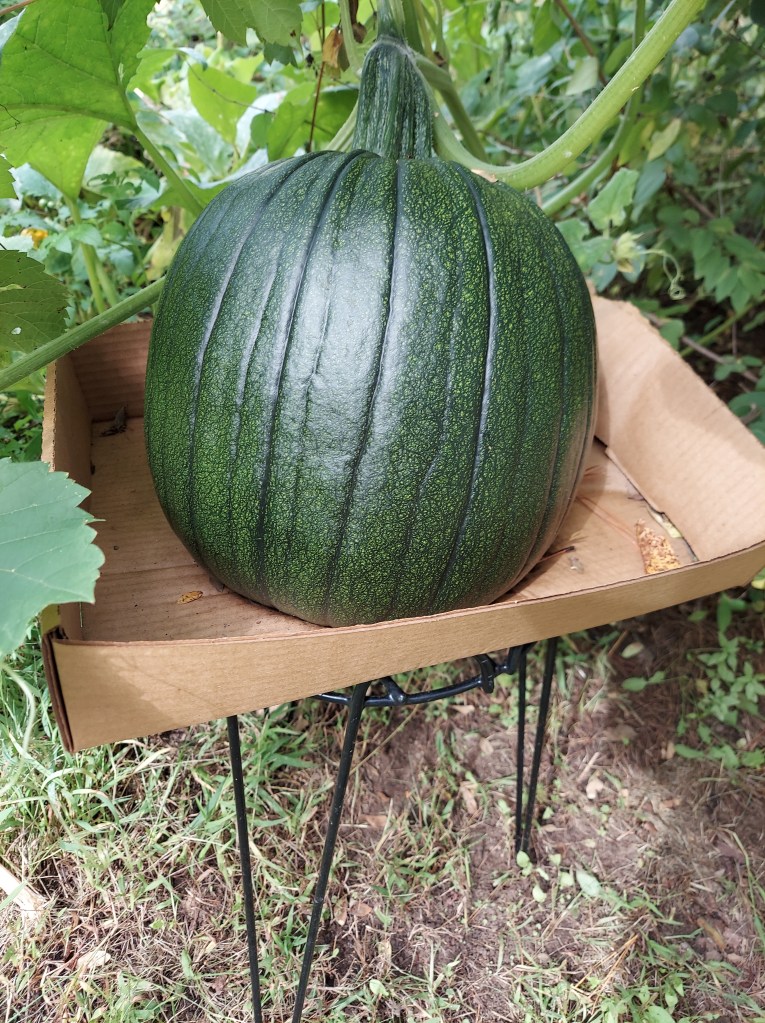
This particular pumpkin grew about 3 feet off the ground because the vine started climbing a nearby shrub. In order to support the vine, we put a plant stand underneath with a cardboard box on top so it wouldn’t get stuck in the slots.
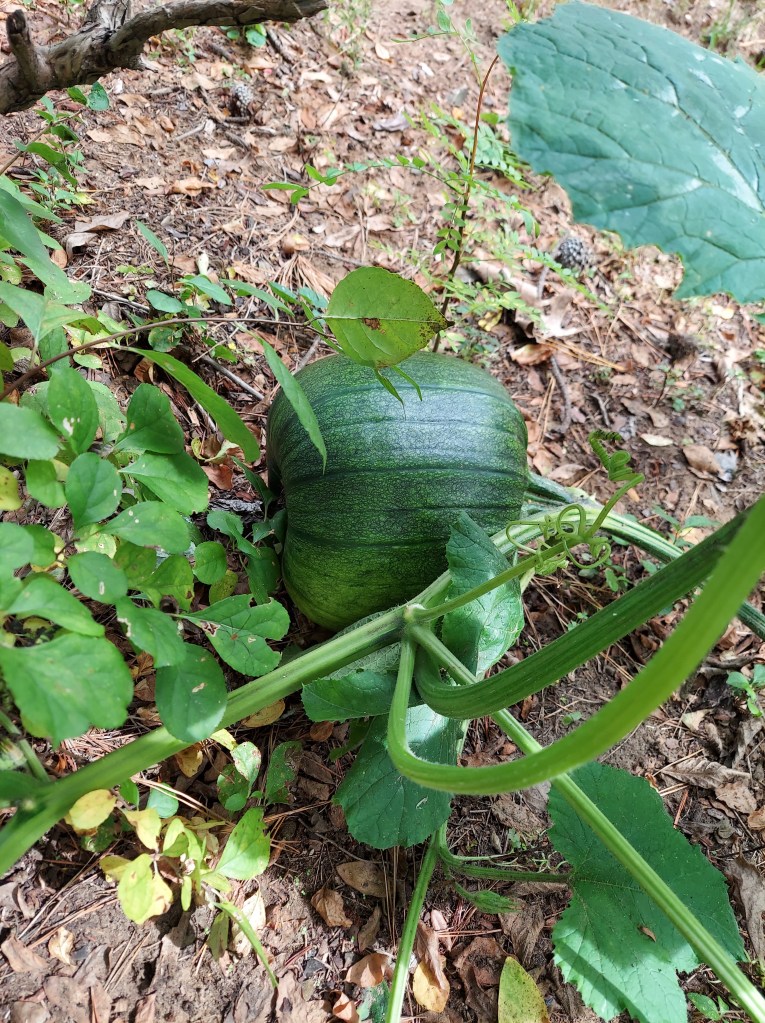
The final full-size unrip pumpkin growing near our magnolia tree. The vine stretched about 25 feet from the compost pile to the border with our neighbor.
I brought home a free passionflower plant from work in mid-August and by late September it was recovering and blooming. The flowers are very unique and pretty.
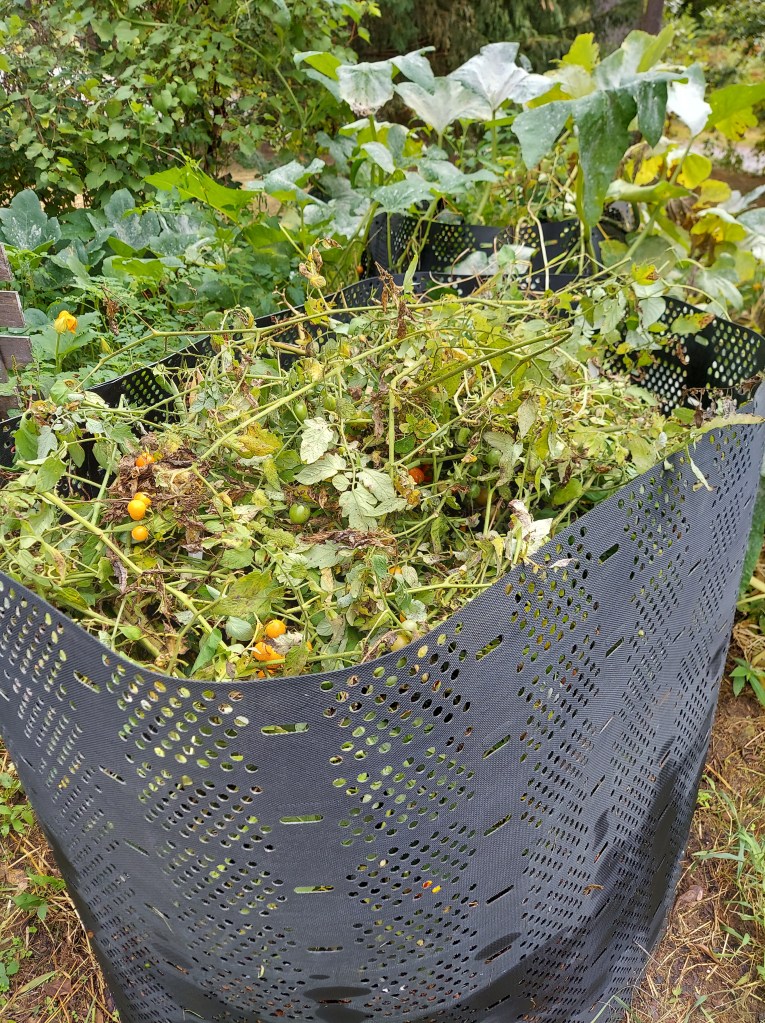
I finally managed to fill the compost bin for the first time all season once I started clearing out summer plants at the end of September. Last year’s compost with the pumpkins growing is just visible behind this bin. The compost in that bin is finished, and I will spread it in the garden in spring. Once that bin is empty, I will turn this bin into it, break up any large stems, and then let it sit and break down for a full year. Composting is a long, slow process, but once I flip the pile, I can basically forget about it. I’m very grateful that we get a bunch of fall leaves, free mulch! I add a bunch to the compost pile to balance out the fresh material and use leaves to protect the fruit trees over winter.
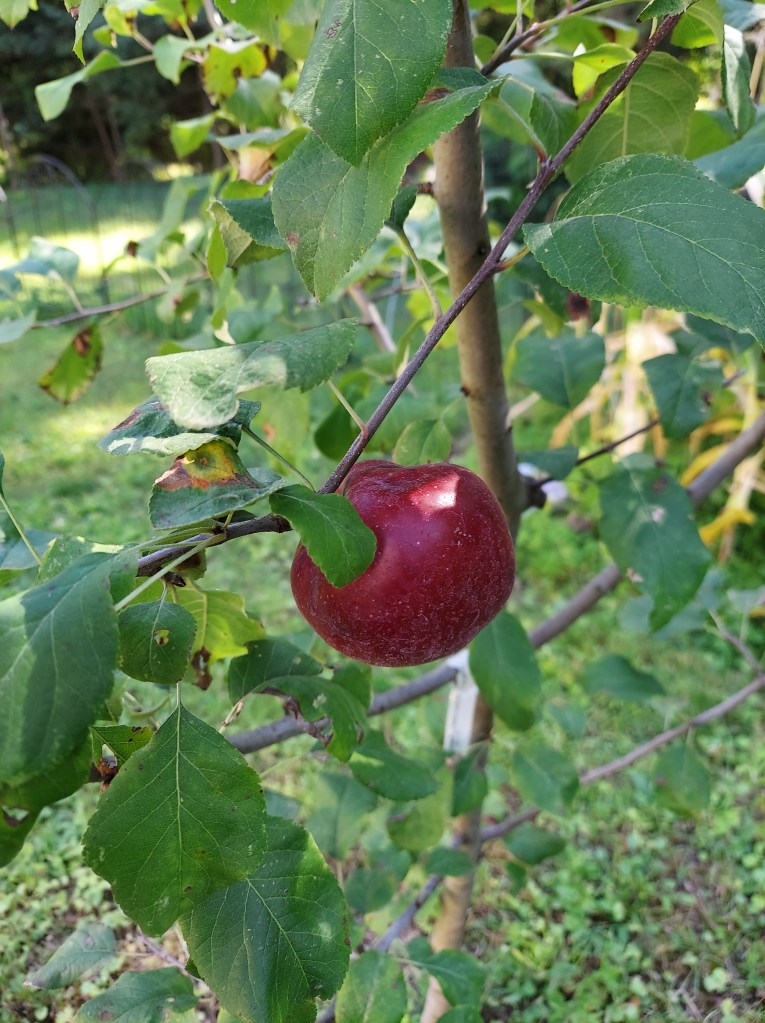
My one-year-old Cortland apple tree actually produced fruit this year! I harvested 3 small apples from it. Looking forward to seeing how many more it grows next year.
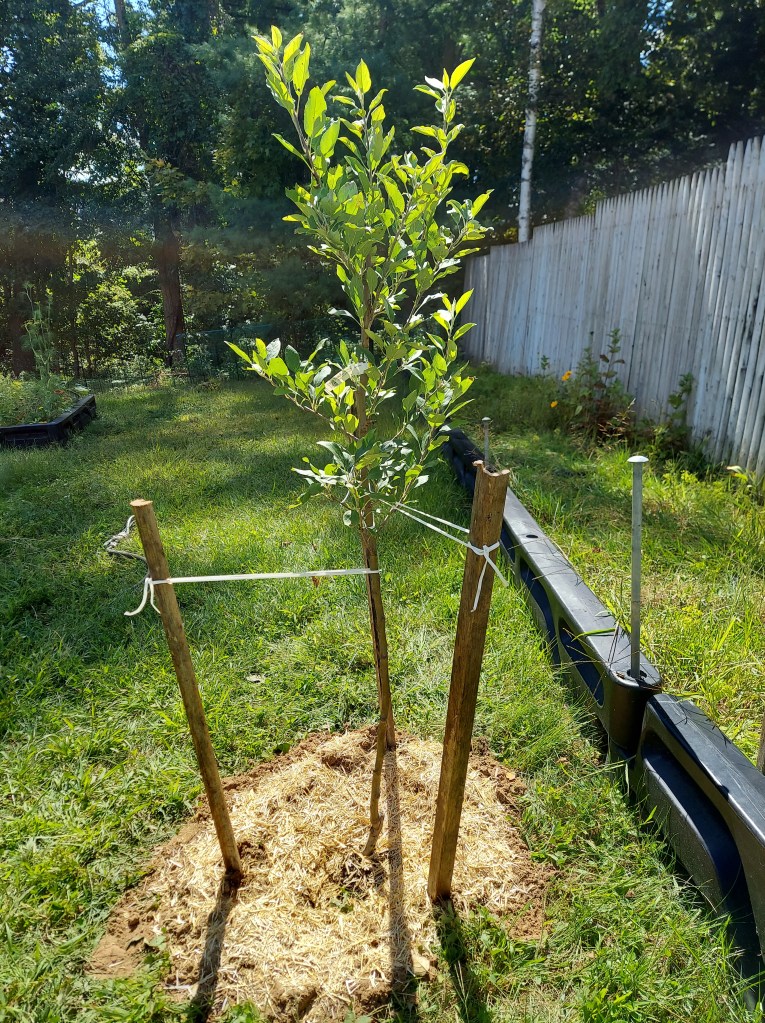
I also bought an additional apple and pear tree from Stark Brothers Nursery because two of mine from last year was not doing well and I wanted to have a replacement if it died over winter. Thankfully they both survived so that meant I had to find new places for the “replacement” trees. They had lived in pots with the fig trees all summer but we planted them out so they could get settled in before the frost hit. We planted them in early September, staked them for additional support and put down a layer of straw mulch to suppress weeds.
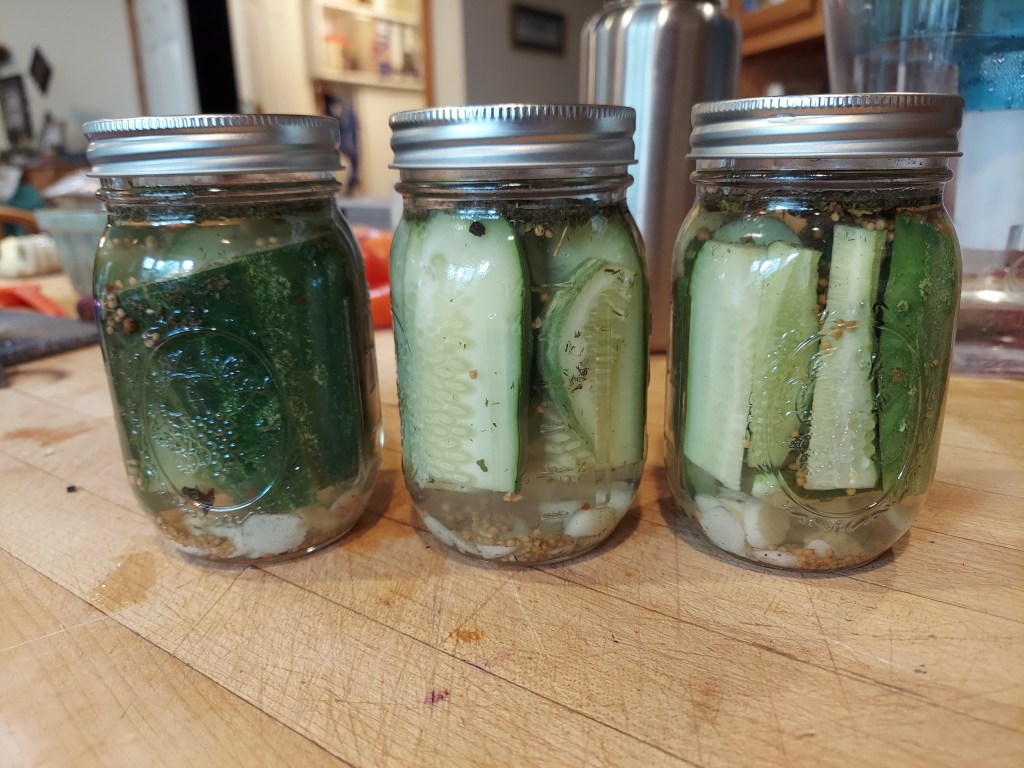
In September I finally had enough cucumbers at once to make a small batch of refrigerator pickles. I’ve never tried canning, but the fresh method works well for making a few jars at a time.
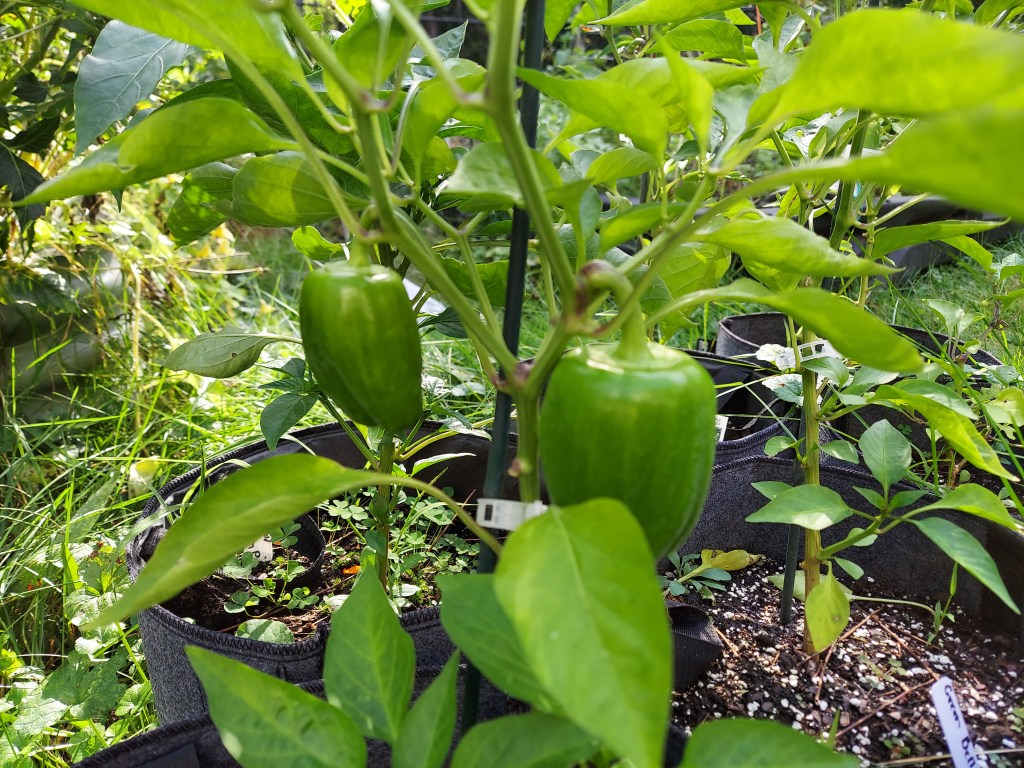
The potted bell pepper plants finally started producing small peppers in late summer. I ended up harvesting them all green and using them when I made pasta sauce. I’m still trying to get peppers right, but I never seem to get fruit until late August/early September, and they almost never have a chance to ripen to their proper color. I will be trying to overwinter some of the plants indoors to see if I can get a faster start to the season next year.
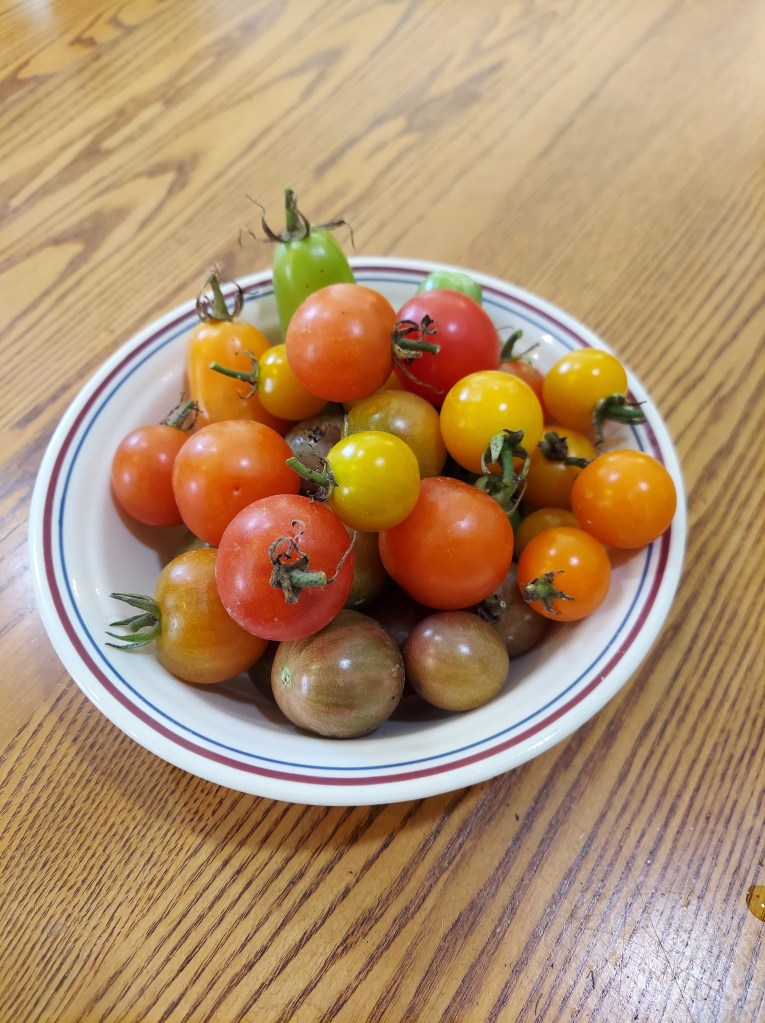
The last bowl of cherry tomatoes before I removed the spent plants to the compost pile. There were many days where I harvested 1-2 pounds of tomatoes.
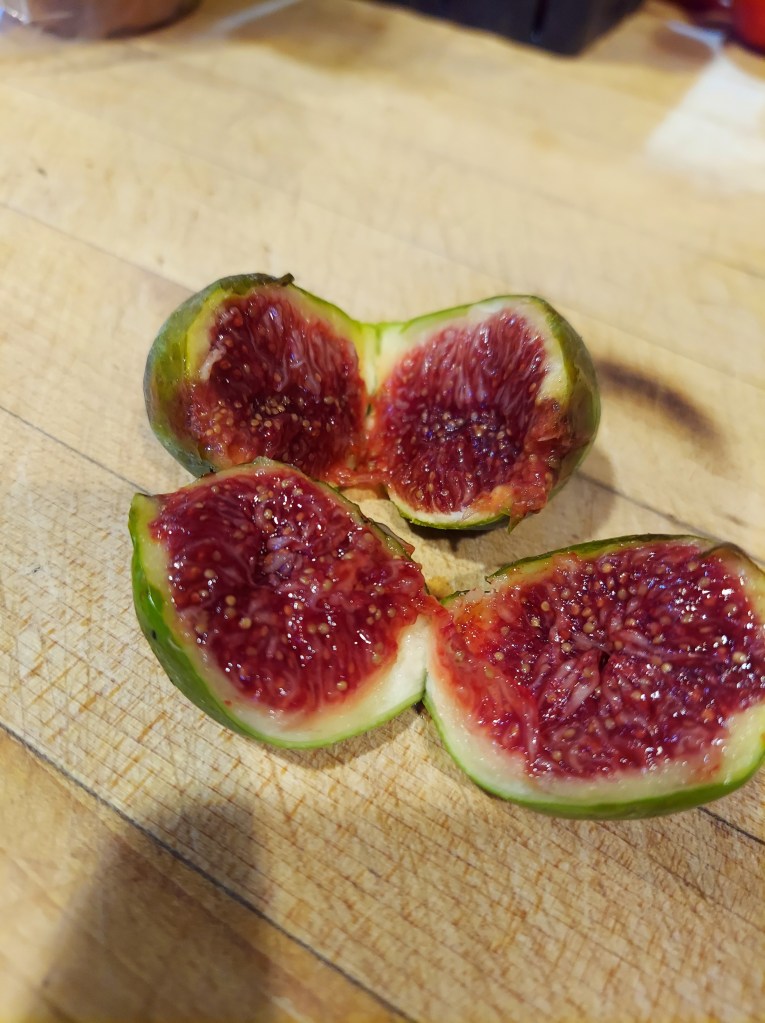
I did manage to get a modest fig harvest this year from my established trees, a few pounds total. These are two of the late season Green Ischia figs I had with breakfast on hobbit day.
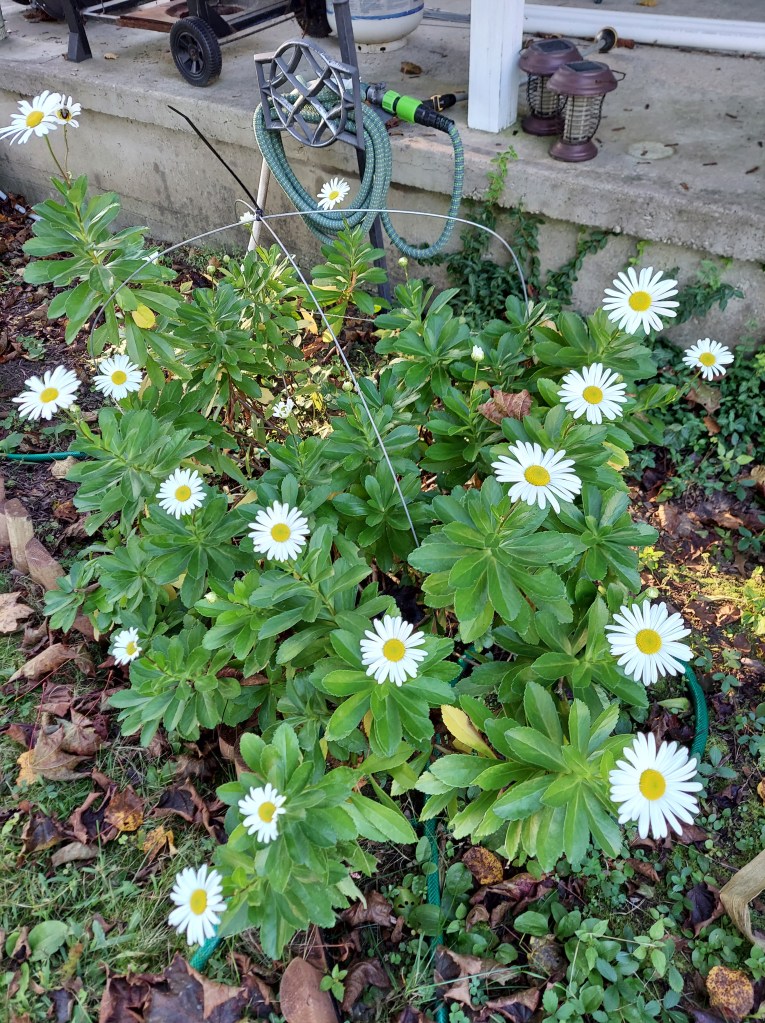
The fall blooming Shasta daisies provided a nice pop of color when most of the other plants were fading away. I still have kale, celery, and some herbs in the outside beds. I planted a few lettuce seedlings in the greenhouse so I’m going to see if they survive winter.
This season proved to be very productive on the whole. There were some surprising wins and some difficult challenges to content with. The year started off with a lot of rain and the spring was very cold and cloudy. As a result, the garlic suffered, but I had my best lettuce season yet. I experimented and grew corn successfully for the first time, not huge ears, but they were edible. My attempt at growing willow did not work out, and the woodchuck ate my squash plants and a lot of the leafy greens. The pumpkins were slow to start but still did well, the other winter squash plants did not do much. The tomatoes did phenomenal; I harvested 73 pounds total! The dahlias were a happy surprise, and I cut over 220 flowers. Next year I will need to stake them better, so they don’t all fall over. I had just over 100 harvest days from the garden over the course of the year. There’s no way to know what next year will bring but I’m looking forward to it.