The middle of May finally brought nice weather to upstate New York. It rained for the whole first week of the month, but there was a window of cloudy days in the 60/70 F range. During that time, I made huge strides for planting out my seedlings, hardening off the next round, and have direct sowed quite a few seeds as well.
Getting my seedlings some much needed sunshine during the hardening off process.
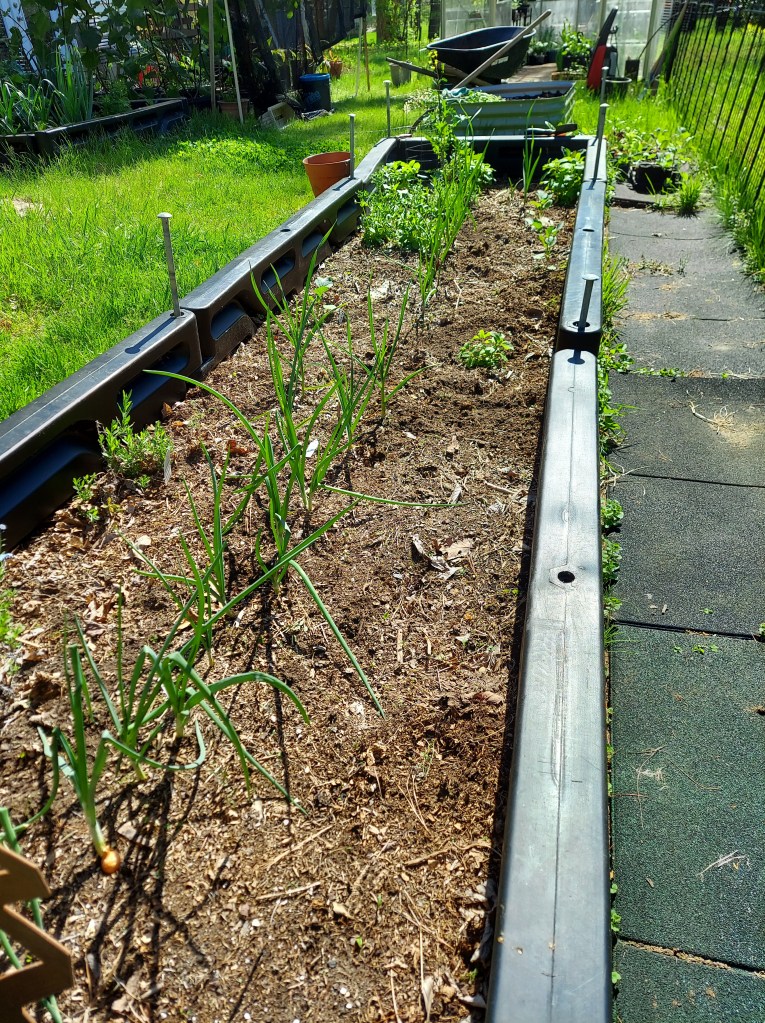
The large garden bed was looking pretty empty at the beginning of May, aside from some garlic and onions down the middle of the bed. Thankfully all 3 of my lavender plants in the bed survived the winter and were starting to put on new growth. Time to start filling it up!
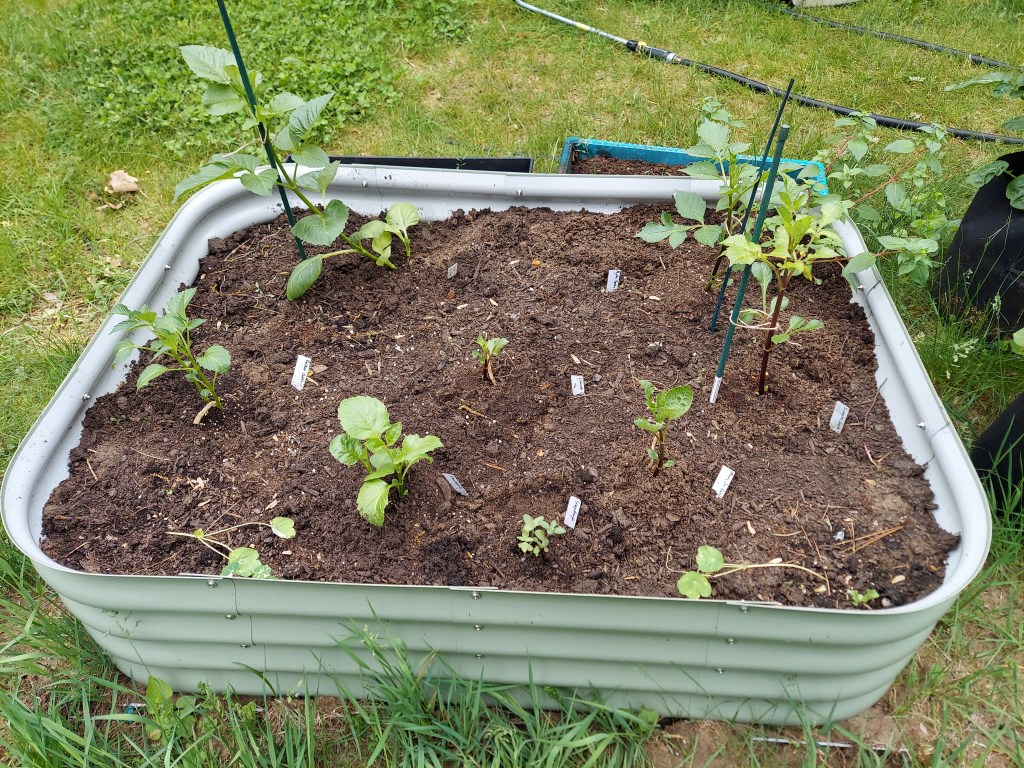
My new Birdie’s raised bed has been planted. 7 overwintered dahlias as well as some nasturtiums, snapdragons and calendula. I also direct sowed some marigolds and cosmos along two of the edges, as well as one watermelon in a corner.
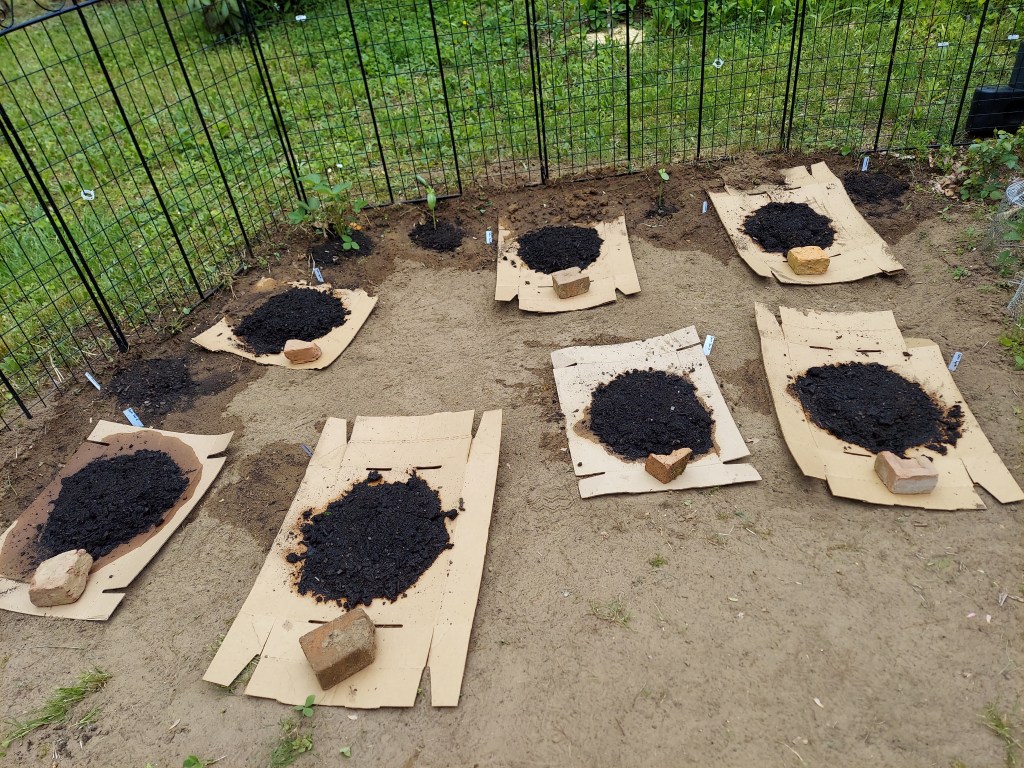
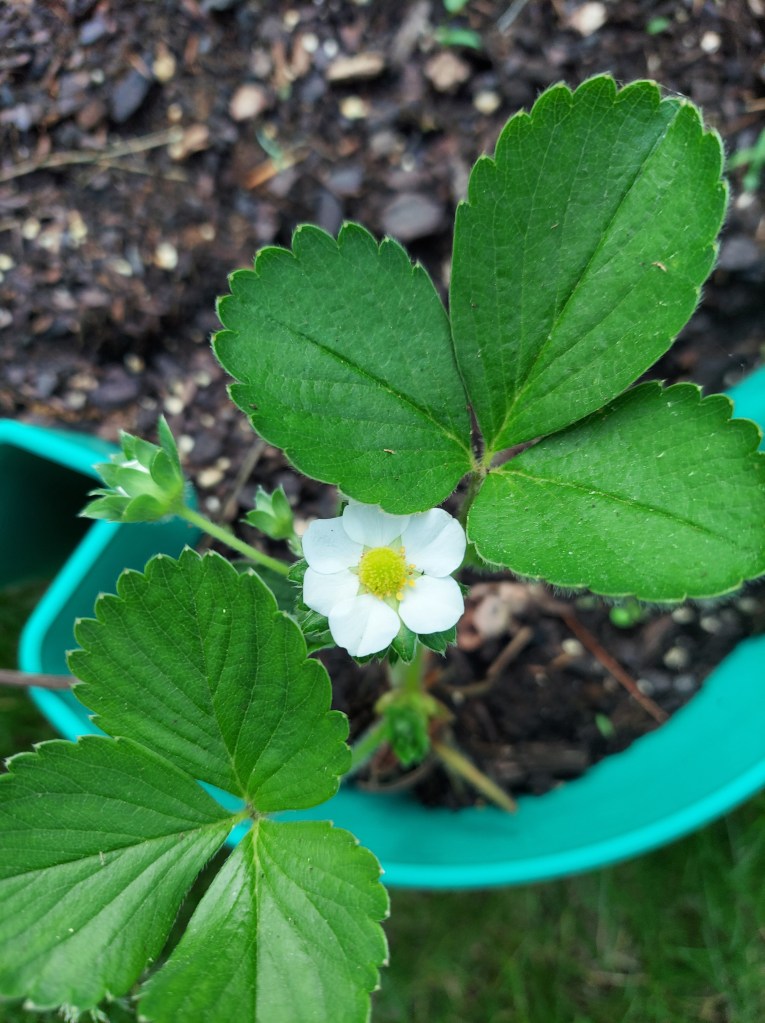
During a sunny day last week my dad tilled this section between our inner fence and the deck stairs. Once it was mostly weed-free I put down cardboard with a pile of garden soil and compost on top. This will hopefully turn into an explosion of squash plants in a couple months. I direct sowed summer squash, zucchini, and melons. We plan to add wood mulch to hold everything in place and slow down the weeds/grass from regrowing. I planted a couple of zinnias along the fence and there is one large strawberry plant in the corner which is growing 3 berries.
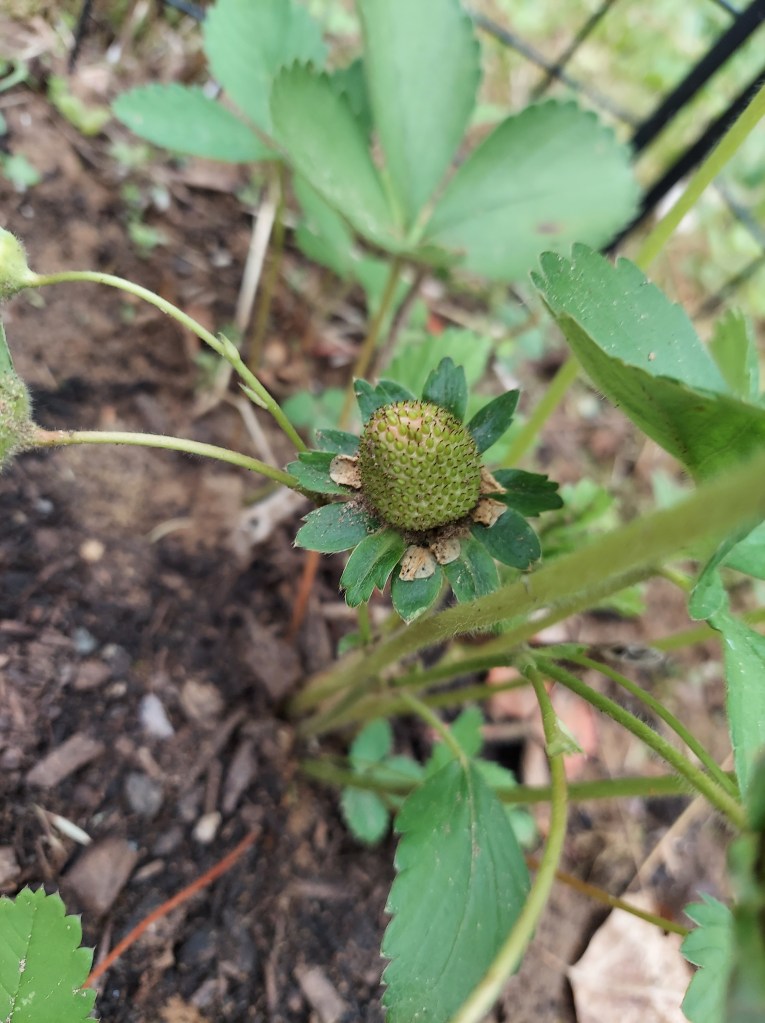
First couple of in-ground strawberries are sizing up!
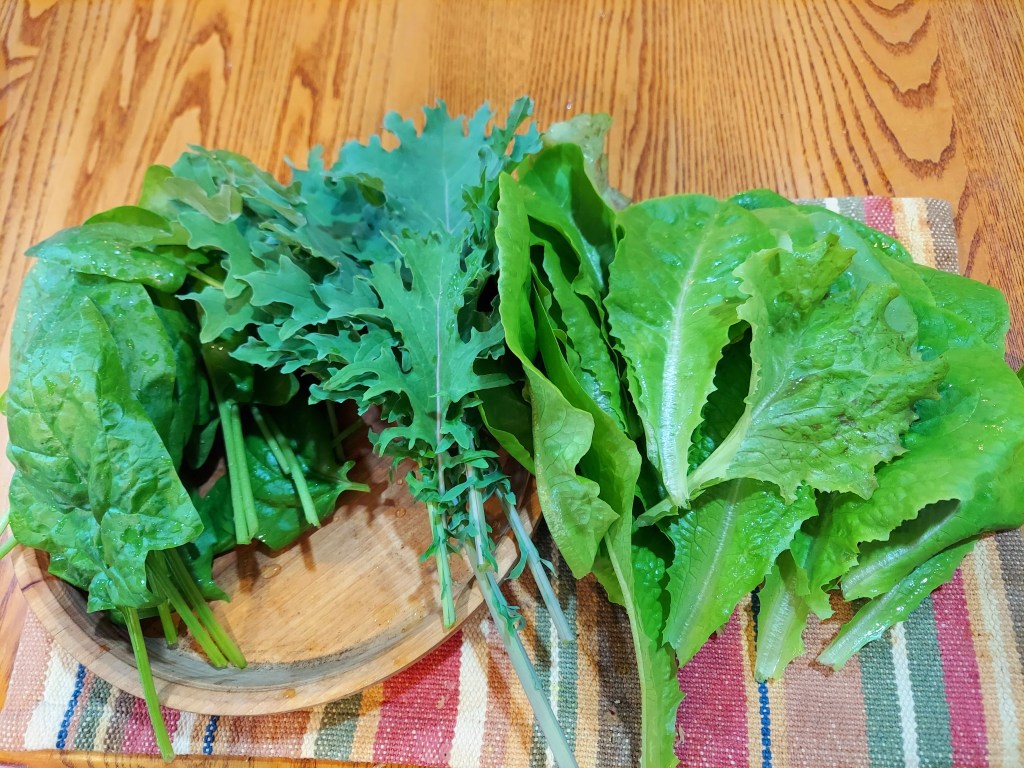
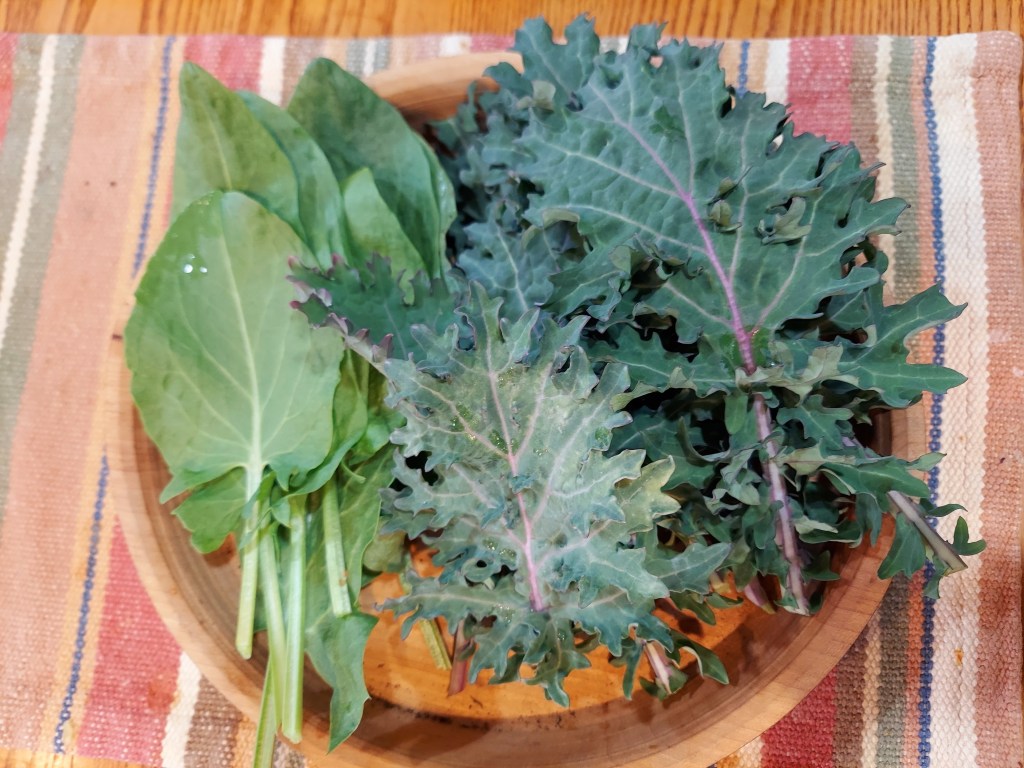
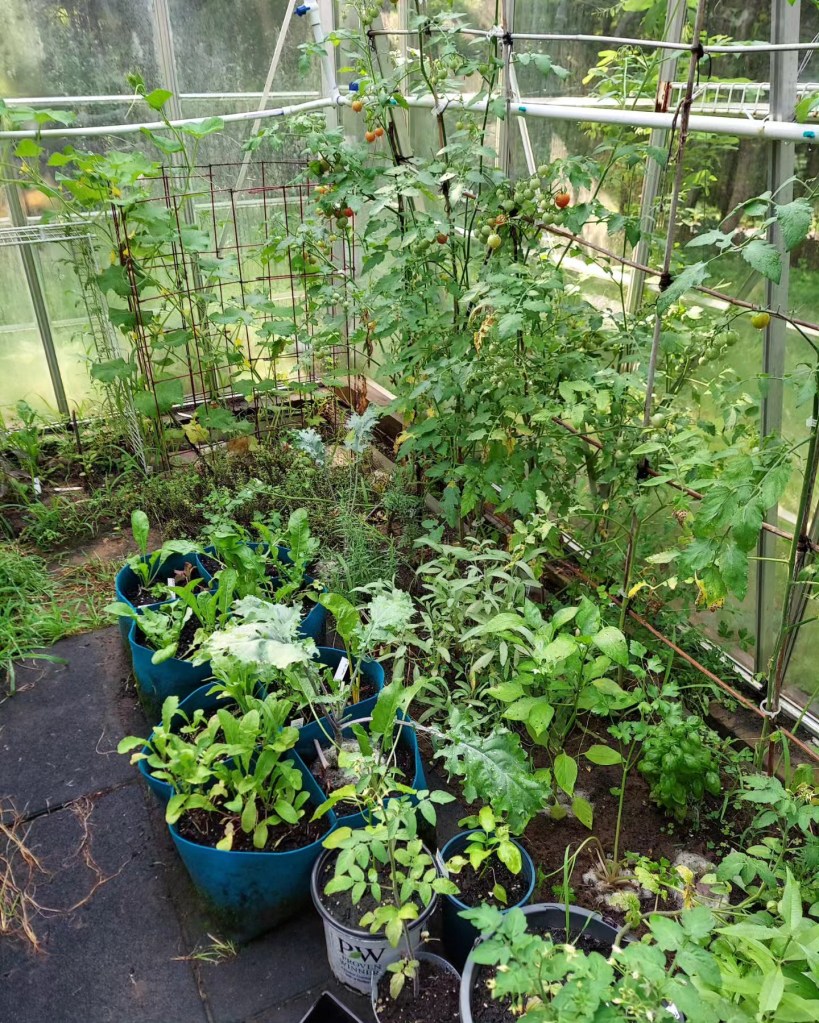
The cold, wet spring has been bad for the summer plants, but it has been very good for the spring sown, cool crops. I’ve made several leafy green harvests like this and my peas in the greenhouse are starting to flower.
A bunny rabbit has proved to be a nuisance. It is currently small enough to fit through the chain link fence and has been eating some of my plants. It nibbled on 2 coneflower and one clump of chives. It completely ate 3 broccoli and 2 kale plants this past week. I have put covers on what I can, but soon the plants will be too tall. Hoping we can either catch the bunny or scare it away.
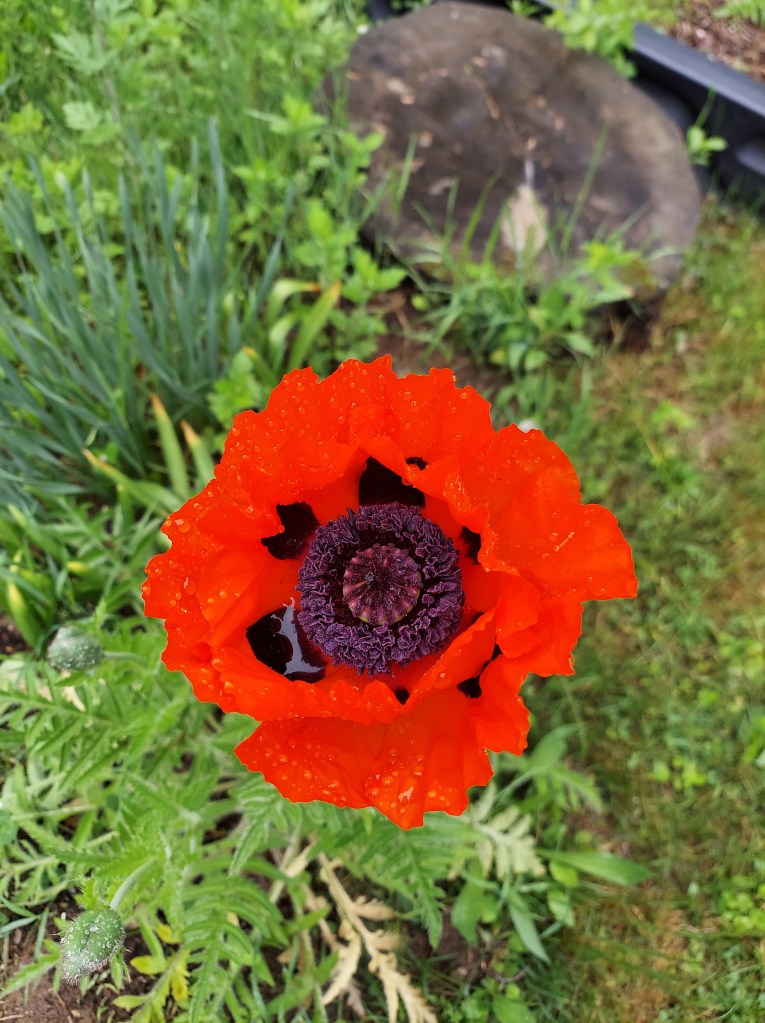
A few of the flowering perennials are starting to bloom including my first ever poppy flower! It’s huge and bright orange. The other two smaller poppy plants nearby are also working on flower buds, so hopefully there will be more soon, and perhaps in different colors. My rose bushes have leaves and are also working on flower buds.
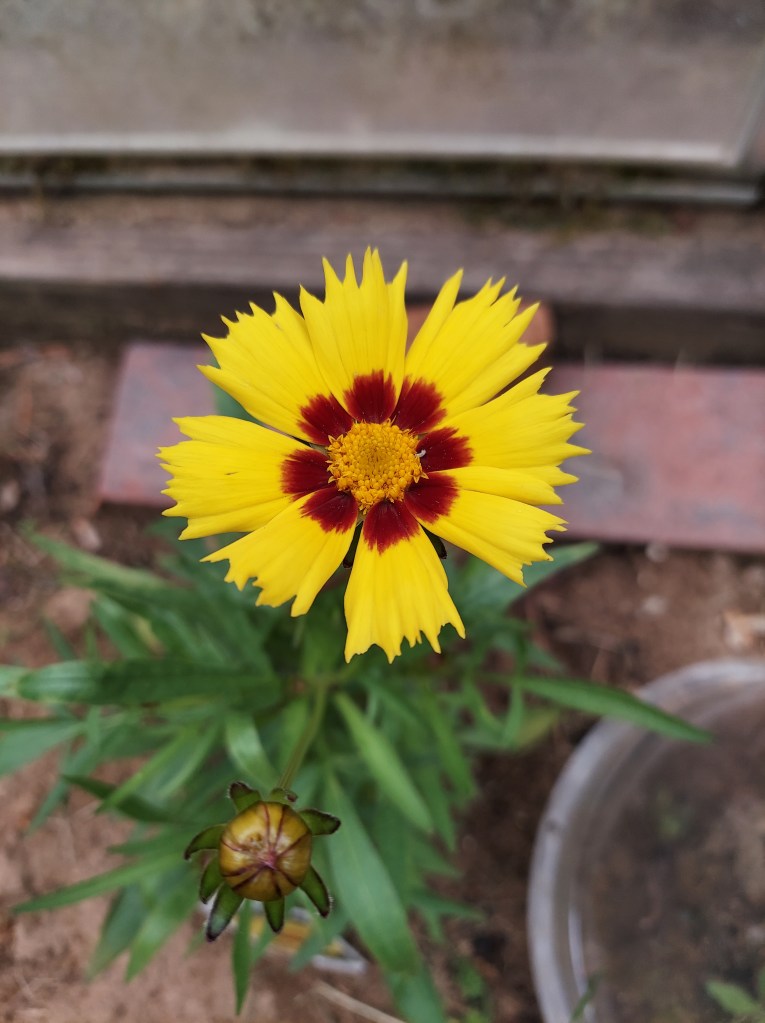
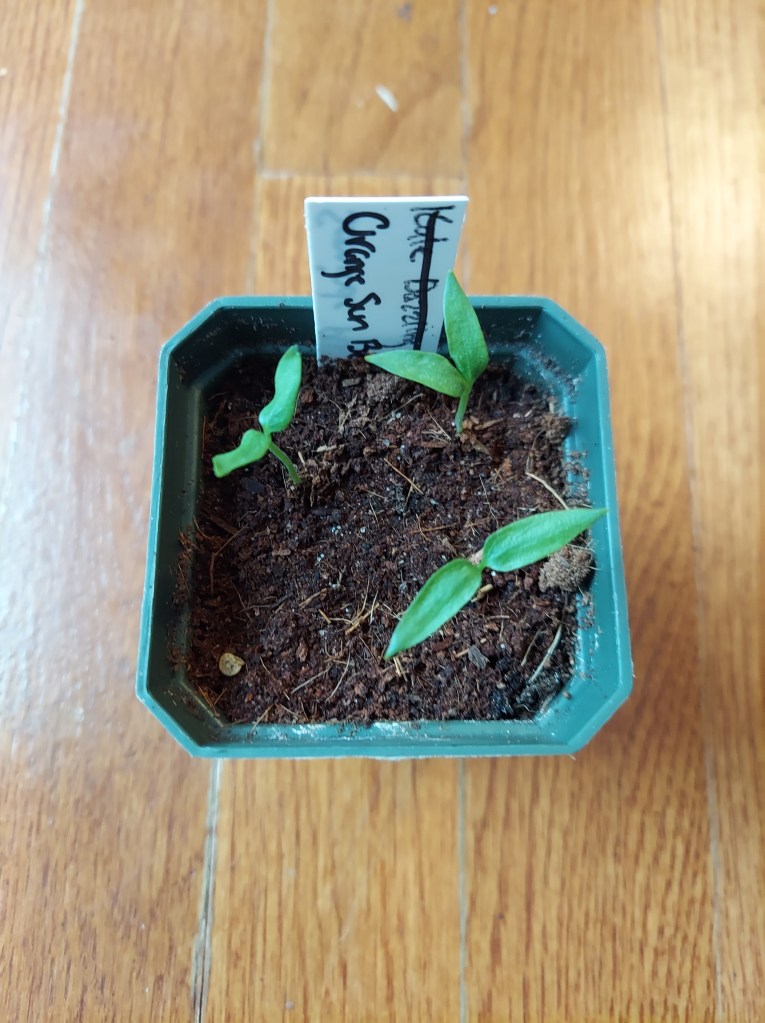
I tried growing coreopsis from seed and got a few sprouts this spring indoors, but they are still tiny. I decided to purchase 2 small starter plants from work in order to get flowers this year. Coreopsis has small flowers and is a good dye plant, both for a dye pot and for hammering or steam transfer onto fabric. I plan to direct sow some of my seeds around the established plant to widen the patch.
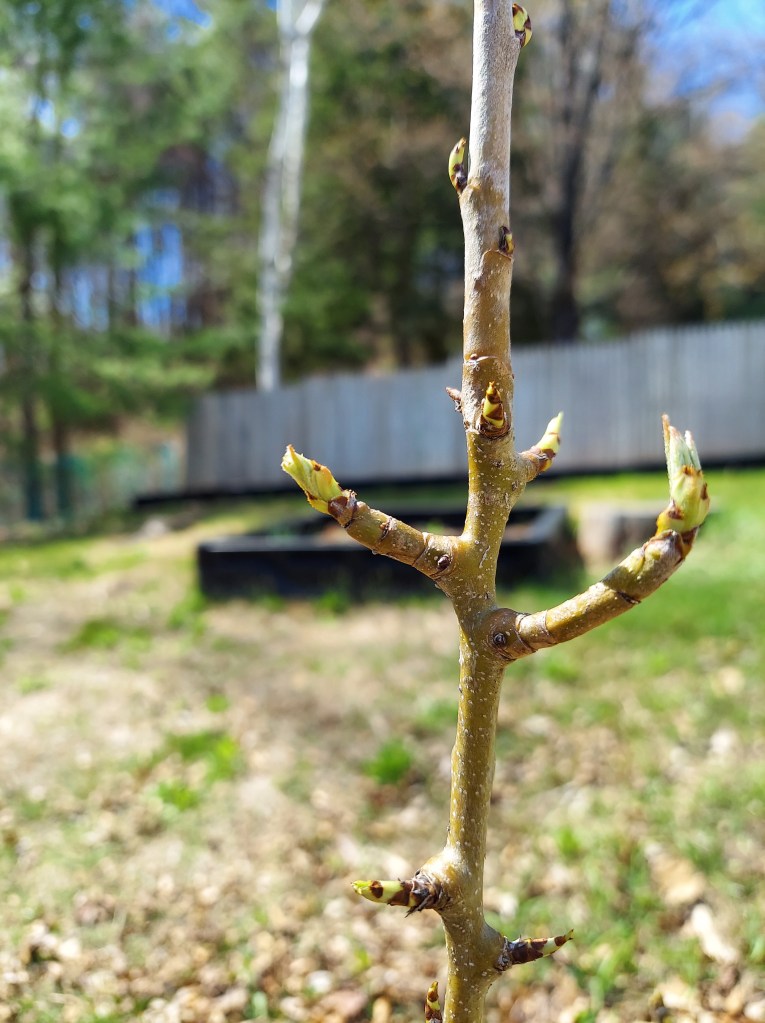
Two of the three apple trees have several clusters of tiny fruit, the bees pollinated almost all of the flowers. In about a month, I will go through and thin out each cluster to one a single fruit. I will also probably cover the fruit with a mesh bag to try and protect them from pests. These are very young trees, but I am excited to get a couple of apples per tree come fall!
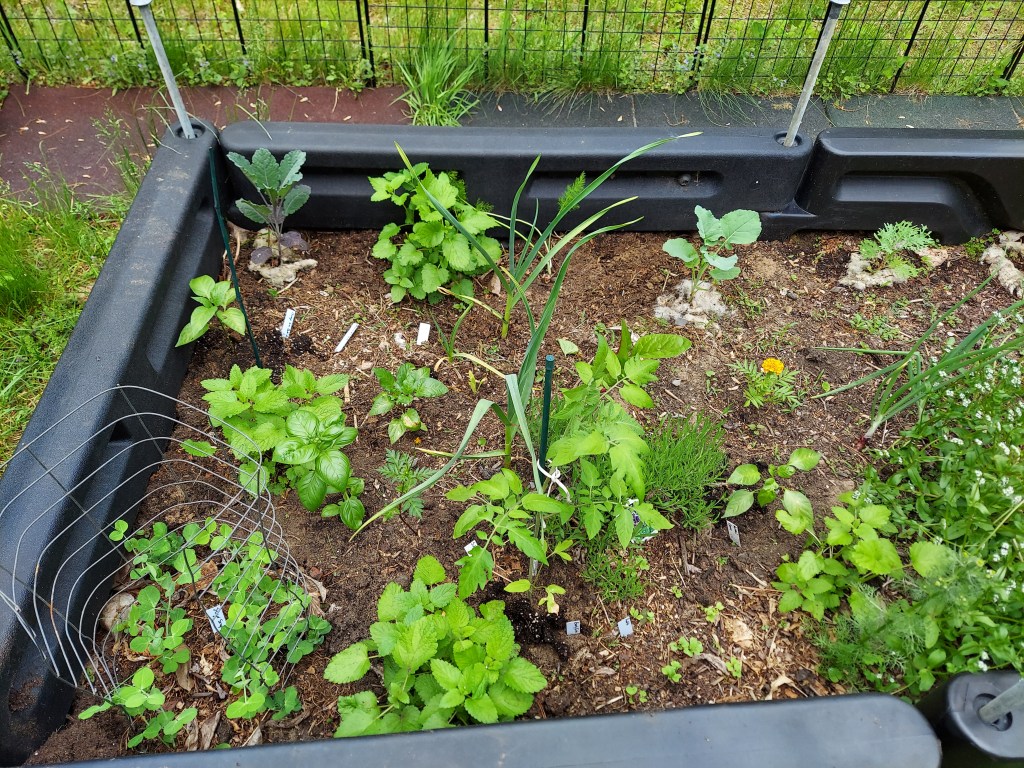
Here’s a before and after of my initial planting in the large in-ground garden bed. The second photo was taken about a week later. I cleared out a couple of flowering kale and mache plants and re-set the bed with new plants.
Peas, kale, peppers, broccoli, marigold, cabbage, radishes, basil, cosmos, and the first of the tomatoes. This section also has 3 small perennial lemon balm plants and a large lavender plant which is currently hidden behind the tomato.
Looking forward to getting more plants moved out in the coming weeks and hoping to see a lot of direct sown seedlings as well.
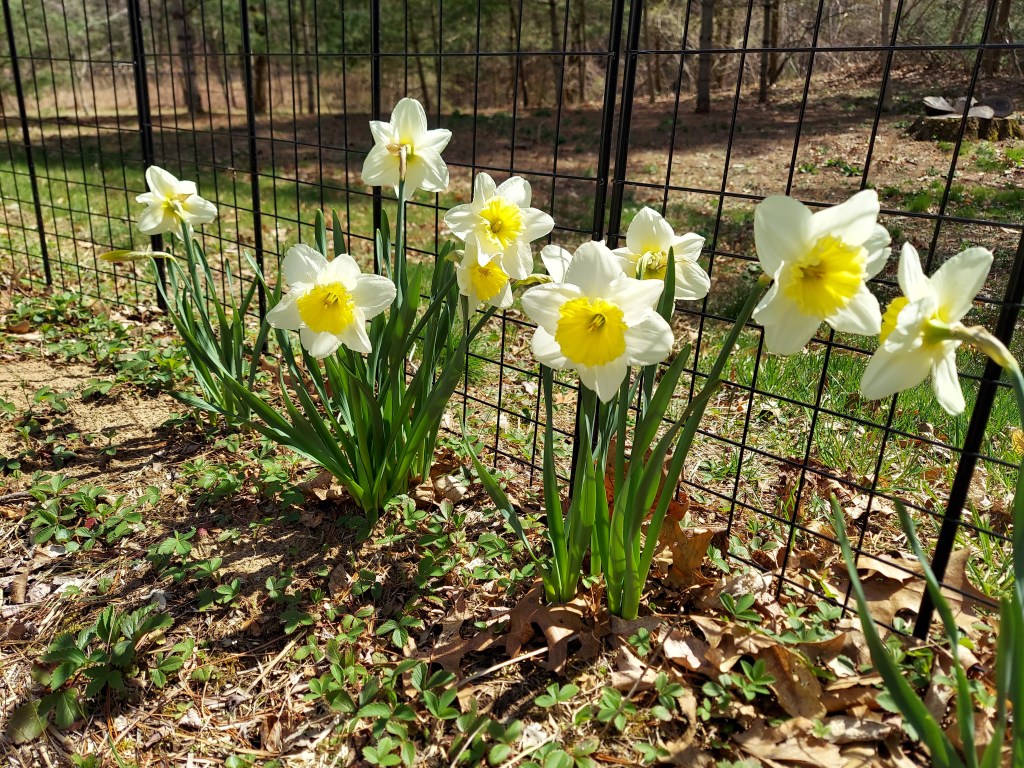
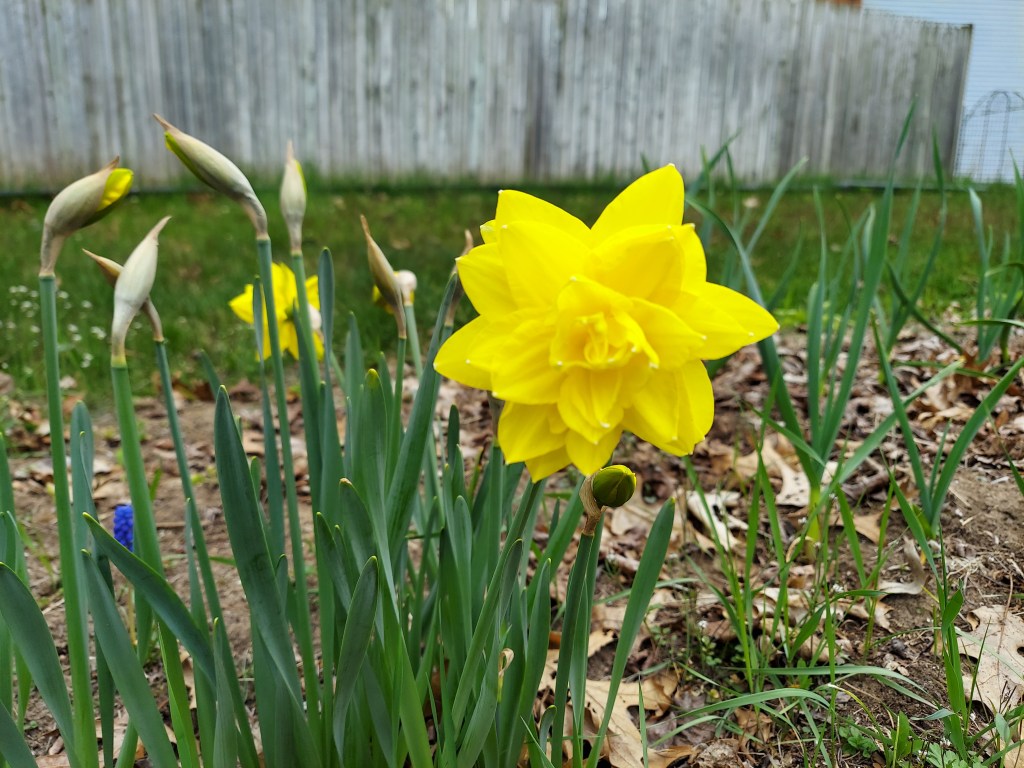
Spring is finally arriving here in upstate NY! We had a very long and windy winter but new life is finally emerging. The fruit trees are waking up and the daffodils bloomed just in time for Easter. The magnolia tree is currently in full bloom, and a couple of tulips are growing.
Magnolia tree
Daffodils
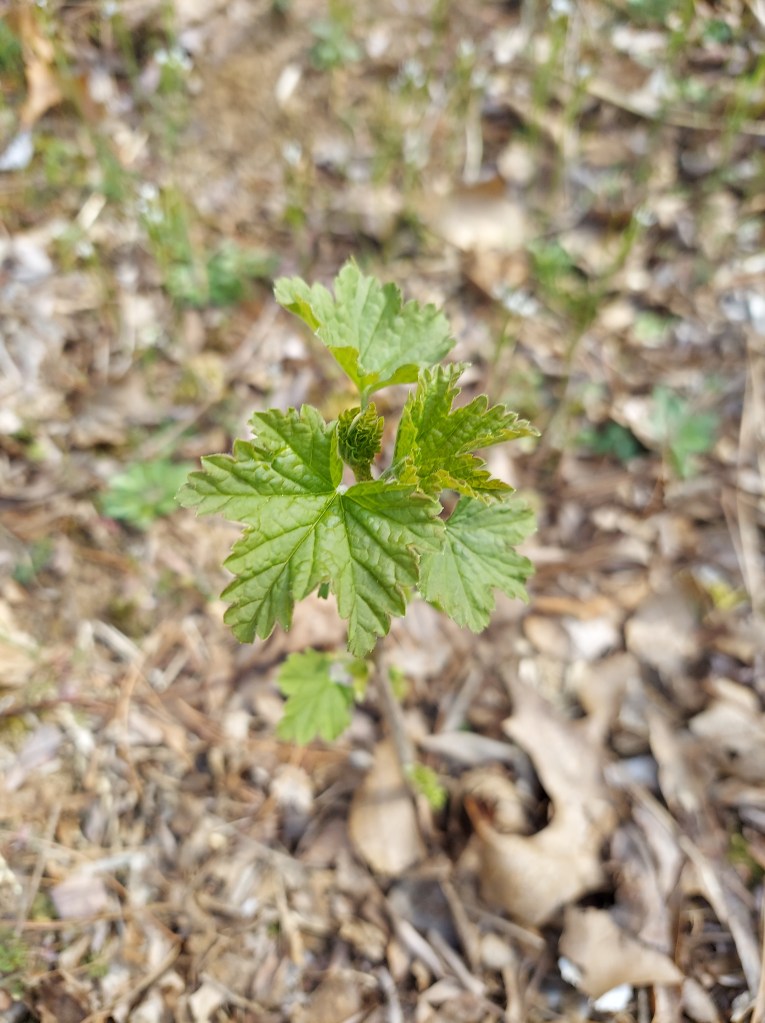
Many of my perennial herbs survived the winter. I have several patches of oregano, lemon balm, mint, sage, and thyme. Several of the comfrey plants are just starting to peek through the dead stems from last year. The blueberry bushes are starting to bud. All 3 of the black currants that I got for free in the fall survived the winter, as did the thornless black raspberry.
New flush of black current leaves
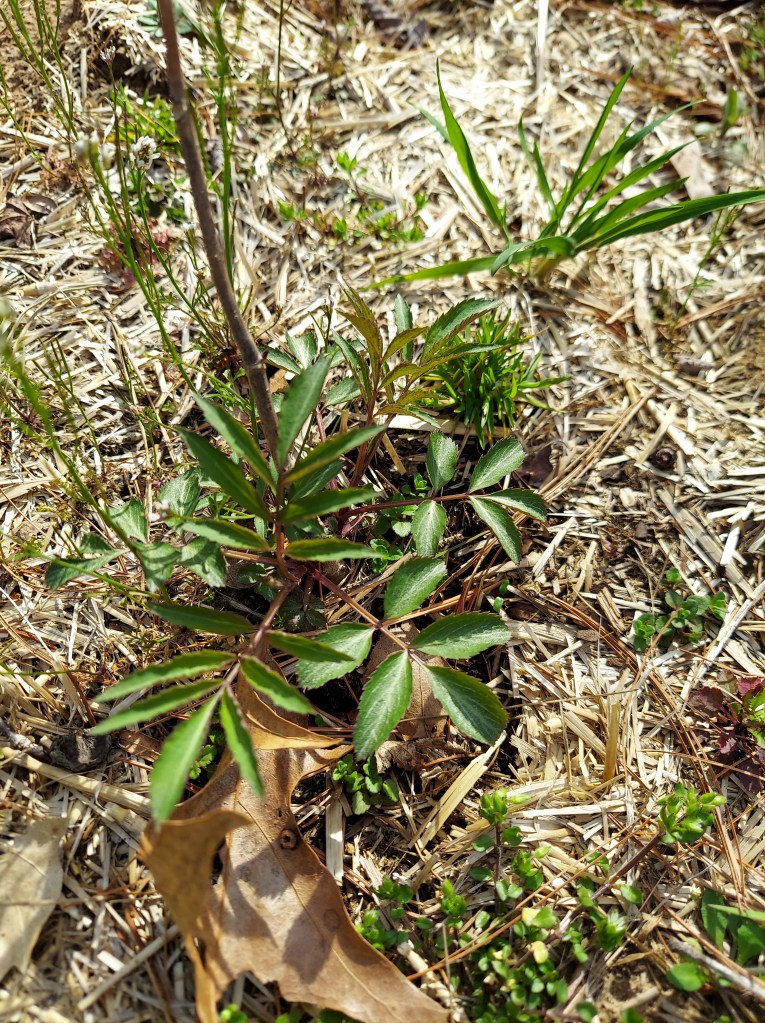
New growth visible on a couple of my rooted elderberry cuttings as well!
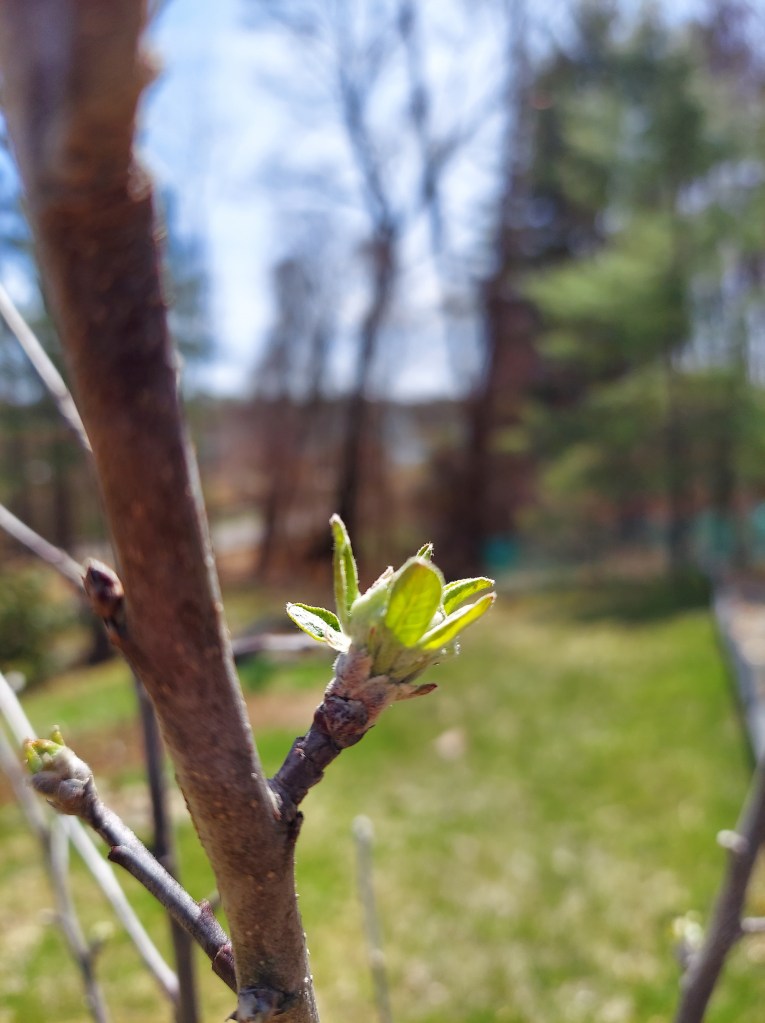
Two of the apple trees are breaking dormancy and putting out new leaves. The third one, which got damaged by caterpillars last year has a few buds swelling. It lost most of it’s leaves so I imagine it will be making slow progress this year, but at least it is showing signs of waking up. I was afraid it might die off, but that is happily not the case.
All three of the new pear trees are also just starting to wake up, I expect to see leaves soon.
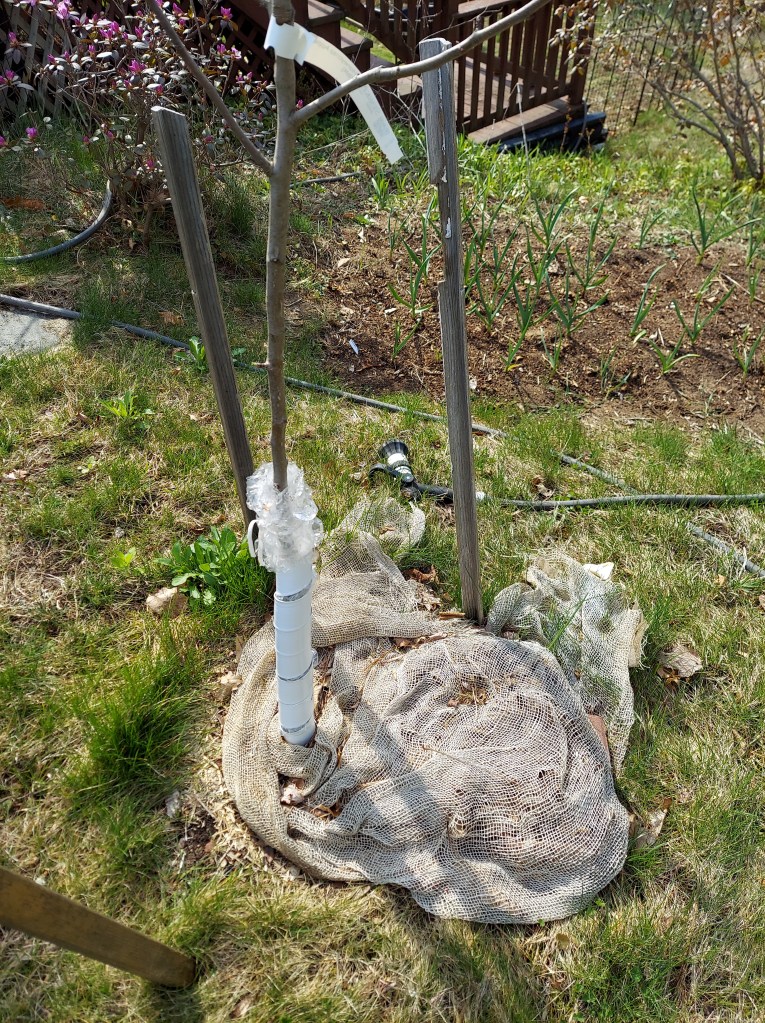
I started to tidy up the fruit trees by removing the bubble wrap, tree guards, and burlap/leaf mulch. I plan to give them all some fertilizer, compost, and new straw mulch soon.
I had my first small harvest from the garden this week! I harvested sorrel, a perennial in the greenhouse, and overwintered outdoor kale.
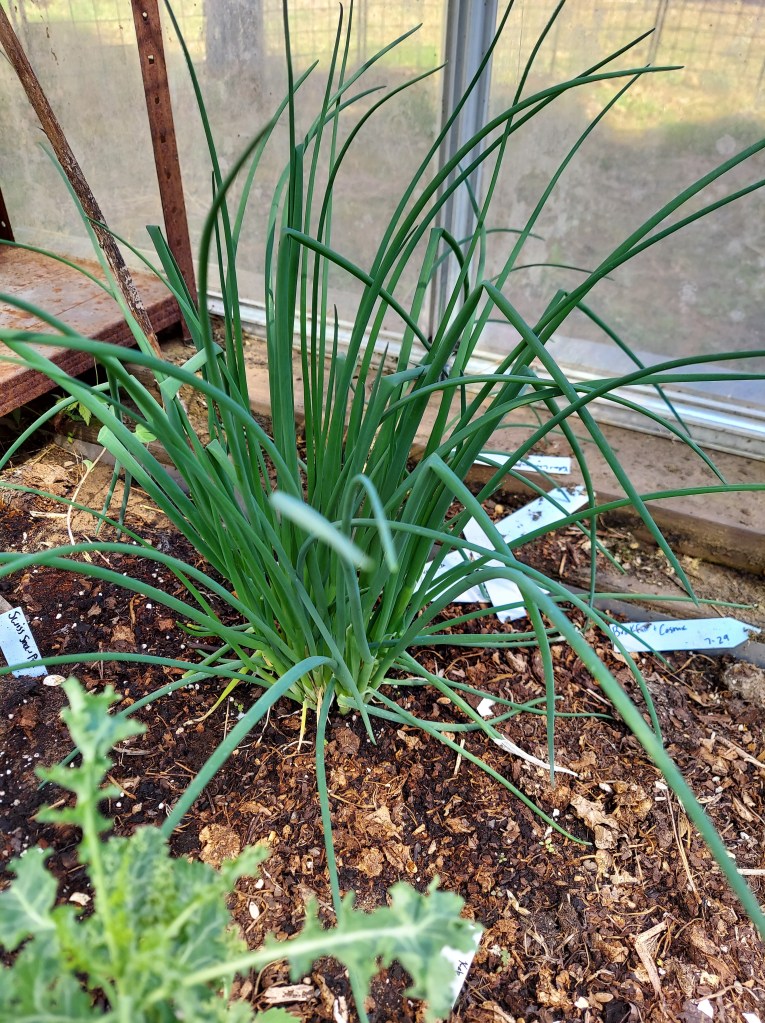
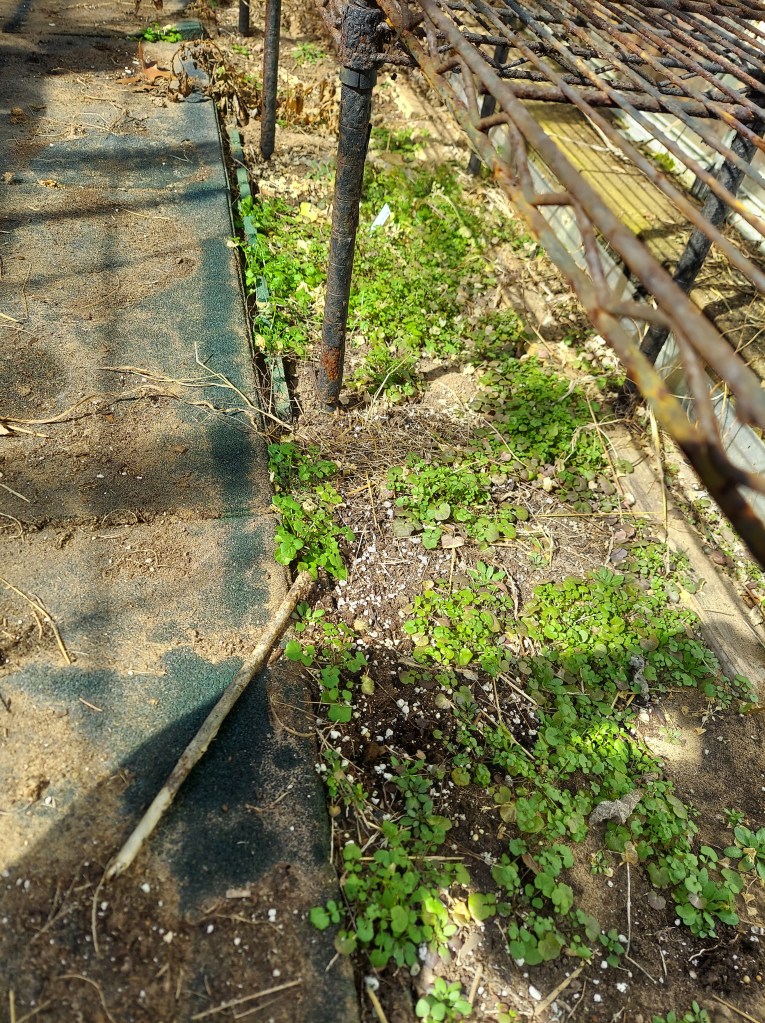
The chives in the greenhouse are looking good and I’ve spotted a few coneflower sprouts along with lots of self-sown chamomile all across the raised beds.
Chives in the greenhouse
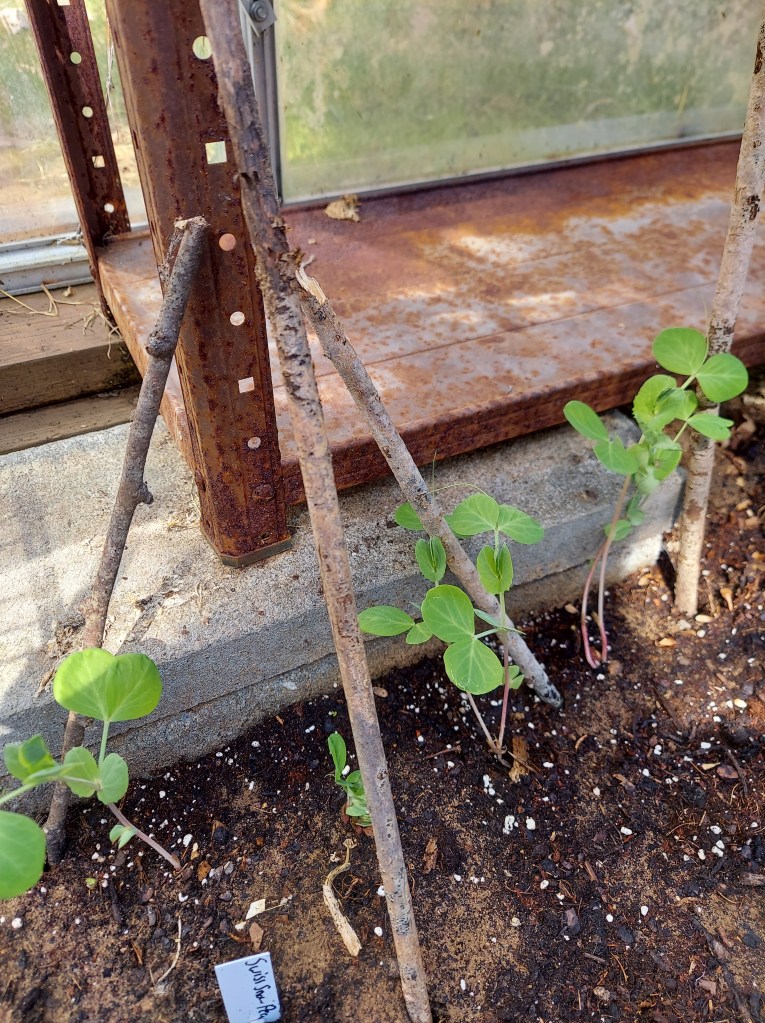
The leafy greens and radishes that I direct sowed a couple of weeks ago are now sprouting, as are the 2 types of peas. I planted out a few onion sets and have another batch nearly ready to go out in the ground.
Hoping the peas will climb the shelf in the corner of the greenhouse. I added a few sticks to encourage them to head in that direction.
I have started to harden off a few of my cold weather crops by placing them in the greenhouse. I will leave them out for incrementally more time each day for about a week to get them adjusted to normal growing conditions before transplanting near the end of April/early May. So far, I have a few kale, cabbage, chives, and broccoli seedlings.
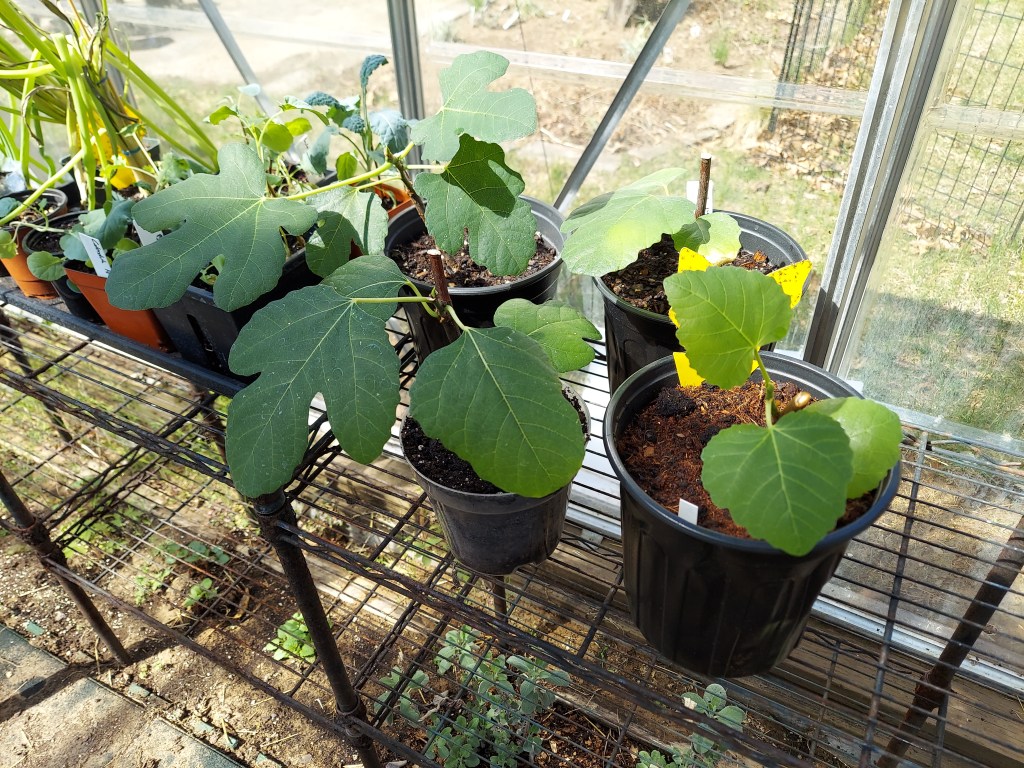
I am also hardening off a few of the larger fig cuttings so that they can get more sunlight and hopefully start growing more.
Azalea blossoms
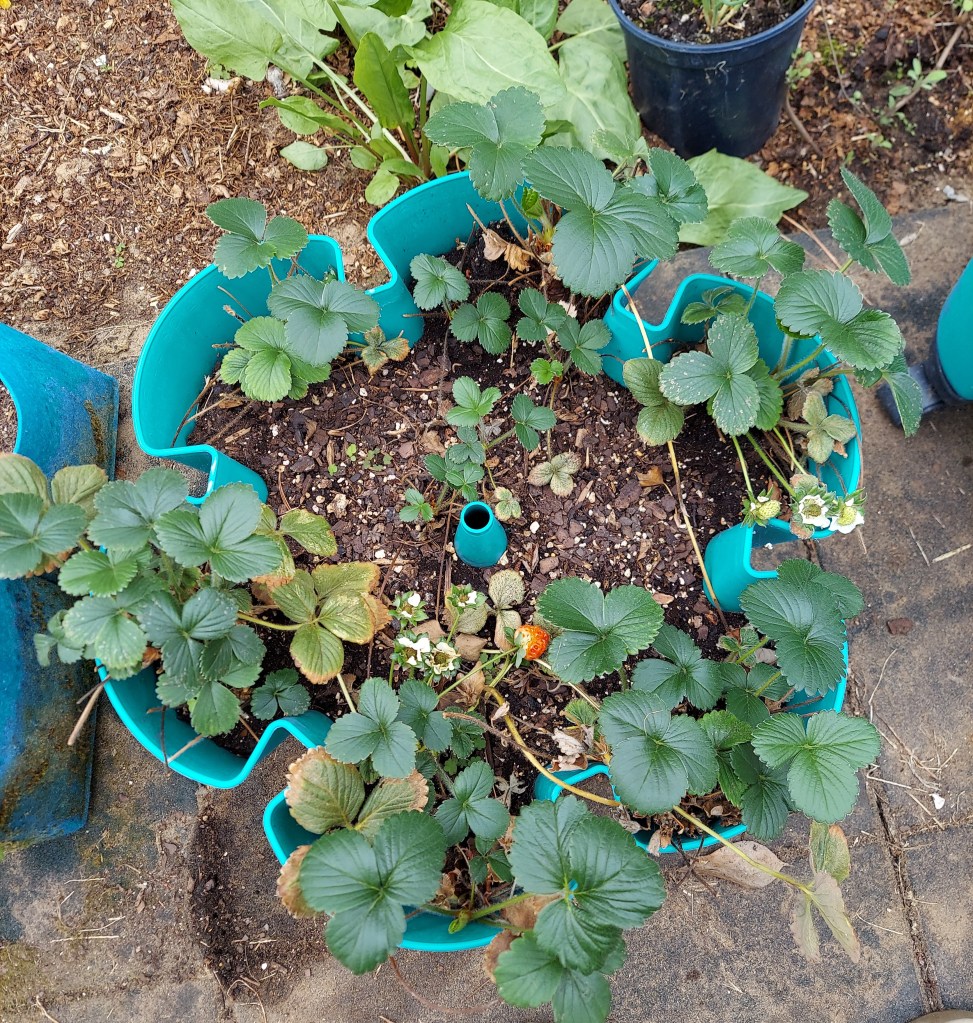
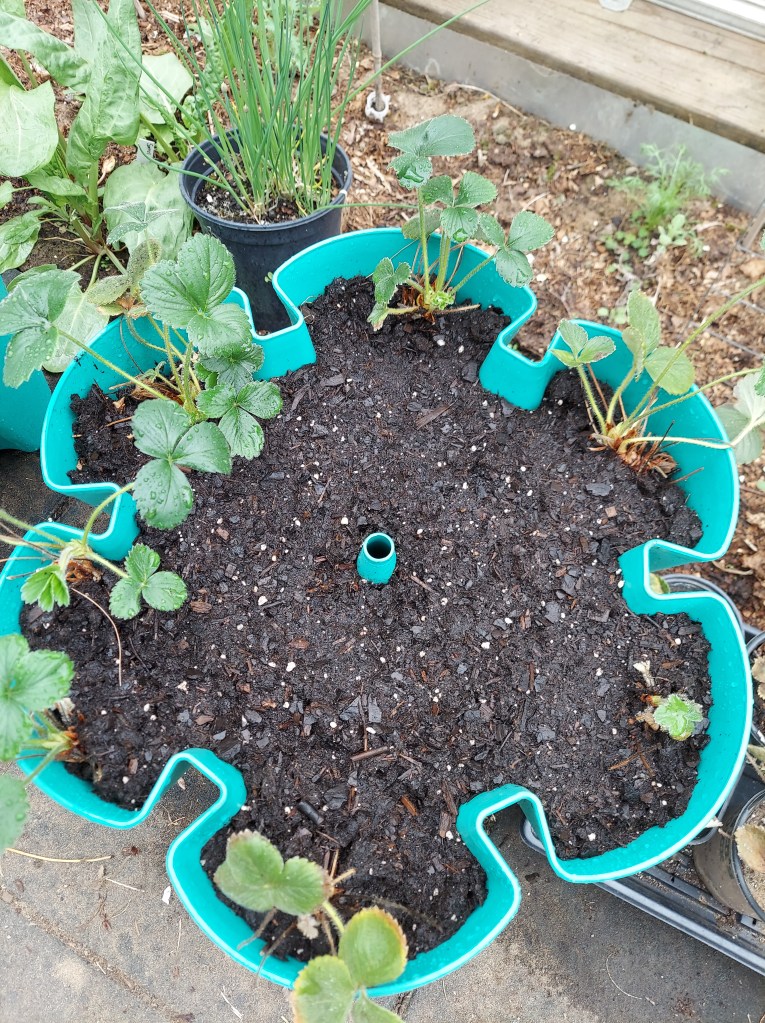
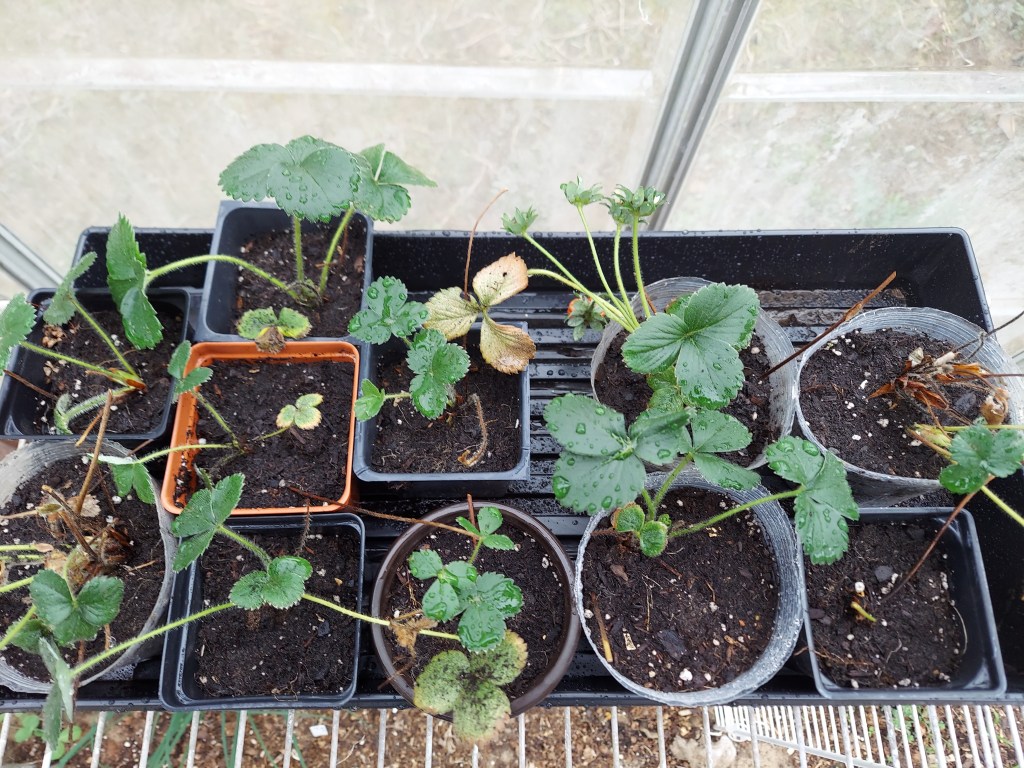
Last weekend I cleaned up the strawberry tower which had overwintered in the basement. A couple of plants died, but there were about a dozen small runners growing amongst the more mature plants. I carefully divided them out so that there was only one plant per pocket and I put most of the runners in their own pots so that they can grow on without competition.
Before and after shots of the strawberries. I added some homemade compost, granulated fertilizer, and fresh potting mix to level out the soil and hopefully provide enough nutrients for the season ahead.
These are an everbearing variety, so that means I should get a bunch of small harvests until frost, rather than one huge glut like June-bearing varieties. I was very happy with how the strawberries did last year, and am looking forward to growing more. I now have extra plants so I might make either another layer of the grow tower, or a couple of hanging baskets, depending on how many of them survive the dividing process.
I planted all my overwintered dahlia tubers in a variety of small pots and a couple of them are already sprouting. I don’t know how many will make it, but I had over 30 tubers, of 4 varieties. I will be planting some of them in my new raised bed which has hardware cloth on the bottom to keep out the voles.
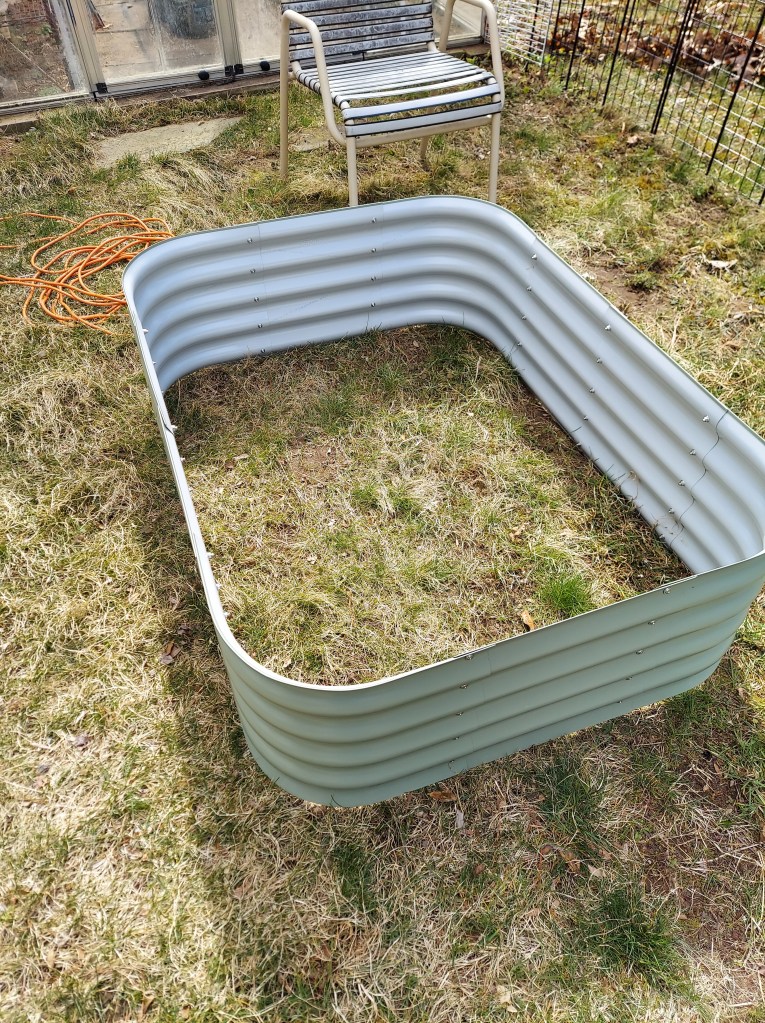
We assembled the new Birdie’s metal raised bed a couple of weeks ago and figured out where I wanted it. We then filled the bottom half with logs, branches, and leaves.
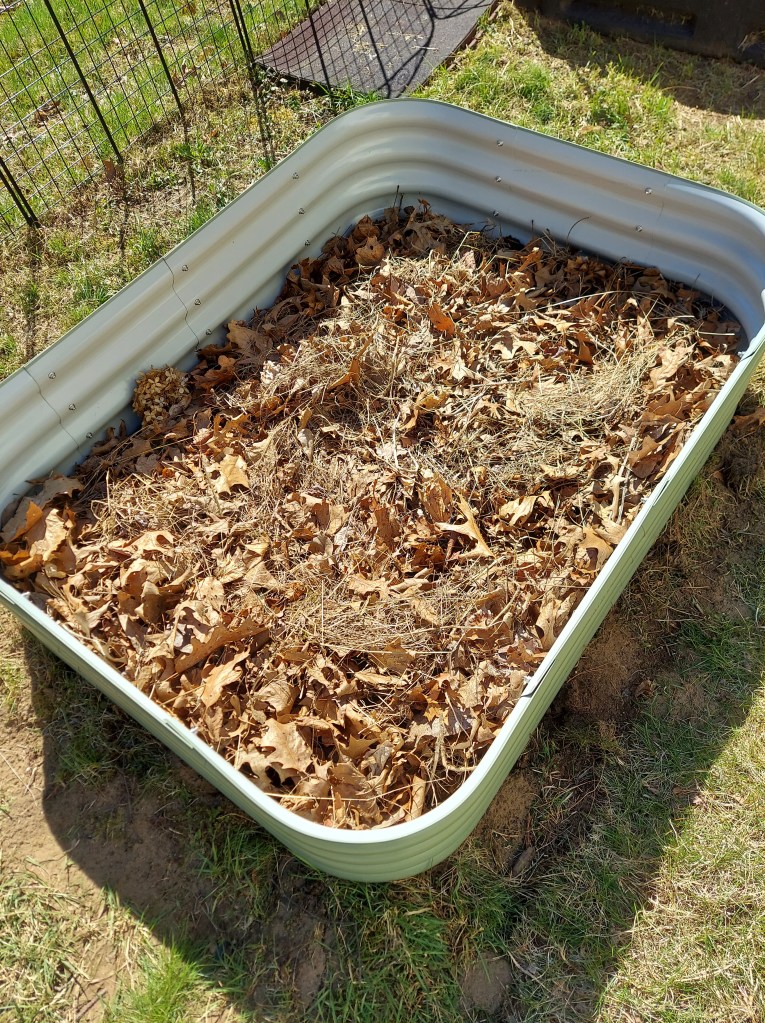
My dad then added a layer of topsoil and compost from out huge leaf/debris pile out back. The final 6-8 inches will be filled with purchased manure and raised bed soil. I expect the level to drop a good bit over the coming year as the leaves and sticks start to break down, but then next spring we will be able to top it up with more compost.
I’m so happy that spring has arrived and that new life is visible on so many plants. Green leaves and fresh shoots are so nice to see after a long, dull winter!
Garden clean-up, potting on seedlings, and sowing more seeds
March was a cold, windy month. I carefully tended to the seedlings that I had growing and I sowed my tomato seeds towards the end of the month. In the past two weeks I have been slowly potting up my largest pepper plants and several of the fig cuttings. I did a second round of garden cleanup at the end of March and spread some of my homemade compost in the greenhouse.
The sorrel and chives are putting on lots of fresh growth due to the warmth in the greenhouse. The sad looking kale on the right actually had several new leaves coming off the base of the stem. I trimmed the upper part off, but should get a few baby leaves for salads in a couple weeks. After I spread the compost, I direct sowed some lettuce, spinach, and pea seeds in the greenhouse.
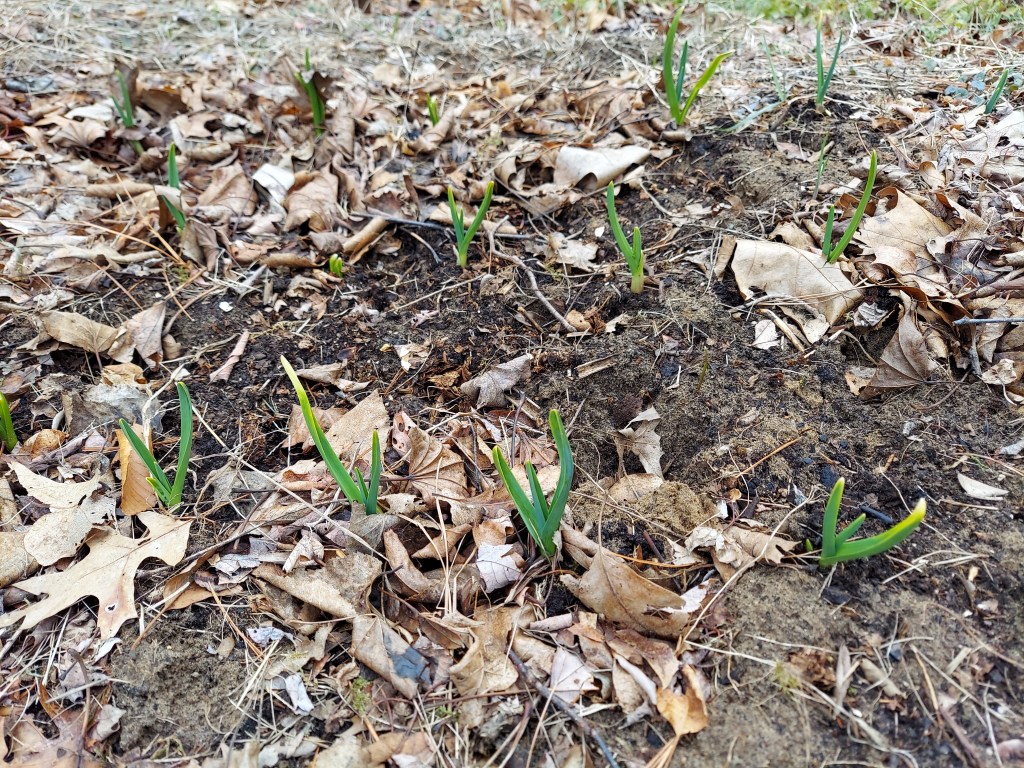
My garlic is looking pretty good for this time of year. The fresh shoots are pushing through the leaf mulch, and I will need to fertilize them soon so they can put on lots of bulb growth over the next few months.
I checked the fruit trees, and the Cortland apple is starting to bud up, so that is exciting. Our huge magnolia tree has a bunch of flower buds that are almost opening up. The crab-apple bush is covered in buds. The two clearance rose bushes that I got in the fall survived the winter, so that is exciting. I kept them covered by plastic domes all winter to give them a little extra snow protection and warmth on the sunny days.
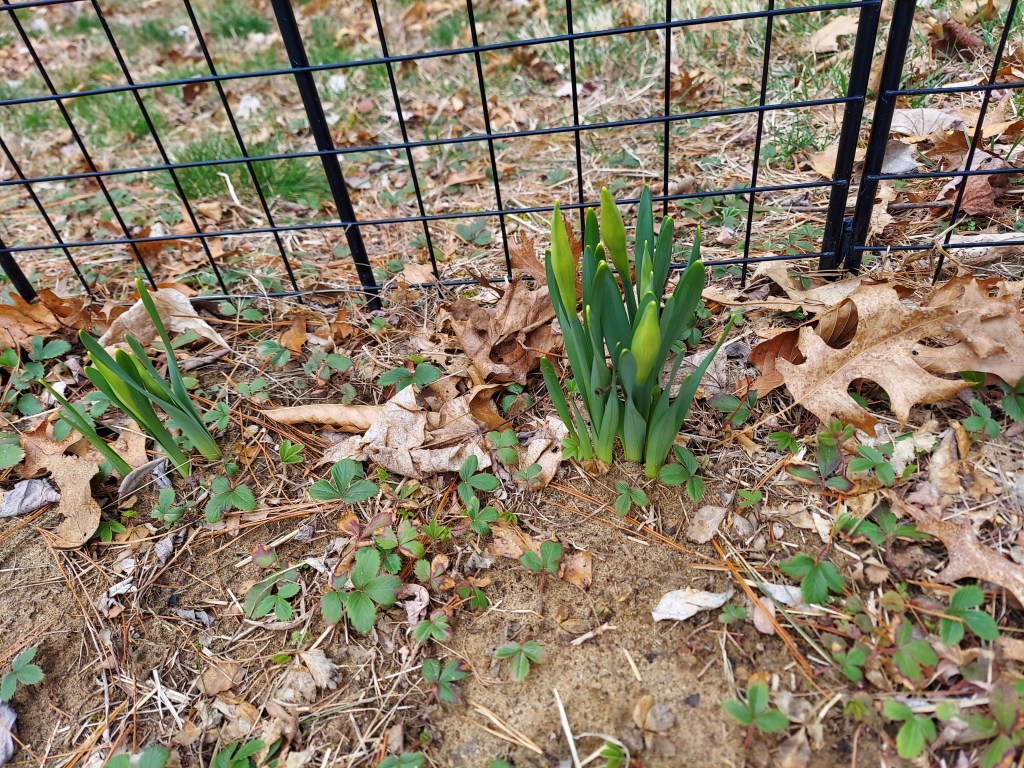
I planted several small poppy plants in the fall, a couple in raised beds and a couple straight in the ground. This plant is in front of some daffodils at the end of the garlic bed next to a tree stump. I’m hoping the overlap of the daffodils and poppies will provide flowers for multiple months.
The daffodils at the back edge of the garden are filling in nicely, I expect to see flowers soon!
I have a few tulips along the side of the driveway, and I noticed some of the leaves had been munched on about a week ago. I expect it was a rabbit. I put mesh covers over them all and they have recovered and are growing new leaves. I don’t like the aesthetic of the covers, but since these are the only tulips I have and they are outside the fence, I will do what I can to protect them so I might actually get flowers.
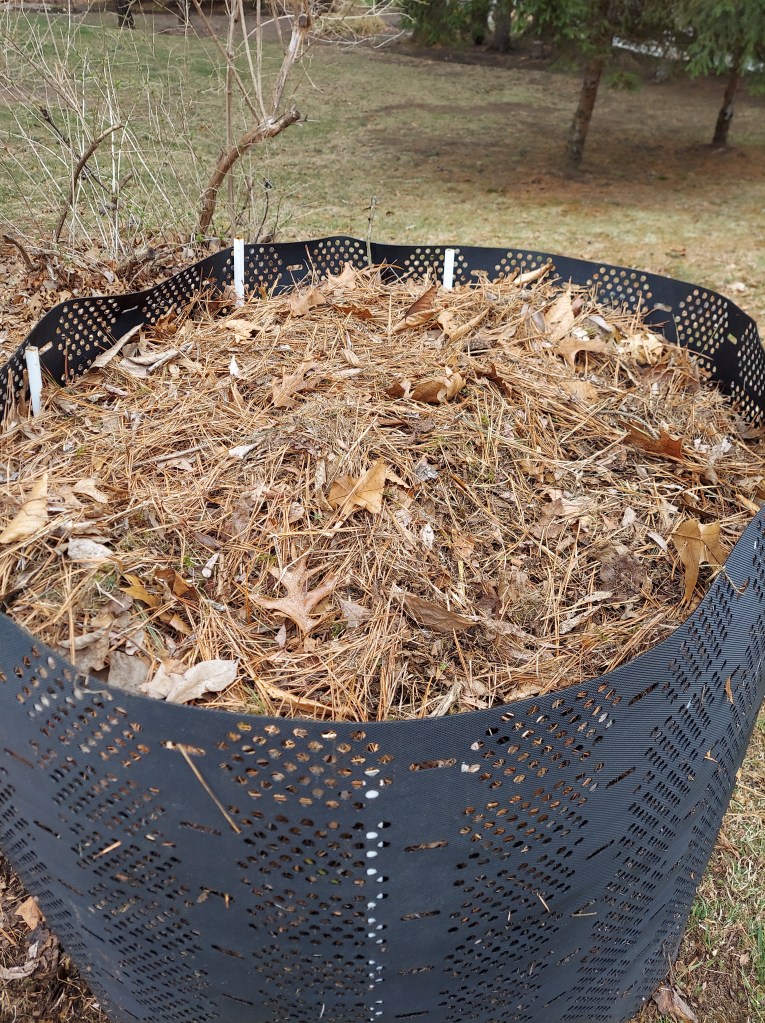
Yesterday my dad and I flipped the current compost pile from one bin to another one. Now it will all sit and decompose over the next year. I should have nice compost to spread next spring. Slow composting is pretty hands free. We just throw all the grass, leaves, and garden clippings into a pile and leave it and we only turn it once a year. The top layer is the leaves and needles we raked up to set up the new bin. My sandy native soil needs all the nutrition and water retention that it can get from adding compost.
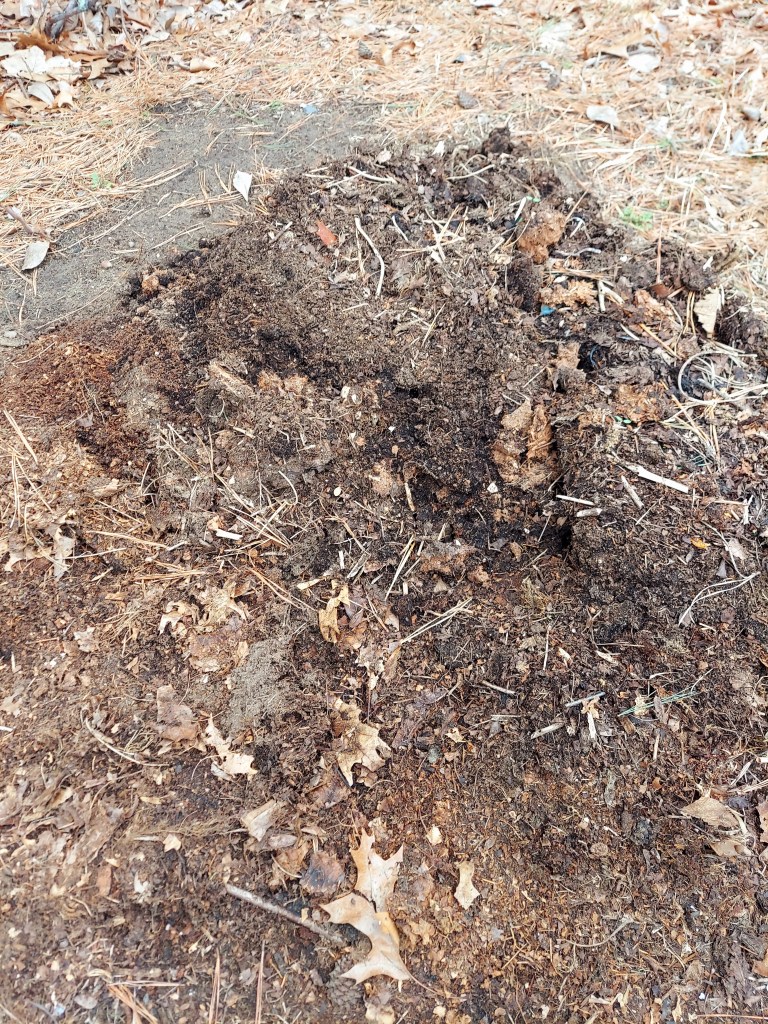
It might not look like much, but this is last year’s compost pile. Mostly broken down and certainly ready to be utilized in the garden. After I went back inside, I saw a couple robins scratching around in the bare ground/dirt that was left from flipping the pile. Hope they found some bugs.
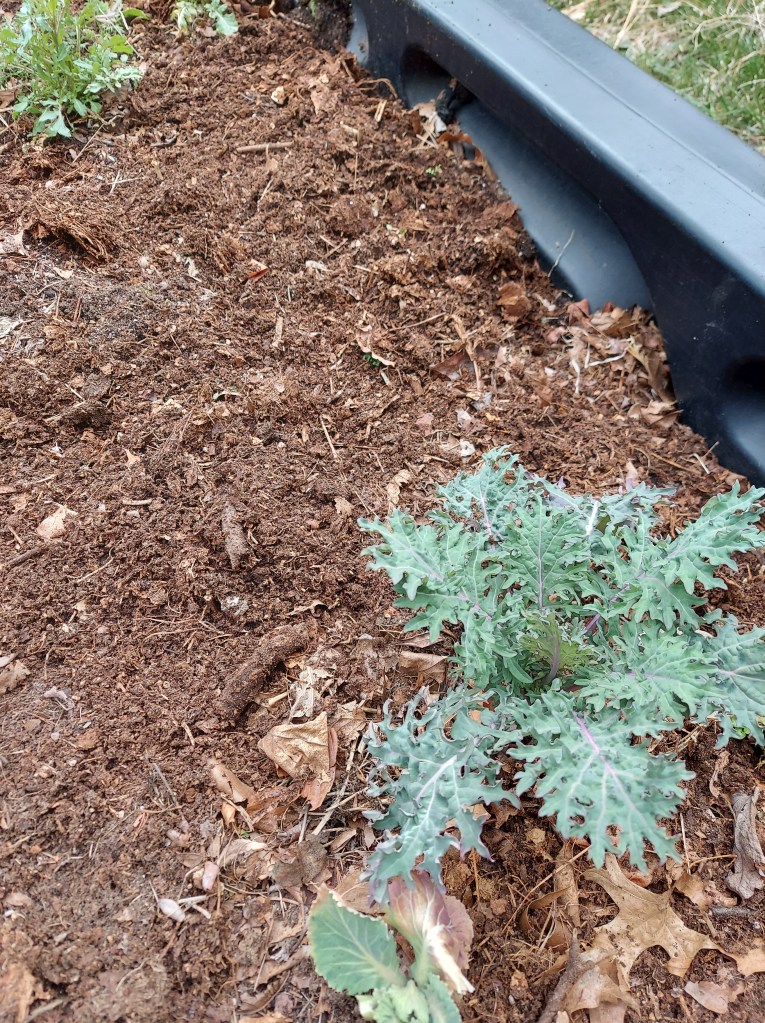
I also spread a nice layer of last year’s compost on two of my raised beds yesterday. It’s mostly nice and crumbly, any really large twigs or stems I just tossed on the current pile. I weeded the two beds and removed most of last fall’s leaves which I had been using as a mulch. Took a few buckets worth of material and dumped it on the compost pile.
This is an overwintered kale which has grown several new leaves this spring already. I should be able to get a few small harvests off of it before it bolts and goes to seed in late May. Kale is a biennial plant, so it naturally will produce seeds in its second year. I may leave it to flower for the pollinators.
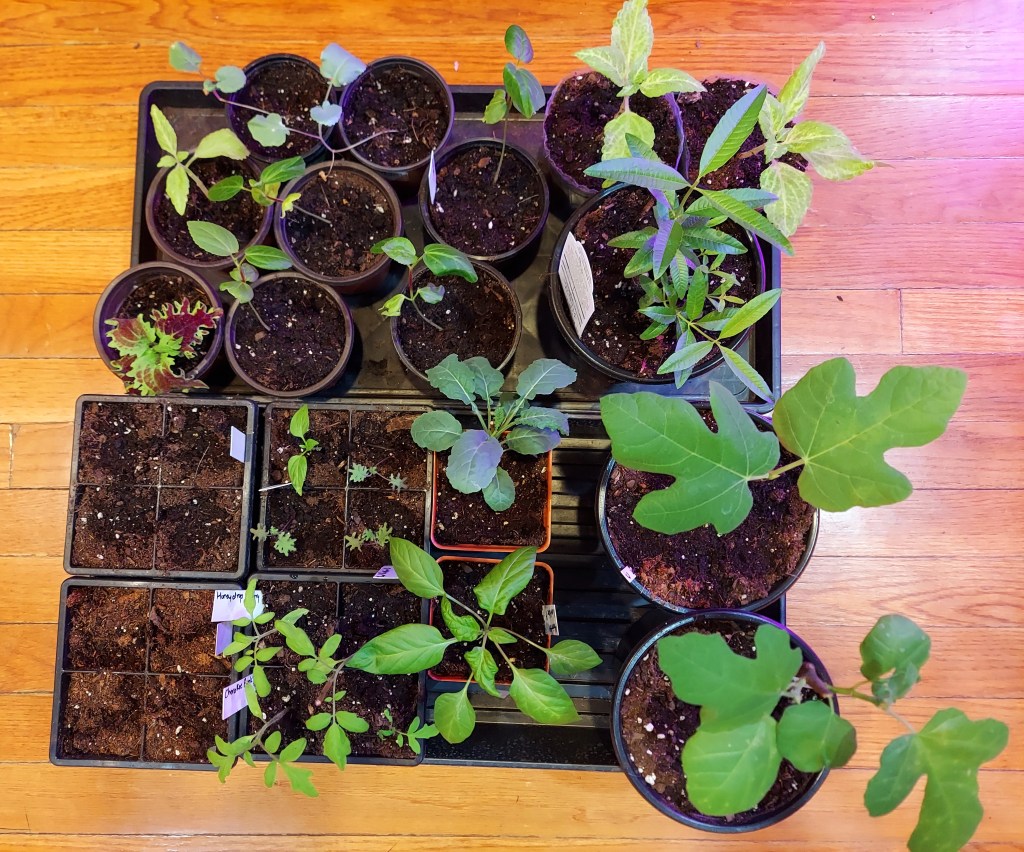
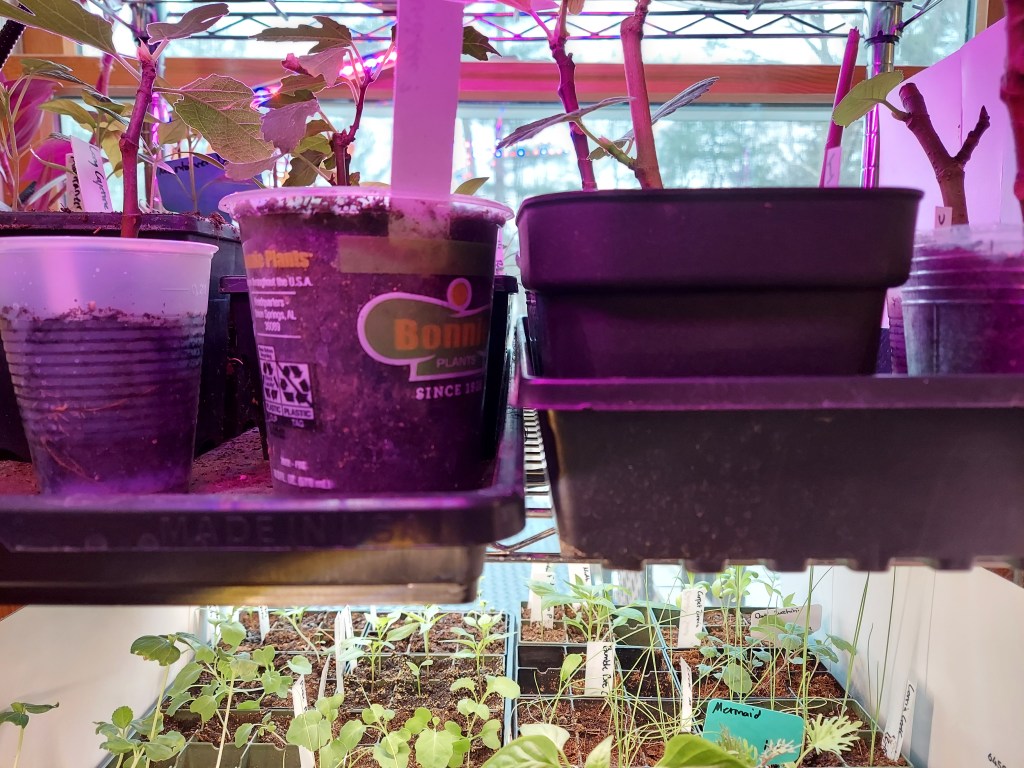
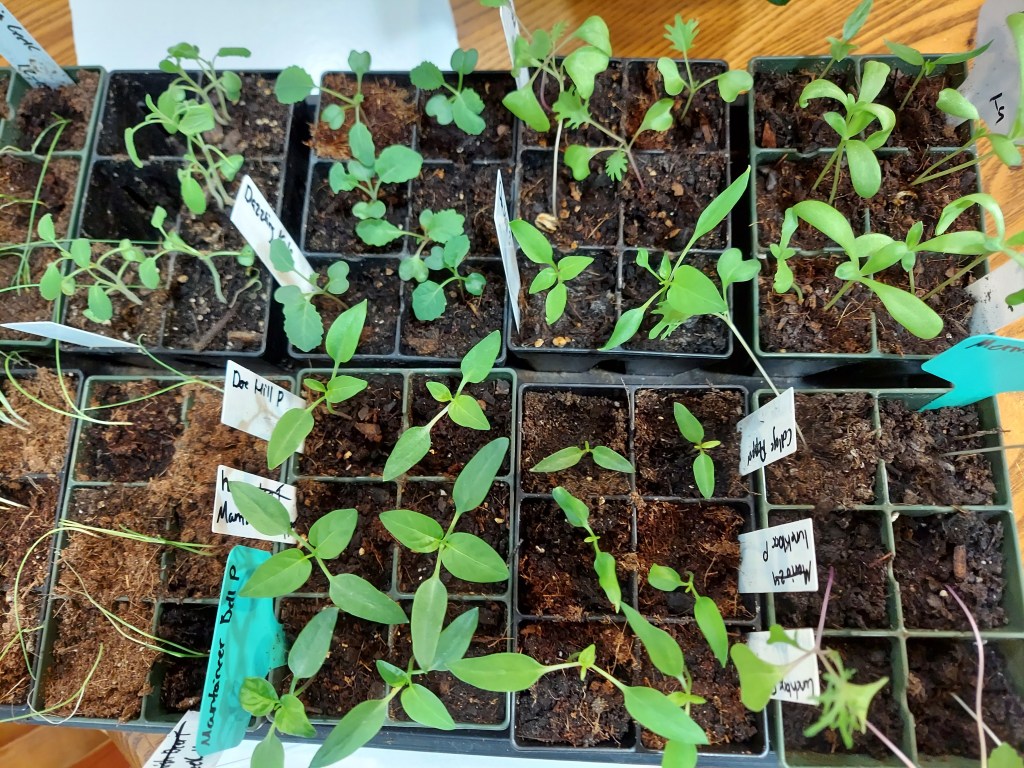
Indoors I’ve been keeping busy the last few weeks. All stages of indoor seed starting are ongoing, from freshly sown pea seeds to potting up one, two, and three-month-old seedlings. These two trays have kale, peppers, broccoli, coleus, figs, and hibiscus, as well as a recently purchased lemon verbena plant. Now the game of Tetris is in full swing as I try to fit as many plants as possible either under the grow lights or by the sliding back door so they can get the natural light.
So much potential for the garden: flower, tomato, pepper, leek, and basil seedlings.
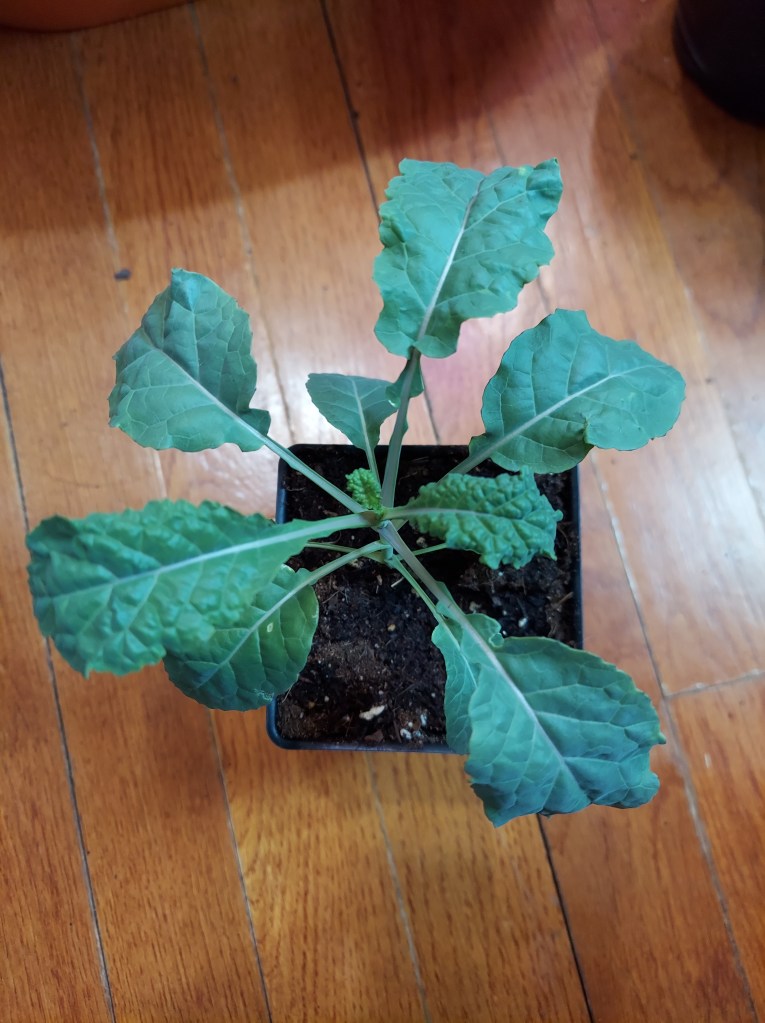
I am really proud of how nice my kale seedlings look at this stage. They are big enough to go outside but I’m going to wait a couple more weeks, since my neighborhood got a dusting of snow this morning.
I am trying onion sets for the first time this year. I purchased both red and white last week and have planted a few inside to give them a head start before transplanting outside. I grew a few onions last year from seedlings, but they didn’t develop into large bulbs. I’m not sure if that was my error or the type of seedlings. Going to see if sets perform any better.
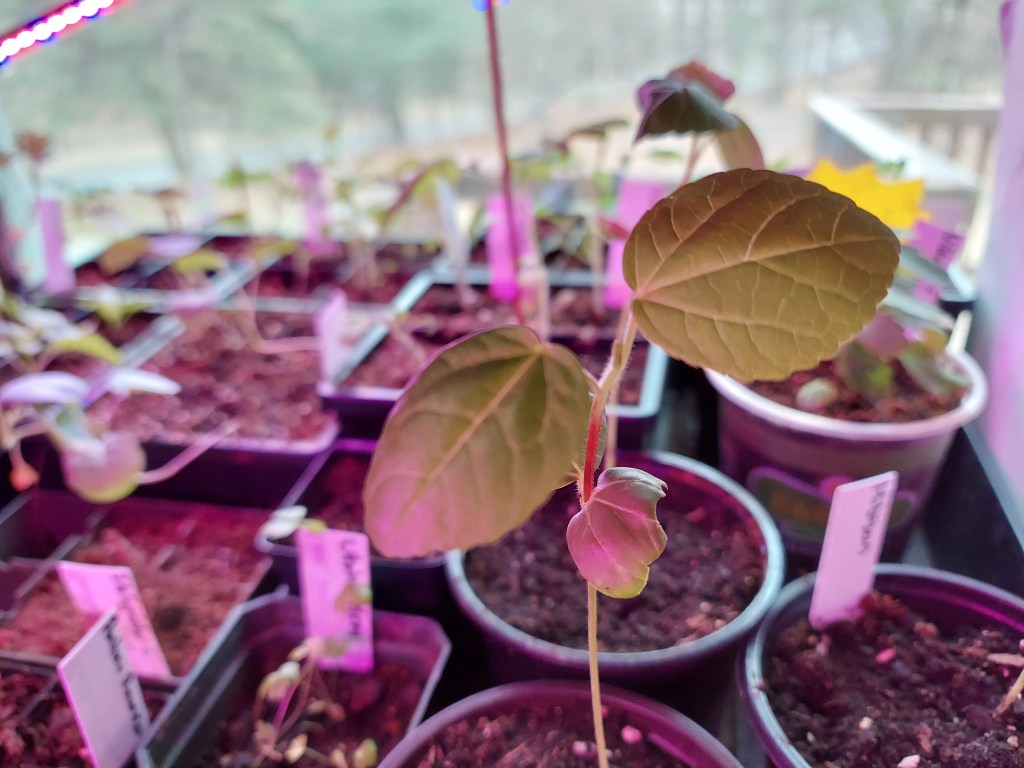
I’m also attempting to grow hibiscus from seed. I had 5 of 6 seeds sprout, and they are all growing their second set of true leaves now. Don’t know how big they will get this year, but it’s fun to try new things. I will keep them inside for a while before putting them out in the greenhouse. I do enjoy hibiscus tea which uses the flower calyxes for the sour flavor and pink color. With my short growing season, I had to get a big head start on the season, since they like tropical weather. I will put them in pots so that I can bring them inside in the fall because they are not frost tolerant.
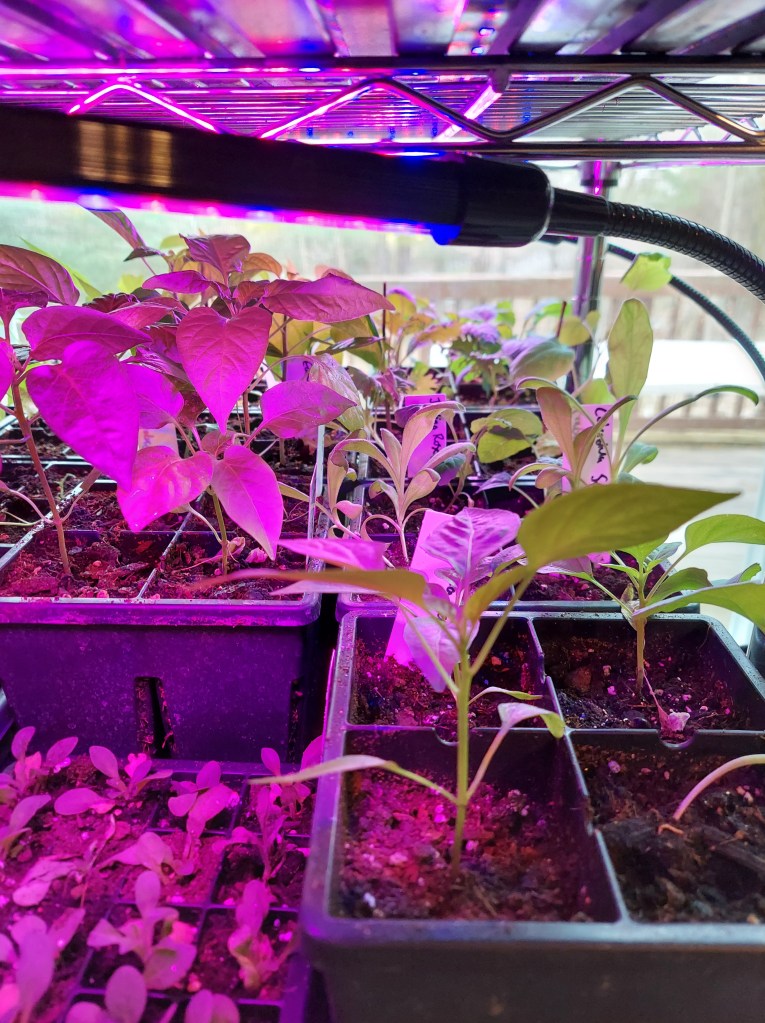
Lots of pepper seedlings are now in 3- or 4-inch Epic seed cells. I should get a good variety of colors and sizes to harvest over the summer months. This shelf also has calendula, cabbage, and sage seedlings.
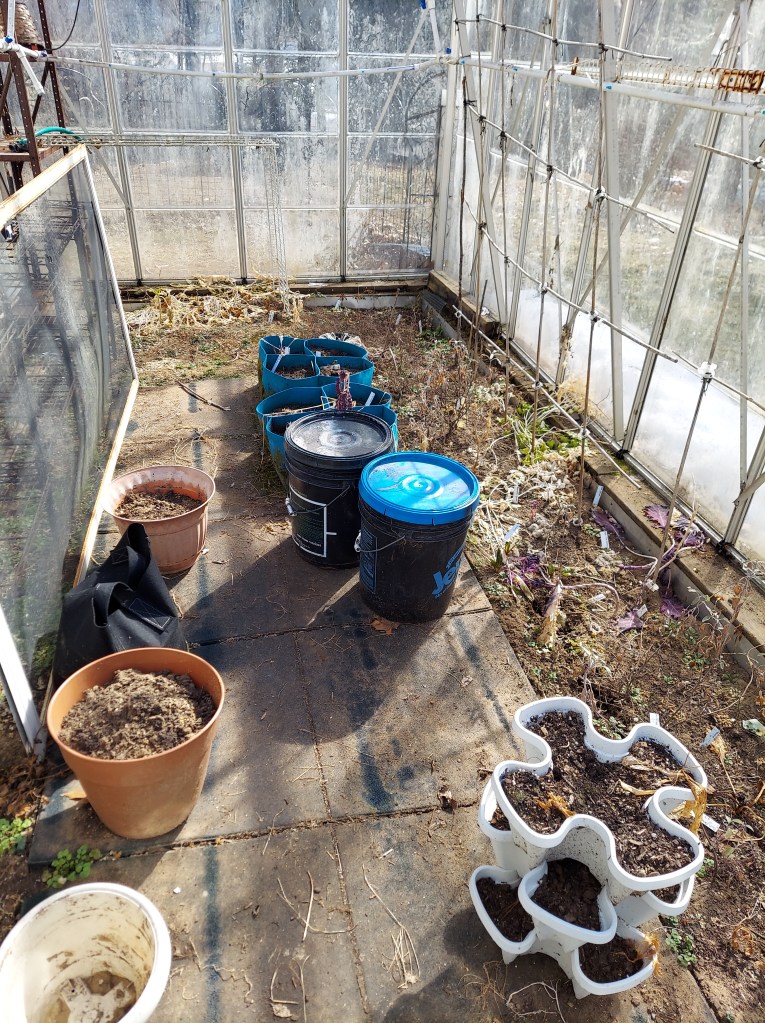
On March 10, we had a very nice spring day so I took advantage to tidy up out in the garden and greenhouse. I removed dead plants, trimmed back the herbs, pruned the fruit trees slightly, and weeded in the greenhouse. I filled several buckets with material for the compost pile. I enjoyed being able to spend time outside without wearing a jacket since the greenhouse was about 80 degrees.
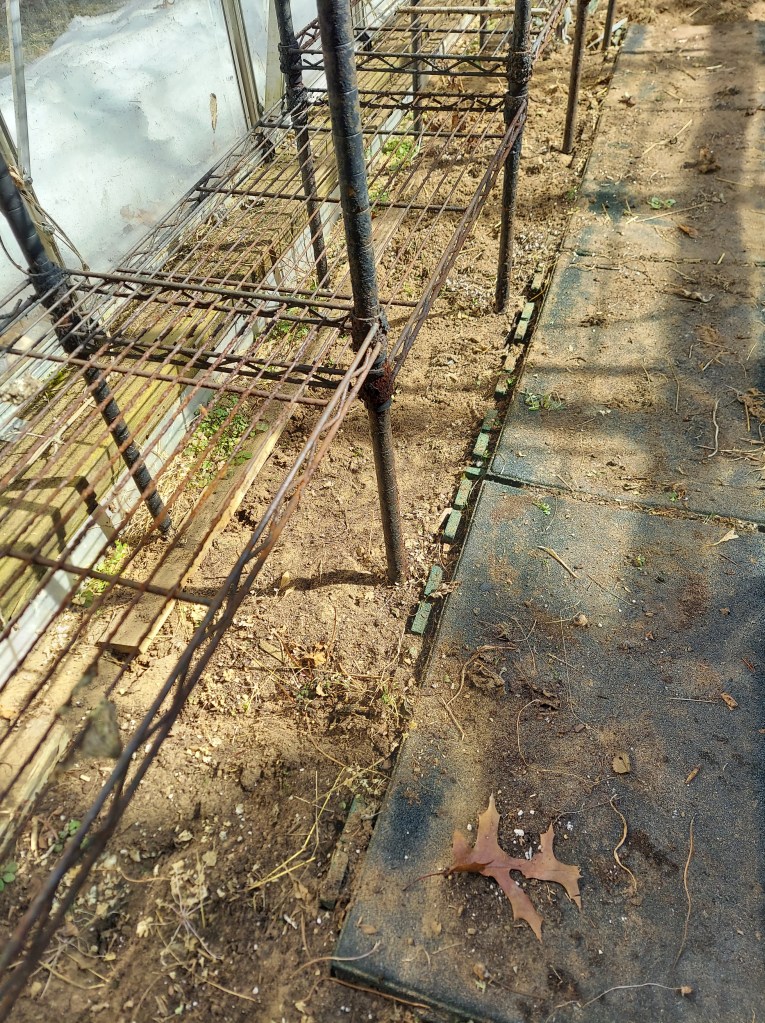
The greenhouse growing spaces needed a good clean up, lots of dead plants and weed. The actual walls and roof will probably need to be power washed this spring to clear off some algae and allow better sun exposure.
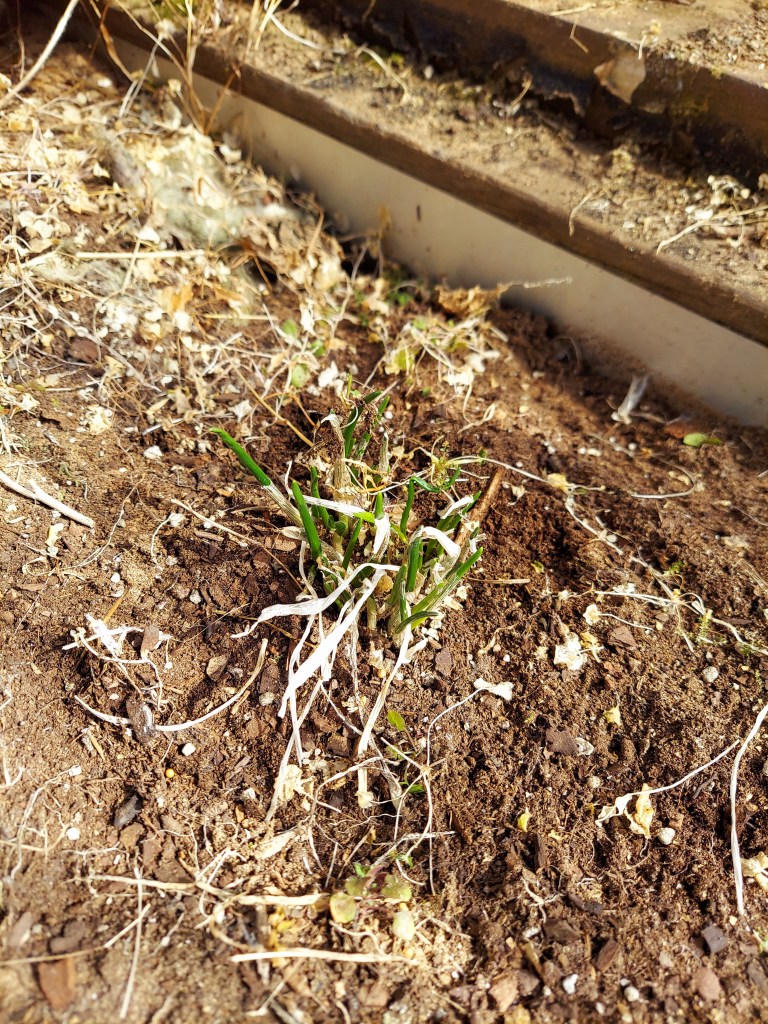
After I had cleared out the right hand side, I left a couple of kale plants along with the sage and parsley. The thyme plant was massively overgrown down near the end, so it got a significant trim. Chives are starting to regrow in the pot.
Fresh growth on the in-ground chives too.
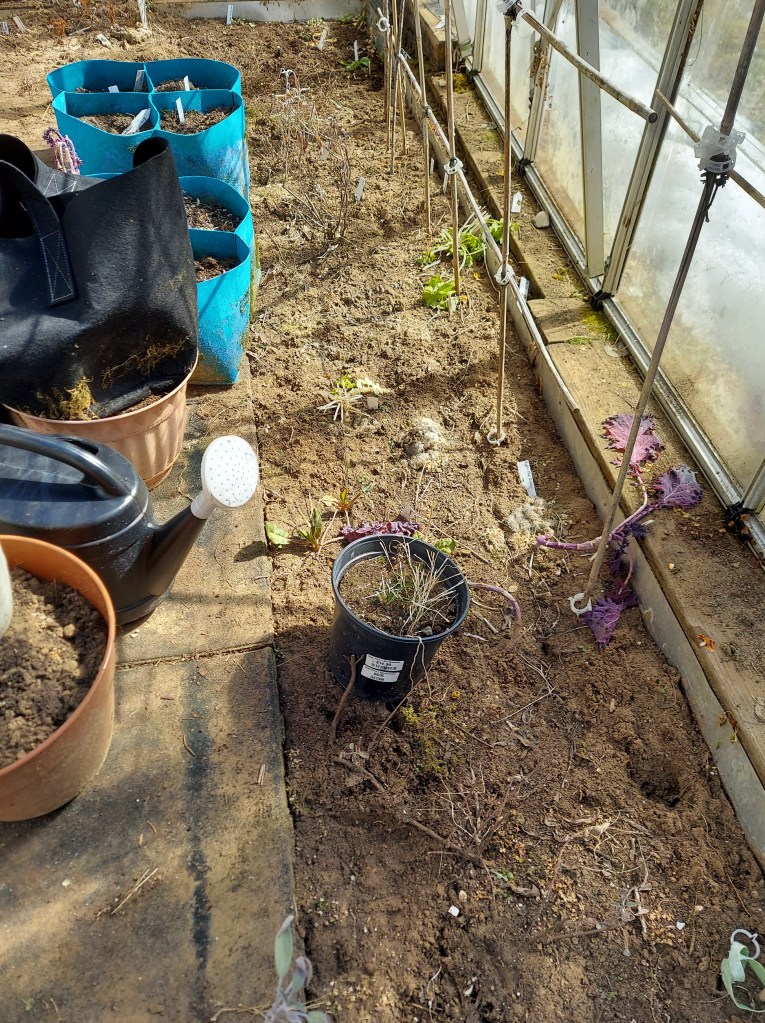
The lefthand side of the greenhouse floor, which is under shelves, was full of weeds. Took a while to clear it out, I also had to trim back a messy oregano plant that had gone to seed last fall.
Much better! Will probably need another round of weeding before I plant anything, but at least this cut down on the weeds significantly.
I also checked on the garden and spotted a few garlic shoots coming through the mulch, two of the poppies I planted in the fall have fresh leaves, and a couple of the herb plants have tiny new shoots. I think the rose bushes survived. I removed some dead plants from the raised beds and pruned the lavender, sage, coreopsis, and lemon balm. I spotted some chamomile seedlings too. The apple and pear trees are looking good, still partially wrapped in bubble wrap and burlap. I pruned the tips off of the tallest two, to encourage them to put out more branches and fill in better. Spring is on the way.
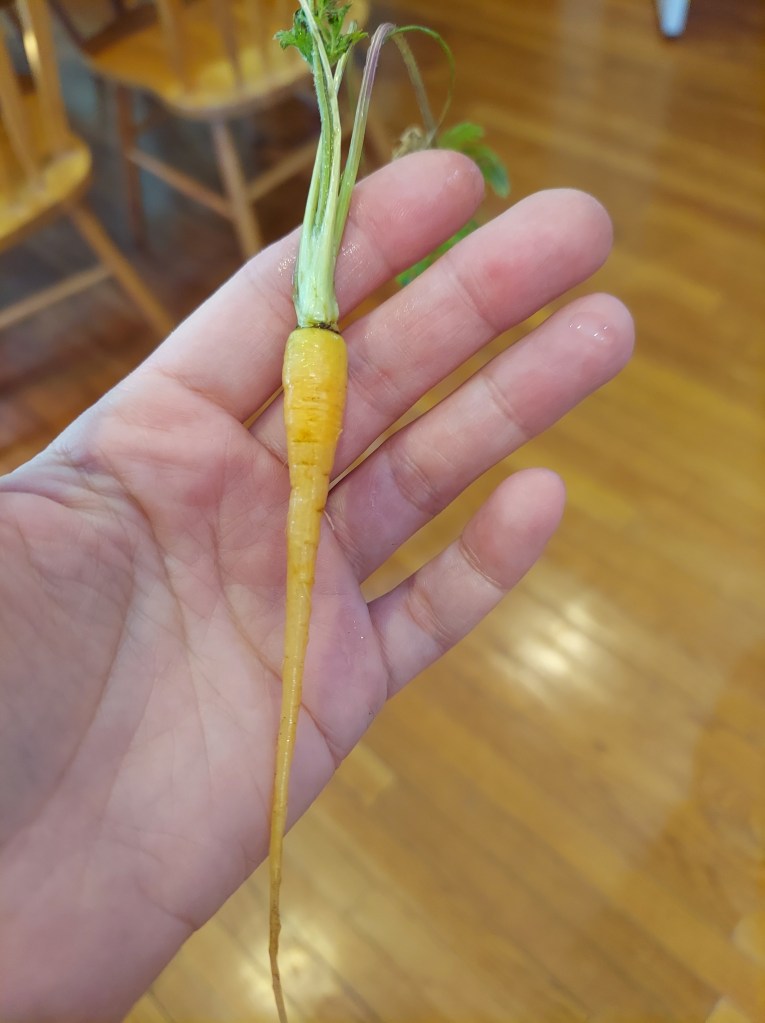
I found a baby carrot among all the weeds in the greenhouse!
This year I will attempt to better record and outline the steps I take when I garden. Here is my process for starting seeds indoors in late winter. This is the process I followed when I started peppers, leeks, and kale in late January. Now that it is approaching spring, I wanted to share it with those who may be new to seed starting.
Seeds: I typically purchase from Botanical Interest, Hudson Valley Seed Co, Fruition Seeds, and a couple of Etsy shops. It’s great to have a local seed company if you can find one near you, that way you know the plants will grow in your climate. I’ve also been saving some of my own seeds (mostly flowers) over the seasons, so I will be starting some of them as well.
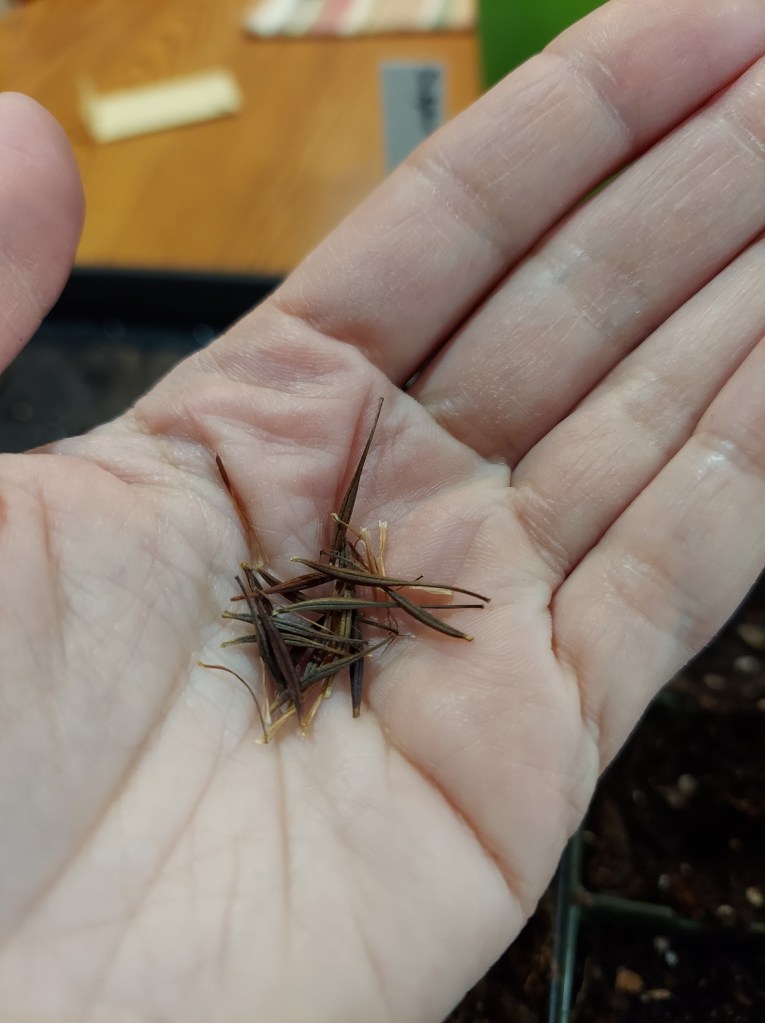
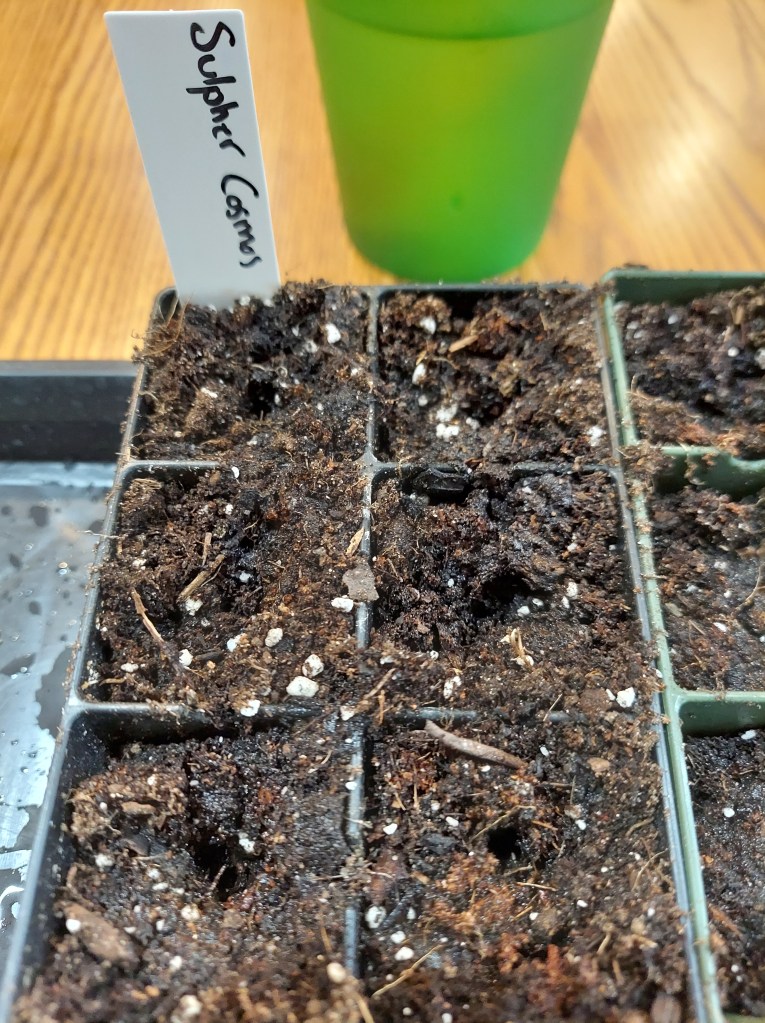
Home saved yellow and orange sulphur cosmos seeds
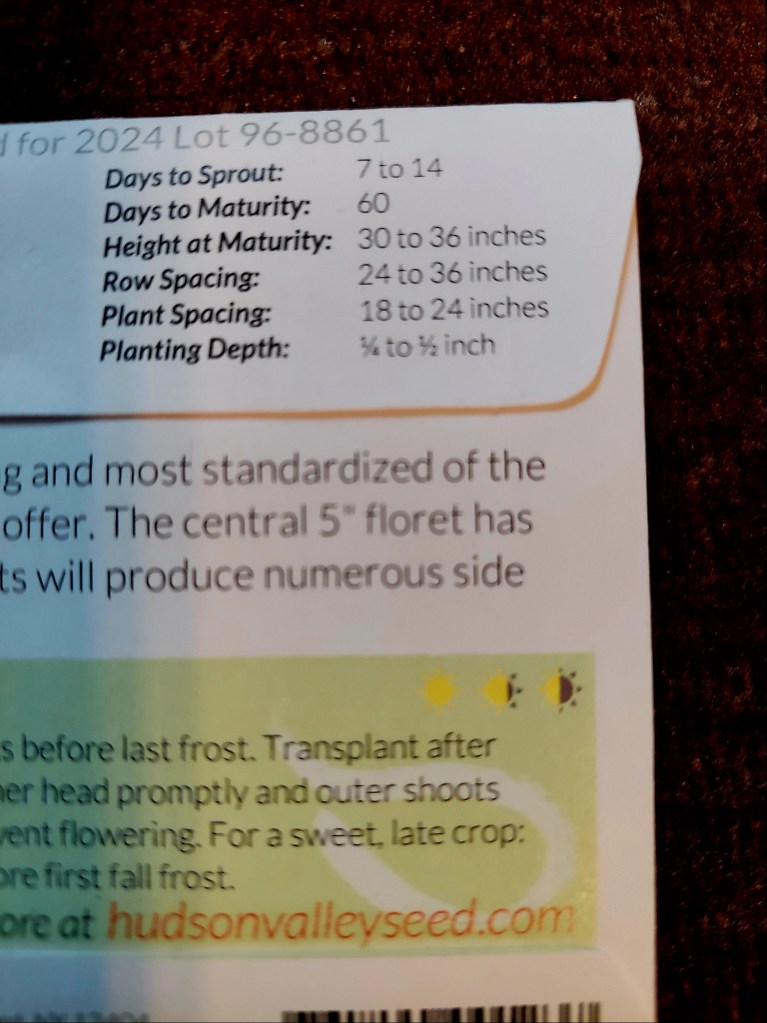
Make sure to read all the details on the seed packet before planting, such as when to sow and the proper depth to plant the seeds. There are certain seeds that need special attention, such as cold stratification (typically fall sown in my region), soaking overnight, surface sown if they need light, or scarification (scraped or cut to aid the seed in breaking the hard seed coat). I’ve grown canna lilies from home saved seeds and the seed coat was so hard they needed to be cut open with a saw before planting. When dropped on the ground they bounced. Please be aware that some plants are harder to grow from seeds than others.
Sample seed packet with planting instructions
Direct sow versus transplant: There are many seeds that can be directly sown into the garden, which don’t require any extra treatment. I personally sow almost all of my seeds indoors, since this allows me better control over the environment, and allows for a jump start on the season. The main seeds I do direct sow are root crops such as carrots, radish, and a few quick growing leafy greens like arugula and spinach. Warm loving, long season crops like peppers, tomatoes, and eggplant need to be started indoors in my climate because they would not be able to reach full size if direct sown in May.
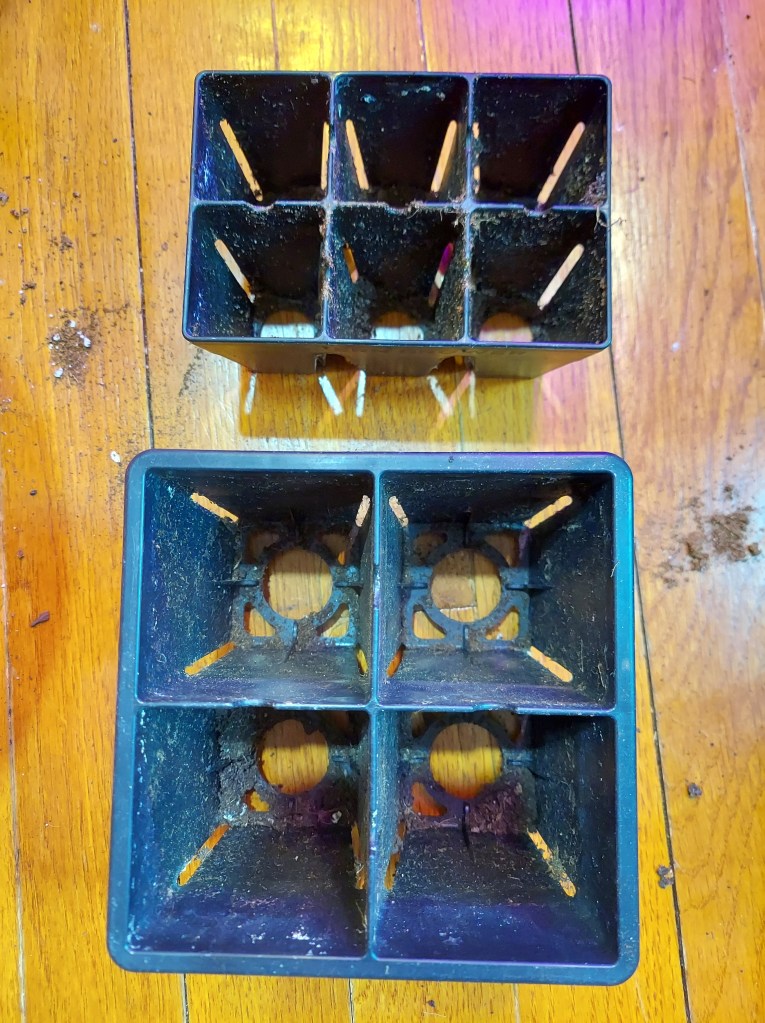
Containers: I use a combination of methods for starting seeds. The most readily available in stores tend to be 6 cell plug trays or peat/compost pots. I use 6 cell seed trays for multisowing things like flowers or herbs. Large seeds like squash or beans get started in 4 cell (3 or 4 inch tall) seed trays.
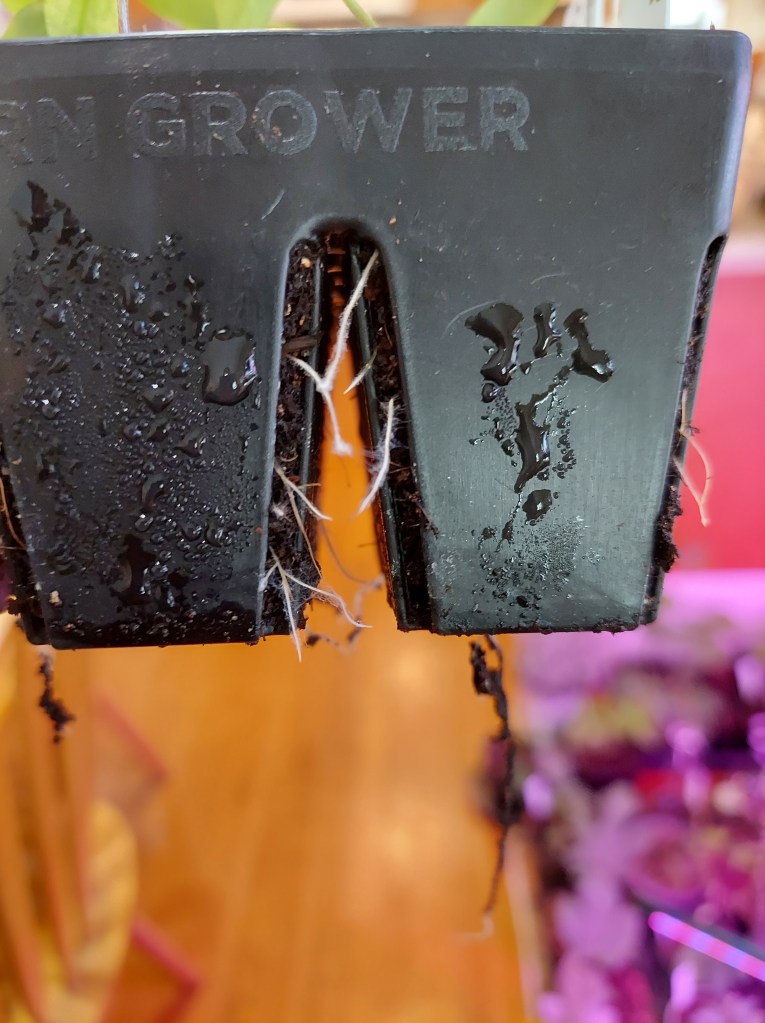
I purchased my trays from Epic Gardening, they are plastic, but really durable and will last a lifetime. They have drainage slits down the sides and large holes in the bottom to make it easy to pop seedlings out for planting. You can also easily monitor the root growth.
Healthy pepper roots, growing out of the side slits. These are ready to be transplanted to larger pots.
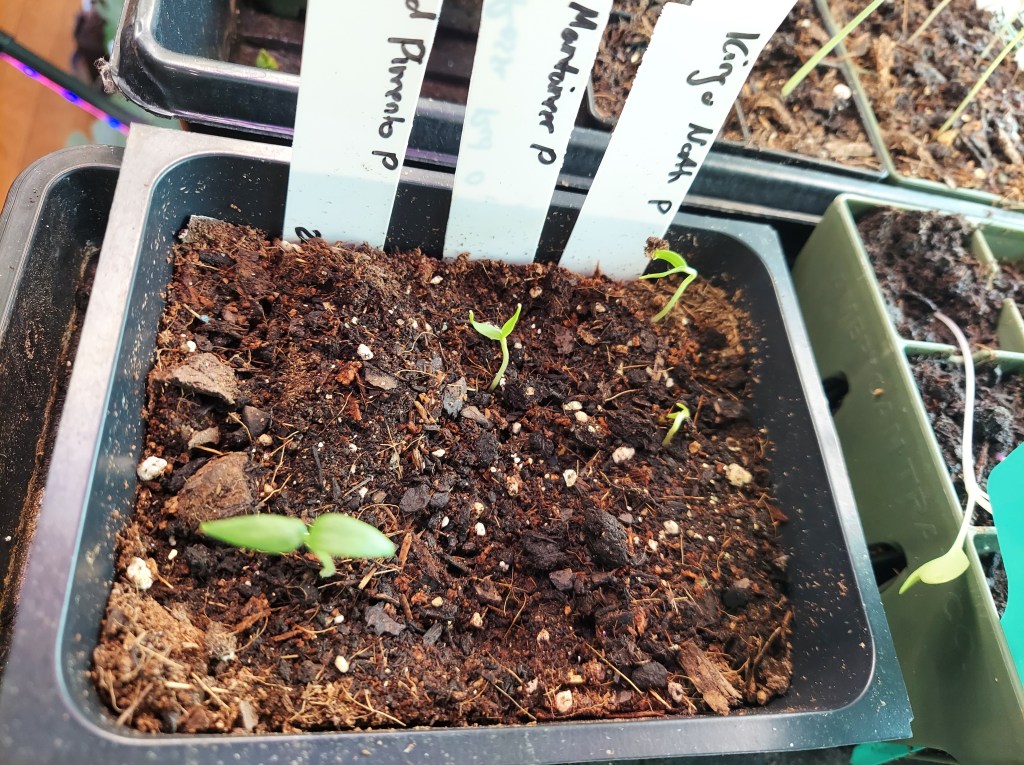
For tiny seeds or things I want a lot of I will typically sow them densely in either a 3 inch pot or rows in a short square pot then prick them out once they have sprouted. This is what I did with my peppers. I sowed 3 or 4 seed types per container, then divided them once the first set of leaves had pushed free of the seed coat. For peppers I do this so that I can fit more seeds together on the heat mat and under the humidity dome for maximum use of space. I also did this for my kale and onion seeds, which did not require heat.
Three types of peppers sown in one shallow tray; they were pricked out to individual cells about a week after sprouting.
Note: I’ve seen folks who recommend egg carton, peat pots, or jiffy pods for seed starting. I have used all three methods and found them unsuccessful. Egg cartons are too shallow and dry out too easily, peat pots are ok, and I have used them in the past for squash seeds. They tend to stay wet and I have had some mold and fall apart on me. The jiffy pods say that the little mesh wraps are biodegradable but not over the course of a single season. I’ve had pepper seedlings really stunted by not being able to grow through the mesh edges. Newspaper pots or toilet paper tubes work better since they are easier to break down out in the soil. Personally, I have not tried soil blocking or other plastic free methods, I don’t mind having sturdy plastic seed trays.
Holes poked, ready for seeds
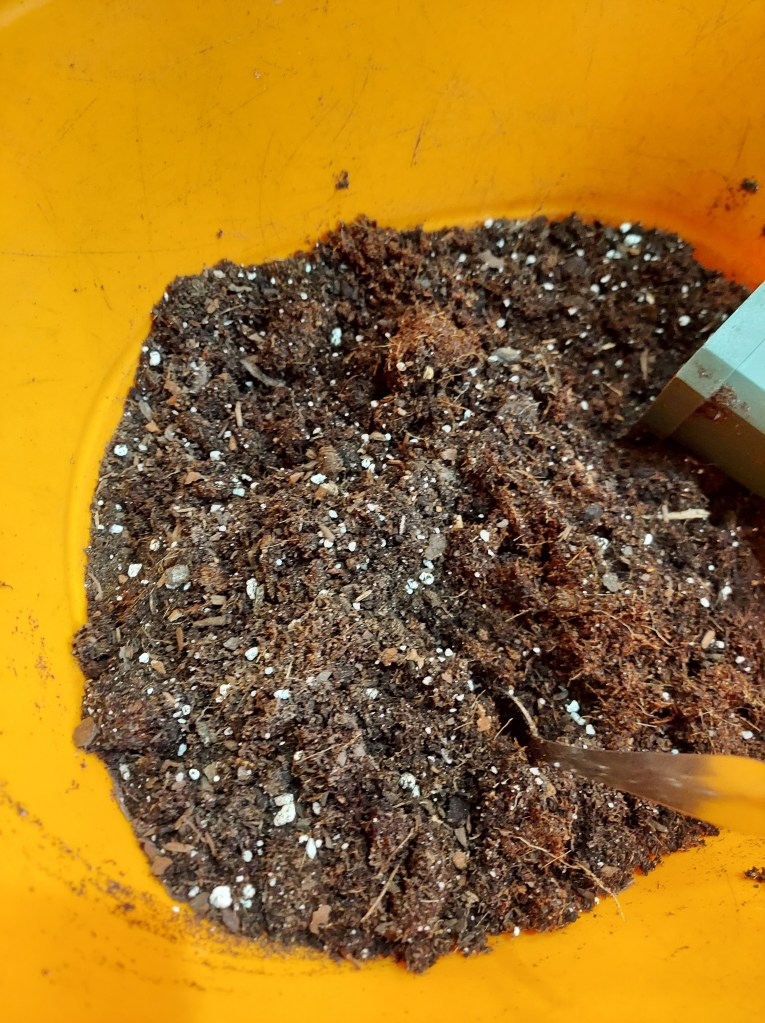
Soil: I tend to make my own blend of seed starting mix, rather than buying it from the store. Store bought mixes are fine, as long as they have perlite for drainage and small particles. Chunky regular potting mix is not ideal, small seeds can get lost and not have good soil contact for moisture. My preferred mix is made from coconut coir, worm castings, perlite, and old potting mix from the previous year. I have a lot of old soil in pots and a good way to reuse it is to mix it with fresh compost. If the seeds are going to be in the cells for a long time, I will often add a bit of 3-3-3 granular fertilizer as well. If seeds need to be surface sown I will often sprinkle a fine layer of vermiculite over top, this still allows light through but helps with retaining moisture on the top of the seeds. I will also use a spray bottle for watering such seeds so as to not blast them from the tray.
Recent batch of potting mix, all blended together and ready to go
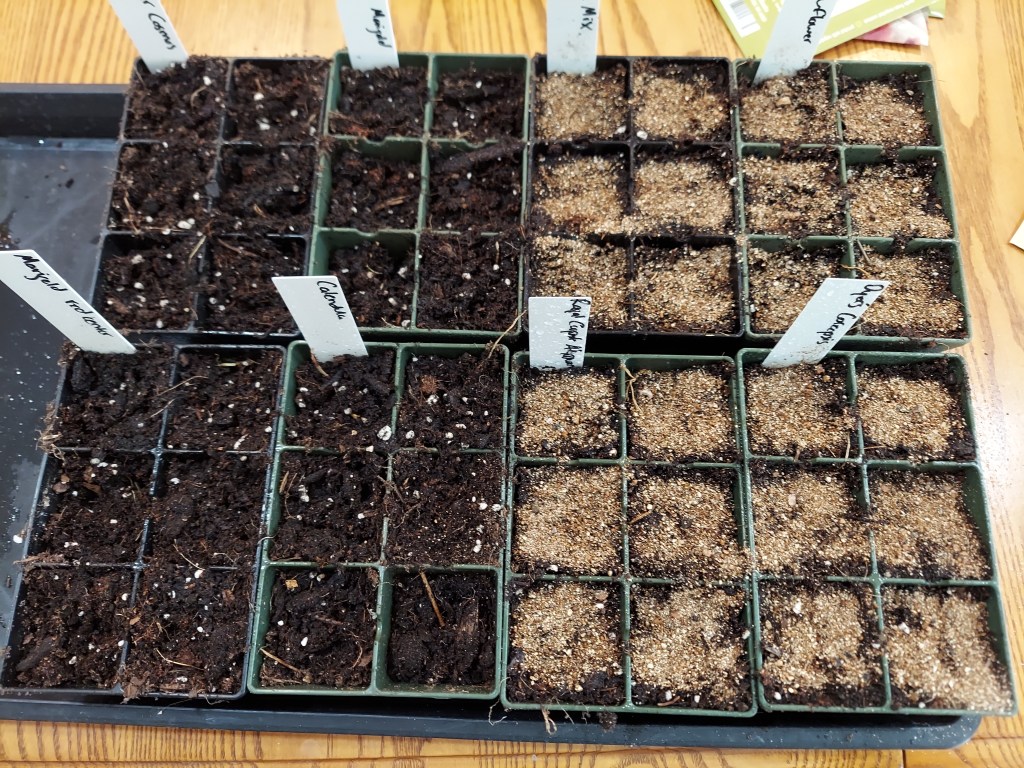
Labels: Make sure you have or make some sort of labels so you remember what you’ve sown. I typically use plastic labels, but I have some bamboo ones too. A sharpie or other weatherproof marker is ideal for seeds going outdoors otherwise the ink or pencil will probably wash off during the course of the season. I’ve learned this the hard way.
Grow lights: Grow lights are only necessary if you are starting seeds indoors in late winter when sunlight is at a weak point. There is a vast range of lights out there, both in terms of light strength, cost, and mounting methods. I personally use cheap, clip-on lights from Amazon. For folks starting seeds in April or May lights are not needed, especially if you have a south facing window.
Many tiny flower seeds need light to germinate, so I sprinkled them on the surface of the soil and covered them over with vermiculite (right half of the tray).
Bottom trays: These are solid trays which will hold your seed cells or small pots of seedlings. These are necessary to catch any extra water that drains through the potting mix. Many gardeners recommend “bottom watering” which means pouring water into the bottom of the tray so that it can be whisked up by the potting mix. It encourages the roots to search for water and avoids any potential of disturbing the top of the soil or dislodging small seedlings with too strong a gush of water.
I use two styles of 10×20 bottom trays, one tall with ridges and the other short and smooth. They both work quite well, though the shorter ones are made of sturdier plastic. I purchased the shorter ones from Epic Gardening. I also own lots of the round ones that go under individual pots for my houseplants, both terra cotta and plastic. On occasion, I have also used old plastic tubs and food containers.
2 types of bottom trays, you can see the height difference between them, and the ridged one on the right versus the flat style on the left
Heat mat: I really only use the heat mat for peppers, tomatoes, and ginger. Most other seeds will sprout fine with regular room temperatures. Again, I got the cheap ones from Amazon. They plug in to the wall and run constantly. I don’t bother with timers or temperature control for seeds, but I did with the fig cuttings.
Tomato seeds on the heat mat
Tray covers/humidity domes: These mini greenhouses with covers are ideal for starting heat loving crops. They help to keep in the moisture and humidity and speed up germination. Just be aware that they need to come off once the seeds have sprouted. Healthy seeds need good airflow, and too much humidity can lead to mold/algae issues on your soil.
Growing Zone: It is very important to know your first and last frost dates before sowing seeds. Growing zones are less important, since your microclimate might vary greatly from the generic zone. If you do not know your frost dates this can easily be found by checking the farmers’ almanac. You can do an online search, and once you enter your zip code it will provide your first and last frost, which is your average growing season. Warm loving crops cannot go outside before the spring frost date, and will be killed off by the first fall frost. My frost free days are typically from mid May-early October. Seed packets will state when they should be sown, often stated as weeks before or after your spring frost date. Please pay attention to these details.
Steps:
Gather all supplies
Decide how many seeds you want to start from each packet. I find it’s best to have a few spare plants than to not have enough to fill your space. Seed packets will state their planting distances for ideal growth, this is based on straight row planting. I like to stagger rows and cram things closer than recommended.
Moisten your potting mix and fill your containers, press down slightly to make sure everything is snug.
Use your finger or a pencil/chopstick to make a small hole in the potting mix, you typically want this to be twice the depth of the seed size. Most seed packets will tell you how deep to sow the seeds. Most seeds will sprout fine if planted up to 1 inch deep.
Carefully place a few seeds in the hole. For really tiny seeds I like to carefully tap on the edge of the seed packet and let them drop out. Sprinkle more potting mix over top to cover the seeds. Fill out your label while you still have the seed packet out and put it in the pot.
Place the pots or cells in a tray near a south facing window or under the grow lights. Check every couple of days to make sure the soil is damp but not soaking wet. Many seeds will germinate within 7-14 days, some take longer.
If you planted a lot of seeds per cell you will probably need to thin them after sprouting. Some crops do just fine when multi-sown and do not need to be thinned. Good candidates include onions, beets, some herbs and flowers. If however you intentionally multi-sowed in a small pot in order to prick out the seedlings, the best time to do that is about a week after the seed sprouted. This way you can separate them without difficulty. Carefully tease them from the pot, I like to use a chopstick for this, then poke a hole in your 6 cell and carefully guide the roots down. Do not hold the seedlings by the stem, they are very delicate. Snapping them will kill the seedling. Hold them by the leaves, they are sturdier and a plant can survive if one leaf is damaged.
Trays of happy seedlings growing in early March.
One of the most important steps is proper watering, small 6 cells dry out much faster than 3 or 4 inch tall pots. Small seedlings can get waterlogged and die from “damping off,” so it is better to error on the drier side. If the top of the soil is dark chocolate in color they are probably fine, once it gets to milk chocolate you will want to check. I normally lift up the trays and check the bottom of the cells once the top looks dry.
Seedling size also makes a difference. Once seedlings roots fill up the cell they will need more frequent watering, and often benefit from being transplanted into a larger pot if it is still too early to put them outside. This is one of the main reasons why I have both 6 cell trays and the taller 4-inch seed cells. Once seedlings outgrow the 4-inch cells, I generally transplant to a 6-inch pot. Sometimes there is a bit of a waiting game to see how big the plants will get before the weather cooperates and lets you move them outside.
When the weather is warm enough for plants to go outside, they need to be hardened off to ensure they are not shocked by the change to their environment. Hardening off involves leaving trays outside in a sheltered spot for increasing amounts of daylight over the course of a week or 10 days. Start with one hour and work your way up to a full day before transplanting them. This will allow the seedlings to gradually adjust to full sun, outdoor conditions. Then you can transplant them and watch them grow all season long.
Since I started working at a local farm almost a year ago, I have vastly increased my houseplant collection. Prior to that I really had a minimal selection of houseplants: ivy, spider plant, aloe, jade, a few succulents, a free pothos from a coworker, and a couple of snake plants. I have learned a lot about houseplants: identification, care, and how to help customers deal with pests.
I was able to take home a few free cuttings (inch plant, variegated spider, pothos) and succulent leaves over the course of the season. I even got several free plants, either from coworkers, or store plants that needed extra attention. One such freebie was a ZZ plant, that was partially dying. I dug it up, chopped off the roots that were rotting, and repotted it. Not sure if it will survive, but I think I improved its chances. It appears to be in a holding pattern for now, so I’m taking that as a good sign. I have also made several purchases and can now say that I own the following: ficus, pepperomia, goldfish plant, anthurium, hoya, and albuca humilis.
Overcrowded aloe that had fallen out the pot at the store, I was able to take it home for free. All these plants had been in one pot.
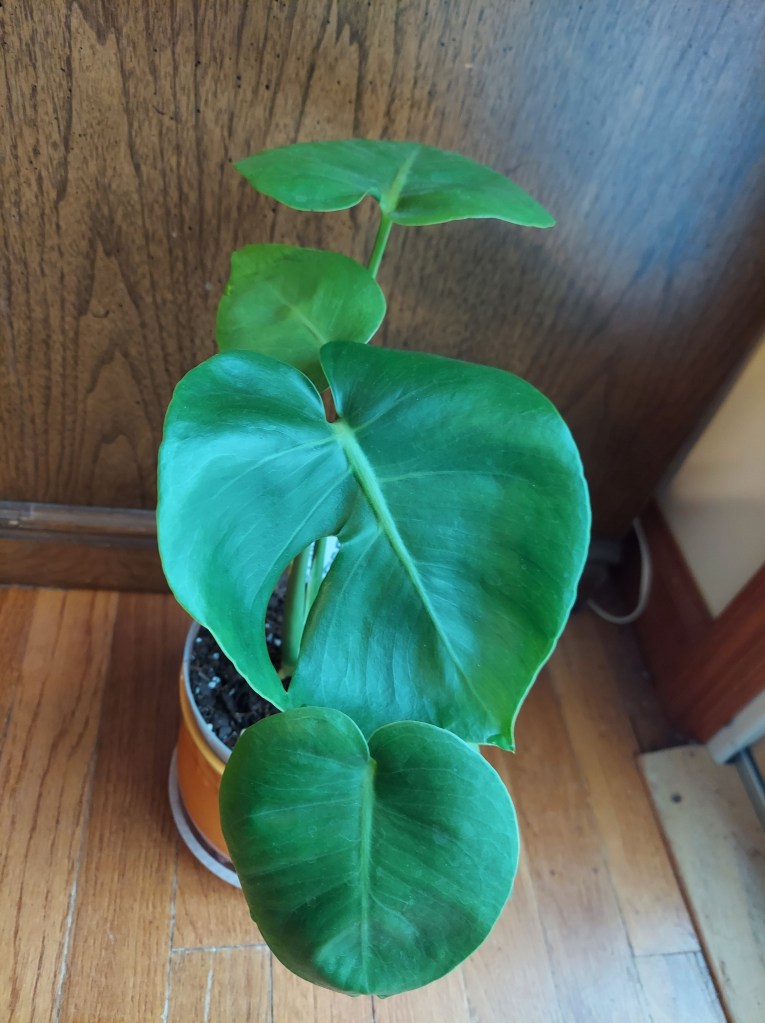
I’m not an expert at houseplants, but I am learning through experience. I enjoy having more greenery inside the house. It especially helps to brighten things up in winter. Right before Christmas I purchased my first ever orchids, split leaf monstera, and white princess philodendron.
Split Leaf Monstera, which needed to be repotted right away. It has since grown a new leaf.
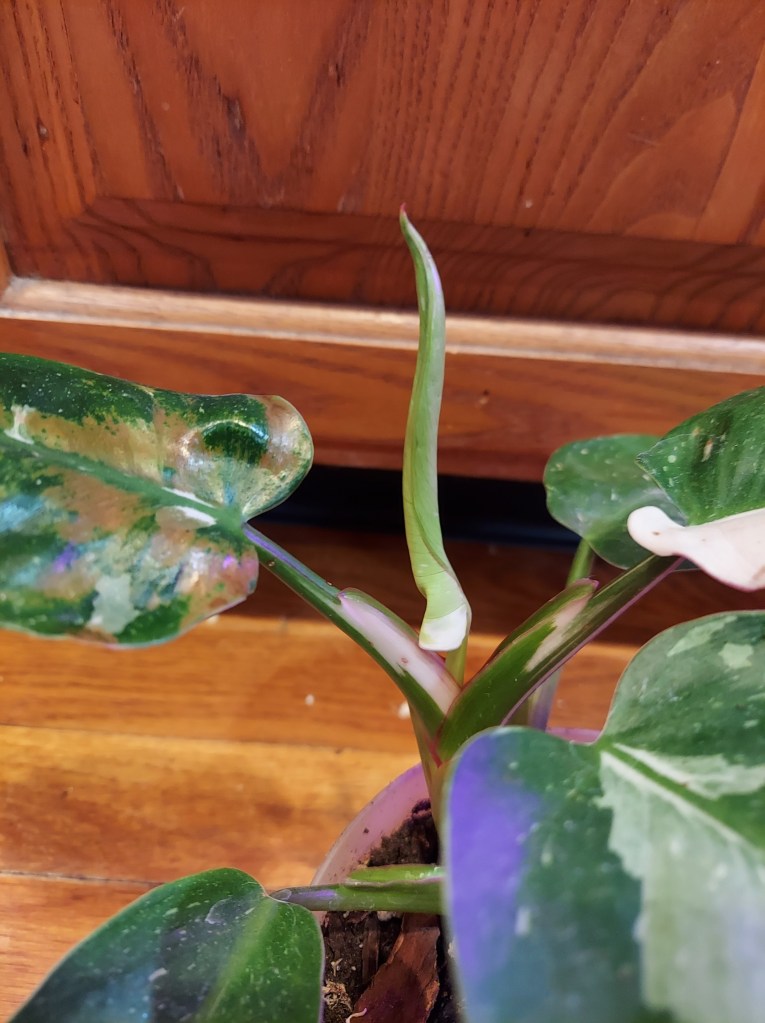
White Princess Philodendron unfurling its first leaf
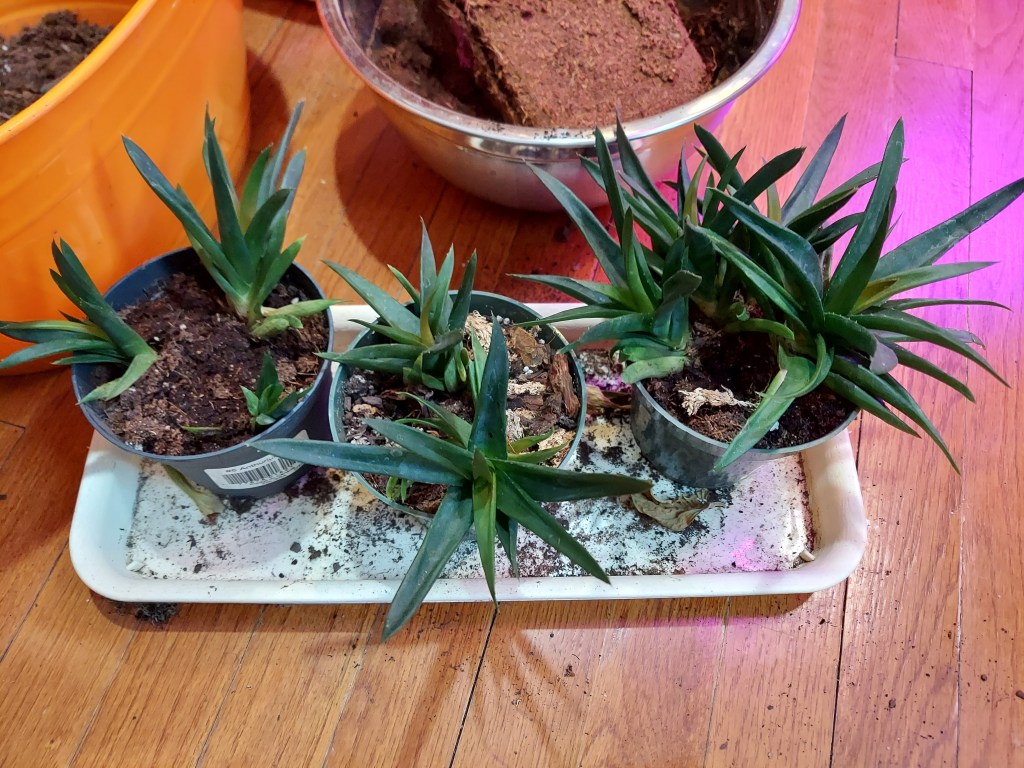
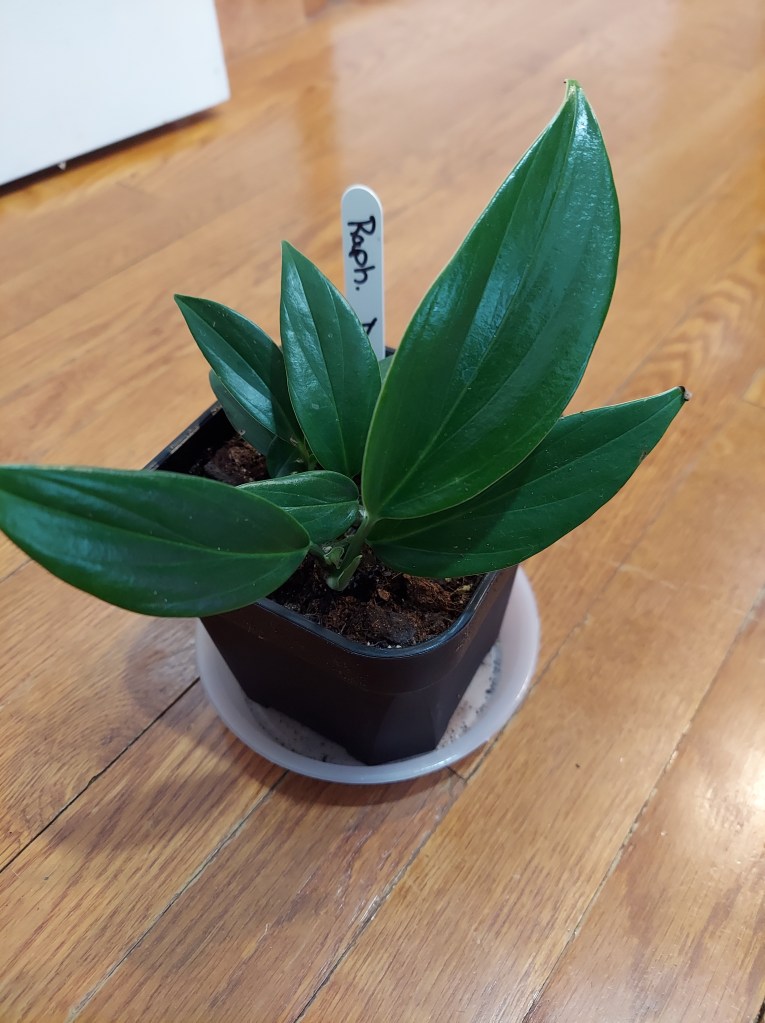
Then in early February after the farm got its first big houseplant delivery of the year, I purchased a couple of small plants. After careful deliberation I purchased my first ever Rhaphidophera decursiva, an air plant, and lucky bamboo.
My new Rhaphidophera decursiva has already put out a new leaf.
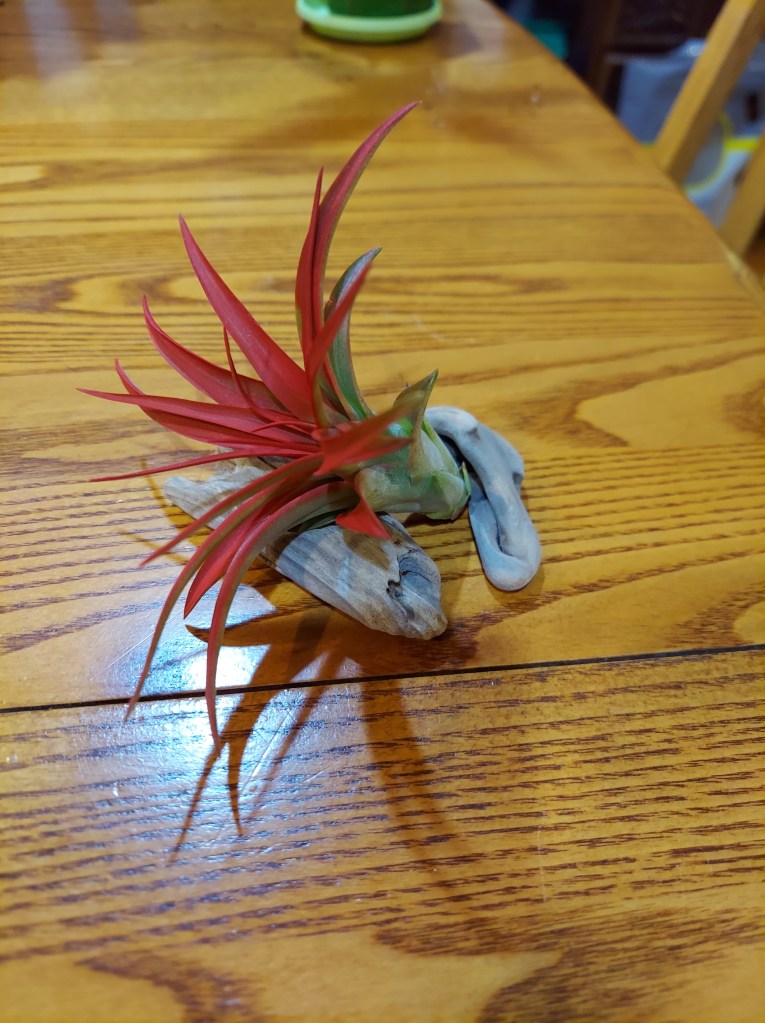
My new air plant is bright red.
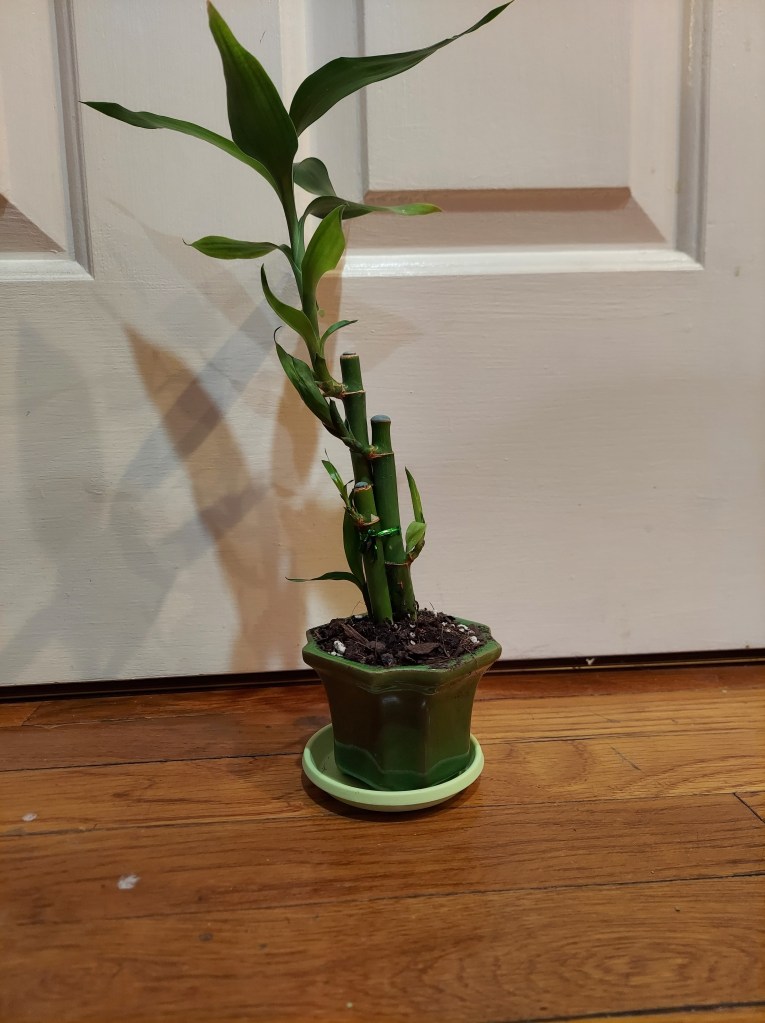
Lucky bamboo, repotted to a green bonsai style pot. It has 5 shoots coming off of 3 stems so I’m hoping it will fill out nicely soon.
My houseplants have taken over three shelves of the 6-shelf rack in the family room, which I normally use for seed starting. Think I am going to be tighter on space this year, since I also have all the fig cuttings. Might need to shuffle trays around and reorganize, to fit in as much as possible near the south facing windows.
On this snowy day in February, I think it would be a good time to look forward to spring and post about seed starting for the 2025 garden. It is winter outside, but I am growing tiny plants inside. In the first week of January, I sowed: leeks, red and white onions, shallots, celery, peppers, and dazzling blue kale. Alliums are slow growers, so the longer head start I can give them the better. I managed to grow a few onions last year, but they were very small bulbs at harvest time. I want to improve this year. I have learned from experience that celery takes a very long time to germinate, often taking 4 weeks before the tiny sprouts make an appearance. Then the tiny seedlings take forever to start to size up.
Seedlings after about one month of growth: leeks, sage, kale, peppers, cabbage, and calendula.
Last year I failed at my first attempts at sowing peppers, so I’m giving myself plenty of time for follow up sowings. I’m starting kale earlier than I have in the past because it is a year-round producer, and cold hardy. I am hoping for better slug resistance if I can plant out stronger, larger plants with thicker stems. I use grow lights on all my seedlings and the shelves are in south facing windows. I have heat mats which I use for pepper and tomato seeds to help improve germination. Once it gets close to spring the greenhouse will also give me a season extension and some cold hardy plants can be moved out there before the last frost date.
In the first week of February, I started my second round of pepper seeds. I have about a dozen seedlings from my first round of seeds. I started 4 different varieties of peppers, but want to have backups in case anything happens to them. This second round includes different varieties than from the first sowing. I tend to grow small and medium sized peppers, as I have found they provide more harvests per plant than with bell peppers. No one in my family likes really spicy food, so I don’t have to worry about any of the hot peppers. The varieties Violet Sparkle and Circus are both new to me, they are small brightly colored snacking peppers.
Second round of pepper seeds
I checked on my dahlia tubers in the garage last month and they were still dormant. I will keep checking and if they haven’t sprouted by April, I will bring them inside and pot them up to wake them up. I also ordered a couple of new varieties from Hudson Valley Seed Company, so I am looking forward to growing a couple new colors.
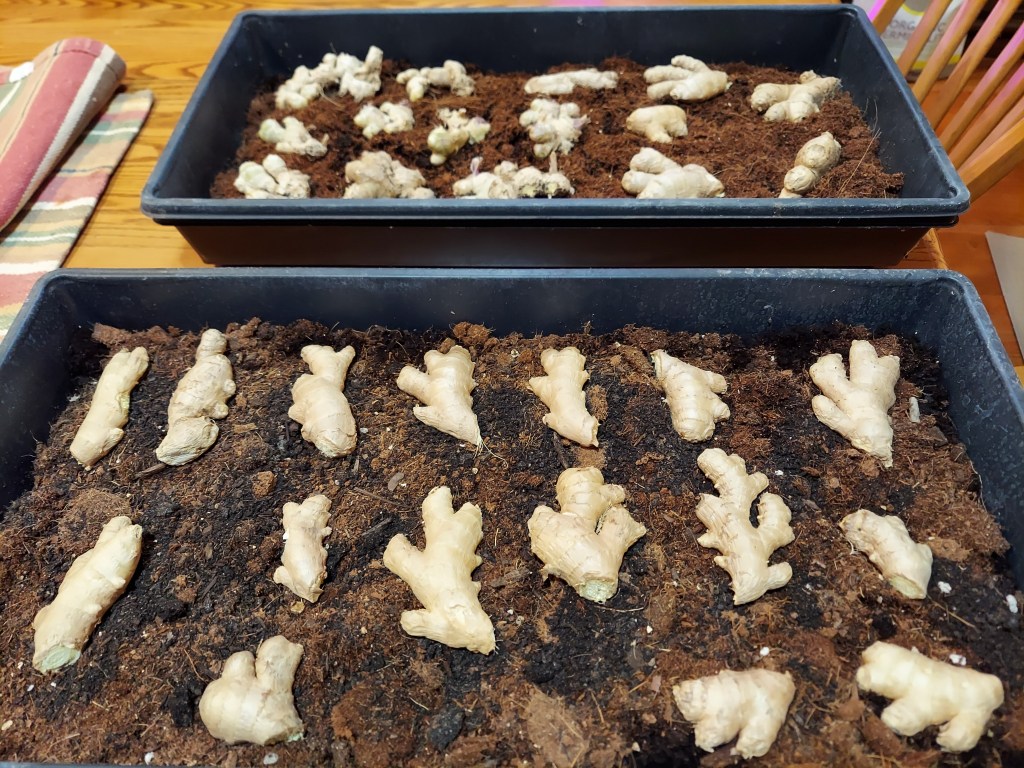
I’ve also started two trays of ginger pieces to pre-sprout them before planting. Much like potatoes ginger has eyes, certain spots that will regrow. However, it can take a very long time to get started and is a nutrient hungry, tropical plant, and it also requires a long growing season (10 months!). These two shallow trays are filled with half lobster compost and half coco-coir with some worm castings and balanced light fertilizer added.
They will now go on heat mats for the next couple of months. As the pieces sprout and put out their first green growth I will carefully lift them from the trays and plant into deeper pots, with lots of compost. Doing them in trays allows me to fit 30 pieces into a small area and ensures that I’m not wasting valuable growing space on pieces that might fail to germinate. After a couple of months, I will check any remaining pieces and then compost the ones that don’t show any signs of growth.
When the warmer weather arrives, I will probably plant a few of the ginger the greenhouse under the shelves since they don’t take up a lot of vertical space. The rest will go in planters, which I typically put outside the greenhouse, but right up against the wall so they get some extra heat. I haven’t managed a bumper crop yet, but I also don’t have the ideal climate for ginger. I have grown a decent amount of small ginger pieces which are perfect for tea and baking purposes.
Tiny bell pepper seedlings
I will probably start tomato seeds in early-mid March, since they grow relatively quickly. After that I will start dye flowers such as marigold, indigo, madder, and cosmos. I typically direct sow sunflowers, and hopefully the chamomile self-seeded and will come up all over the place like it did last year. Most root veggies will be direct sown after our last frost. Squash and cucumbers get started inside at the beginning of May because they grow very quickly but are not frost tolerant. I like to get a head start by sowing in plug trays, which also means better protection for the vulnerable seedlings.
This year I am going to try to have extra seedlings ready to go in case of loses along the way. I also want to practice at succession sowing this season, by having plants ready at different points of the season for continual harvests, and keeping the soil used and covered. All the garlic I planted in the fall is currently under a nice layer of snow. I look forward to it poking through and starting to grow green shoots in spring.
Looking ahead to the new gardening season, here are some of my hopes and ideas.
Adding another raised bed to the garden, mostly likely to be used to protect my dahlias from the voles. I plan to put hardware cloth down on the bottom before filling the bed.
I am currently propagating figs via cuttings and will be looking to sell them come spring. I have over 20 that successfully rooted so far, and have a second round in the works now. There may be three varieties available.
I received a few free elderberry and black currant cuttings from a coworker in the fall. I planted them outside, and am hoping that they survived our strange winter. It has been mostly mild weather, but we had a streak of 4 days of non-stop wind and a few quite cold days. Not much snow overall.
I planted a bunch of strawberry runners from last year’s plants. This should allow me to increase my total number of plants (by up to 30%) and provide more berries for this season. I am currently battling spider mites on the plants.
I purchased a Meyer’s lemon tree in the fall and it has spent the winter in the basement. Looking forward to potting it up and moving it to the greenhouse for the summer.
My dahlia tubers are out in the garage in small boxes of coco coir. I will bring them inside in a couple months to re-pot them and wake them up from winter dormancy. Starting them indoors will give them a head start for the season.
I plan to start pepper seeds earlier this year than last year. My plants were very slow to produce and I only got a few ripe peppers before frost. The plants were covered in tiny peppers and flowers in October.
I plan to spread my small batch of homemade compost over the beds in late April/early May.
I managed to grow a few small onions and leeks last year but want to improve my allium game. I do very well with garlic, but not any other types.
I received a new dehydrator for Christmas with temperature and timing controls. I plan to put it to good use this season to preserve my harvests, especially herbs and dye flowers.
Strawberry plant in the vertical tower from last season.
2024 was a challenging year for gardeners worldwide, and since I had some time off at the end of the year I decided to reflect on the successes and failures. Here in NY the toughest environmental challenges were pests and lack of rainfall. Last winter was very mild, with barely any snow, and I think that led to an increase in pest pressure. I had to water a lot more than in previous years, and my sandy soil was a detriment to moisture retention. Some plants thrived and were very productive but many struggled.
My only ripe snacking sized pepper of the season
Pests
Problems:
I saw slugs and snails everywhere, and I tried several different deterrent methods which were only partially successful.
Voles ate a couple of my dahlia tubers and tunneled under and killed my butterfly bush. They also burrowed under and killed about a dozen heads of garlic.
We caught and released many chipmunks, but they ate some of my tomatoes.
Rabbits and slugs ate two rounds of climbing bean sprouts, so that delayed harvests.
Caterpillars on brassica plants and apple trees cause significant damage.
Lessons learned:
Beer traps for slugs are more trouble than they are worth in my opinion. Wool wrapped around plant stems worked better for me. I also used plant covers/domes to protect young plants from the critters. Whenever I saw snails and slugs I killed them.
Dahlias will produce when grown in pots. This was my first year growing them so I wasn’t sure. I dug them out of the ground as an emergency measure (one of which was almost blooming) to save the remainder from being eaten. I got a few very pretty flowers once I moved the pots to the greenhouse.
I started using mesh bags to cover the clusters of tomatoes while they were still green. This helped protect from chipmunks and slugs.
I purchased a mole sonic spike in the hopes that it will protect my garlic crop from the voles, especially over winter.
We chased a bunch of baby rabbits out of the garden, since they were small enough to fit through the chain link fence. One remained inside, and moved in beneath our deck, where we couldn’t reach it. It became a nuisance once it was too big to get itself out of the garden.
I need to be more active in preventing pest infestations. Next season I plan to check the apple trees and brassicas more often for pests. One apple tree had severe caterpillar damage before we noticed it and sprayed it. Hopefully the tree survives, but it will be set back because 80% of its leaves were eaten. I lost a few brassica plants entirely to cabbage white caterpillars when I was away camping for a week.
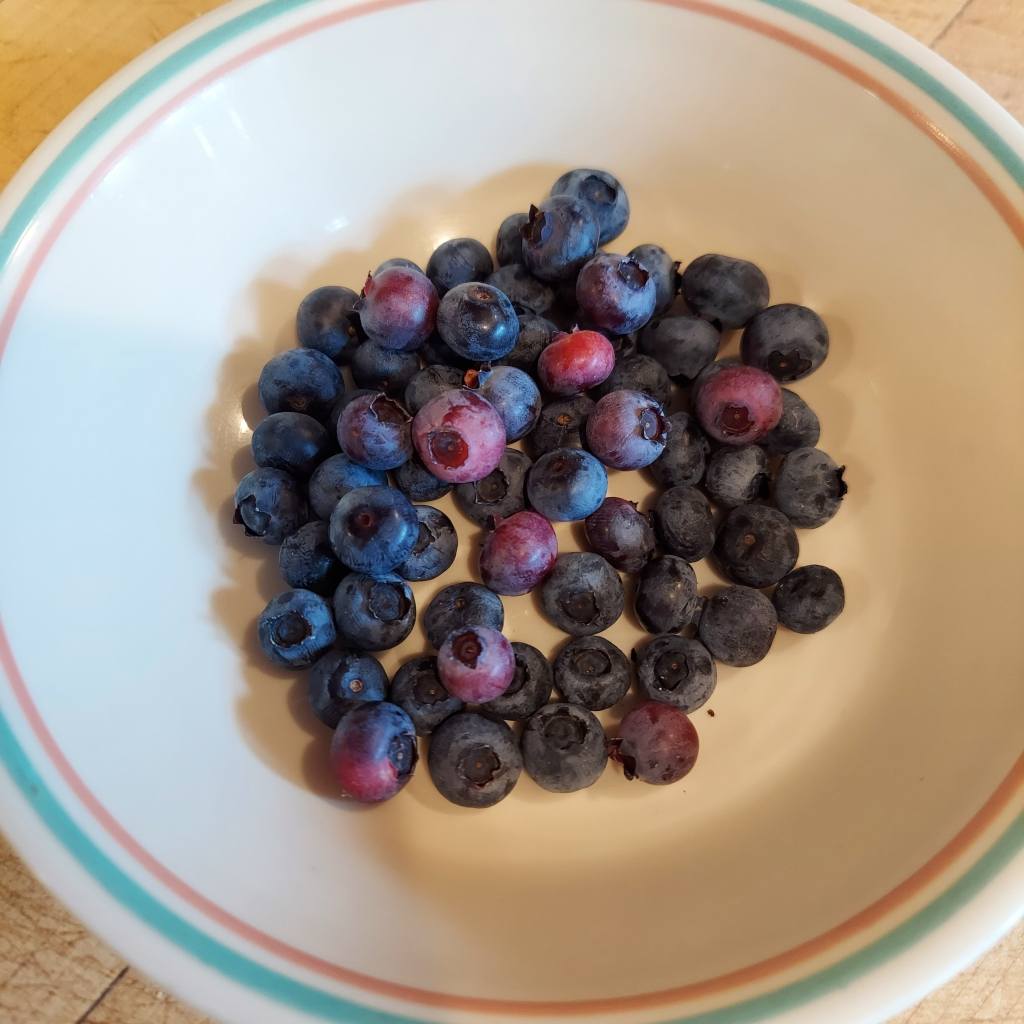
A blueberry harvest from the potted plants
Productivity
Problems
My squash plants barely produced anything before dying off. The only winter squash I harvested grew itself from the compost pile.
I sunburned my container figs and cost myself an entire growing season.
I did not weed the herb bed and it was completely overrun by grass and chocolate mint.
I only had a couple of very small indigo plants, which did not provide very many leaves for dye. I did manage a couple of hammered leaf towels from the handful of leaves that I got from each plant.
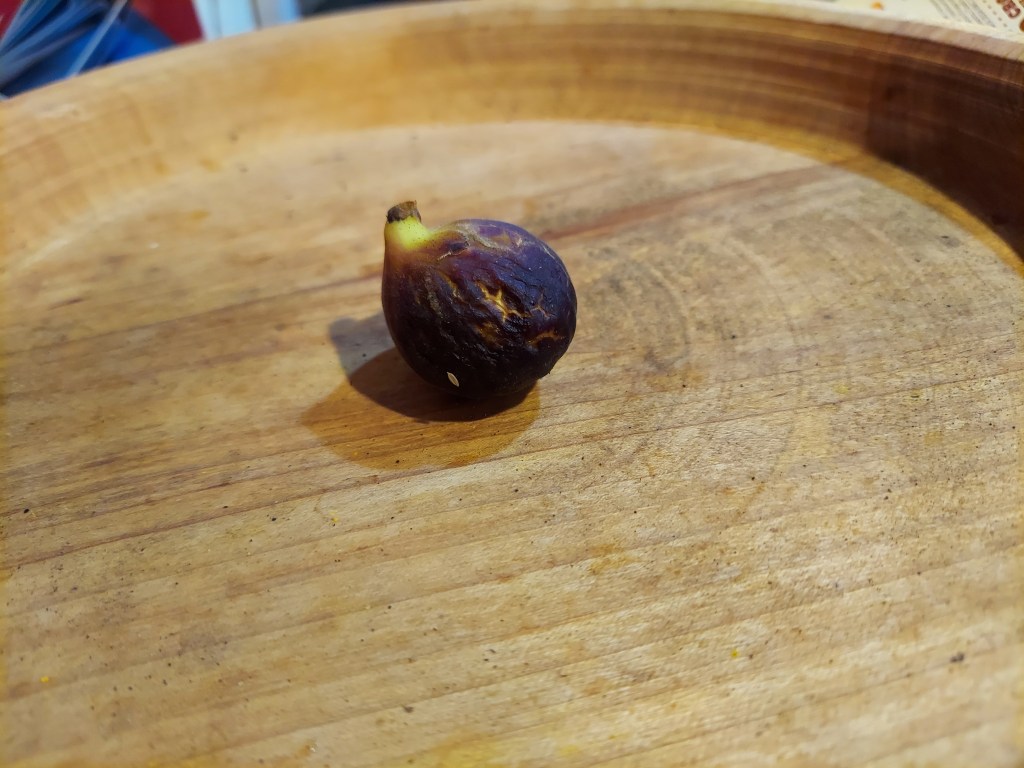
One of only 2 figs I harvested last year
Lessons learned:
The compost pile grew a ton of tomato plants, which I allowed to grow. Free produce from an out of the way corner.
Next season I will harden off the fig trees and provide shade cloth once they are ready to be moved outdoors in order to combat the chance of sunburning the leaves.
I want to start more seeds than I have space for so that I can fill gaps or have succession crops ready to go after I harvest. I have homesaved indigo seeds from 2 years ago that I will be using to see if it grows better than freshly purchased seeds.
I need to stay on top of weeds, in the late fall I started to fix up the herb bed and planted a few more perennials to fill in some of the gaps. Coreopsis, sage, lavender, chives, delphinium, and thyme were all added.
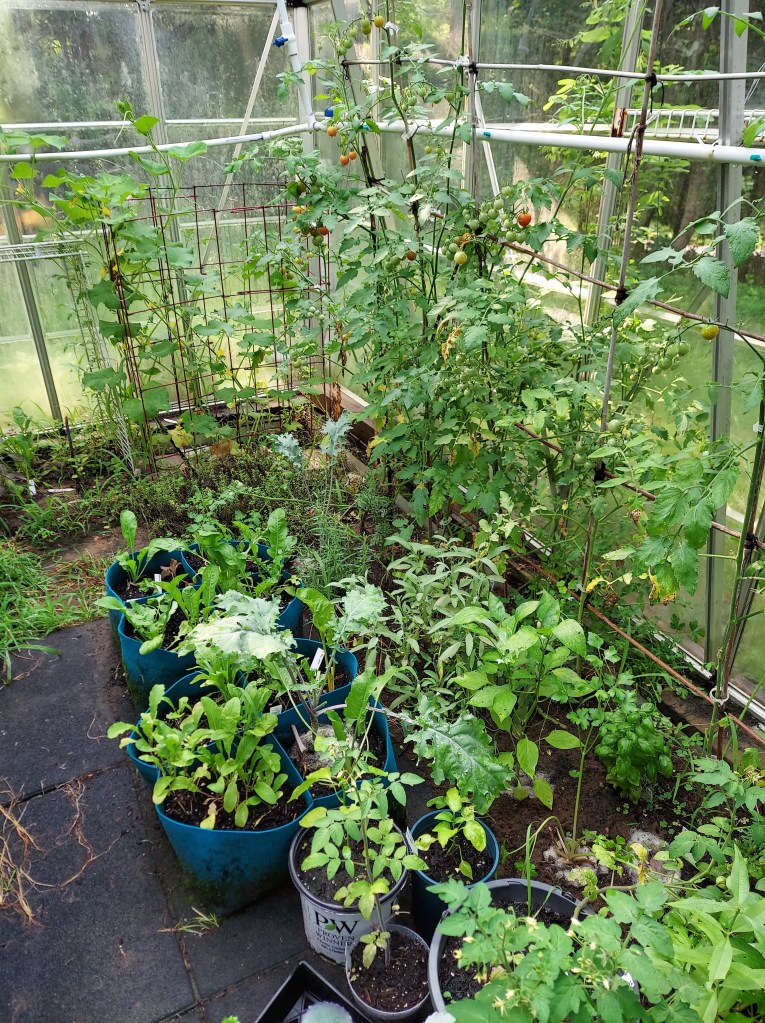
Greenhouse jungle, in the height of summer
Garden Successes
Tomatoes and pole beans were prolific last year. I grew multiple varieties and once they got going they did really well. I made tons of pasta sauce and blanched and froze a lot of beans.
Herbs: I was successful with herbs such as oregano, thyme, basil, chamomile, lavender, sage, and lemon balm. The lemon verbena and rosemary were less productive, but I still got a few harvests.
I added a very large gardening bed in May which allowed for a lot more growing space. I threw a lot of plants in it but didn’t necessarily put them with the best spacing in mind.
The sunflowers were gorgeous and a couple of them were huge. Very satisfying to look out and see them towering over the garden.
The blueberry plants are finally in the ground, so I’m looking forward to better growth and productivity going forward.
Straw mulch on one raised bed helped preserve some of the moisture in our sandy soil, and also in the potted figs. Helped to keep down weeds as well.
Grew strawberries for the first time in a vertical tower planter. They were a fun success.
Carrots finally worked out for me. I grew both orange and yellow and got some nice big ones.
Grew a ton of marigolds, harvested and dried several different colors for future dye projects. Moderately successful with growing and harvesting cosmos flowers.
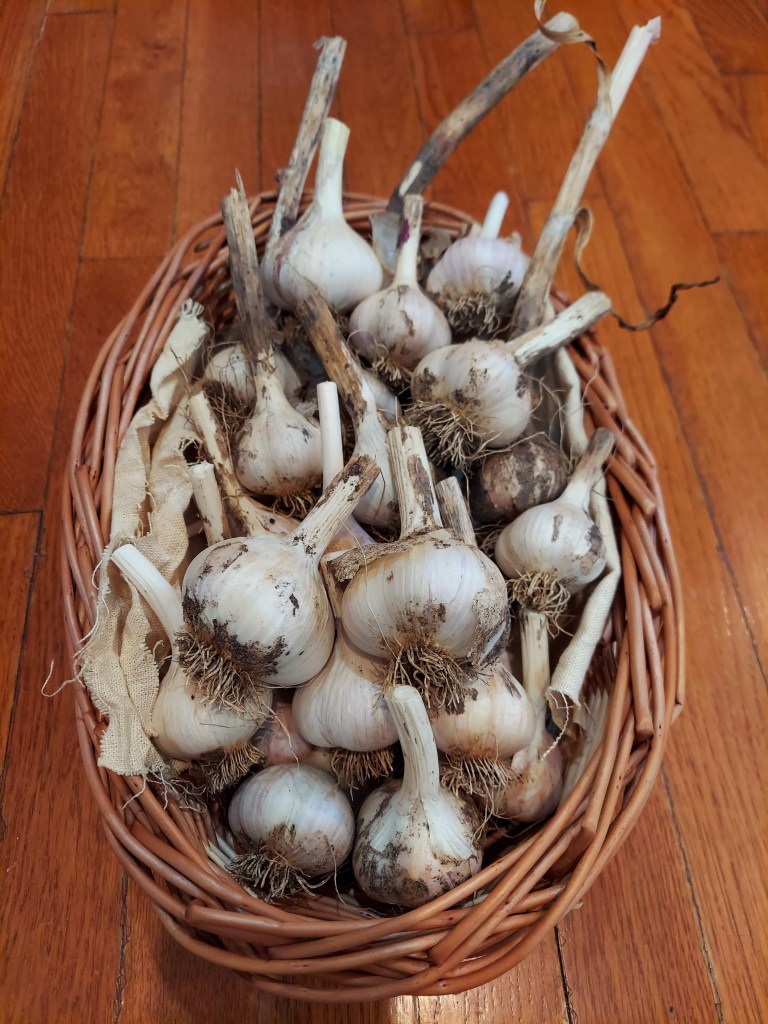
Even with the voles, my garlic patch was a success, and the new batch went in the ground in mid-October.
Self-sown chamomile allowed me to get a huge harvest, enough to make a couple of different tea blends. I’ve learned that sometimes it’s a good idea to leave “free” plants to get in some bonus harvests.
Grew my first ever watermelon, and 2 tiny cantaloupe melons.
Saved a nice variety of seeds from the garden, mostly beans and flowers. About half of the garlic I planted was from homegrown heads.
Purchased 3 pear trees and planted them in the garden.
I made my second ever batch of slow compost, and have a very large pile going for next year. I do a combination of bokashi fermentation for the kitchen scraps and a throw everything else in a pile and forget it for a year method. Garden waste, grass clippings, small branches, and fall leaves mostly, with a tote of chicken manure from my sister’s chickens.
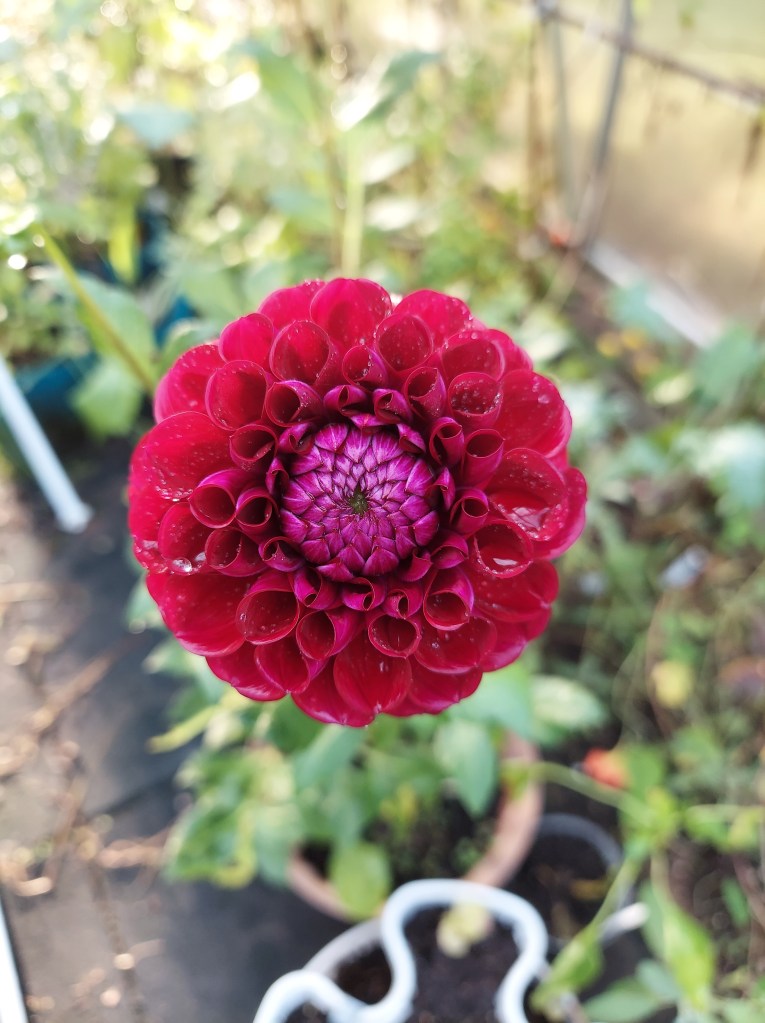
Dahlia flowers are gorgeous. This was the first year I’ve ever had cut flowers on the kitchen table as a decoration. Sunflower, zinnia, and nasturtiums were also included.
We dug up and divided the canna lilies to overwinter in the basement, and ended up with 19 pots, some with multiple bulbs.
I grew enough calendula to collect and infuse in oil for herbal salves and balms.
I planted one Chicago Fig in the ground to see if it survives the winter.
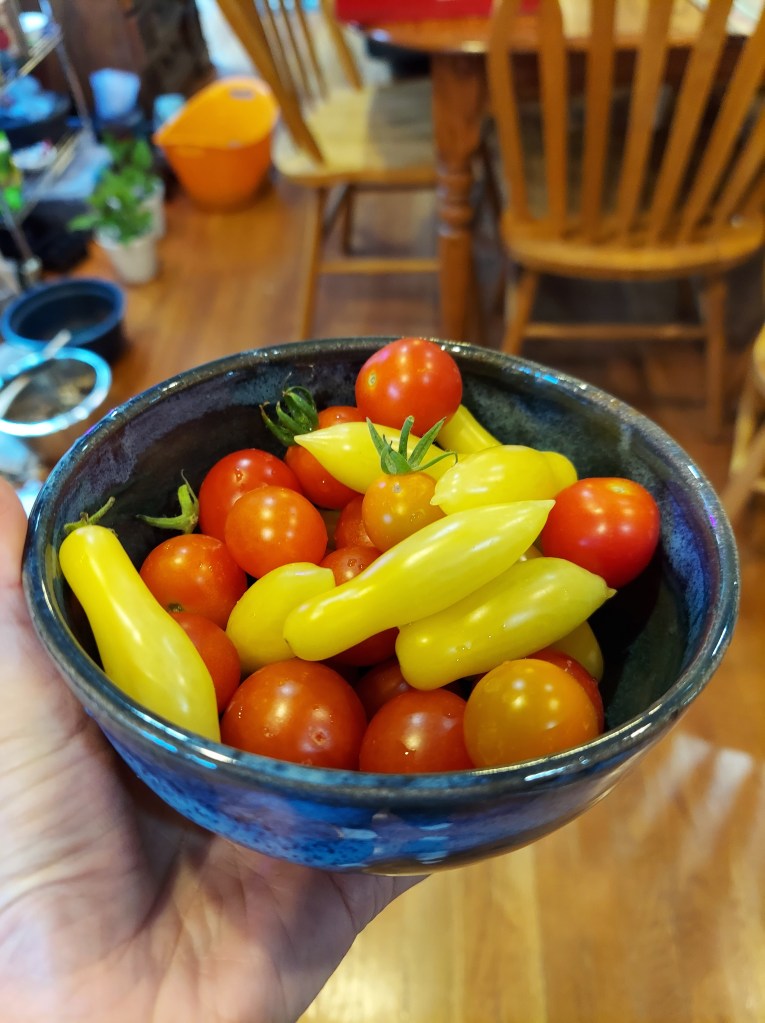
I grew a total of 139 pounds of produce last year. 50 pounds of that was tomatoes!
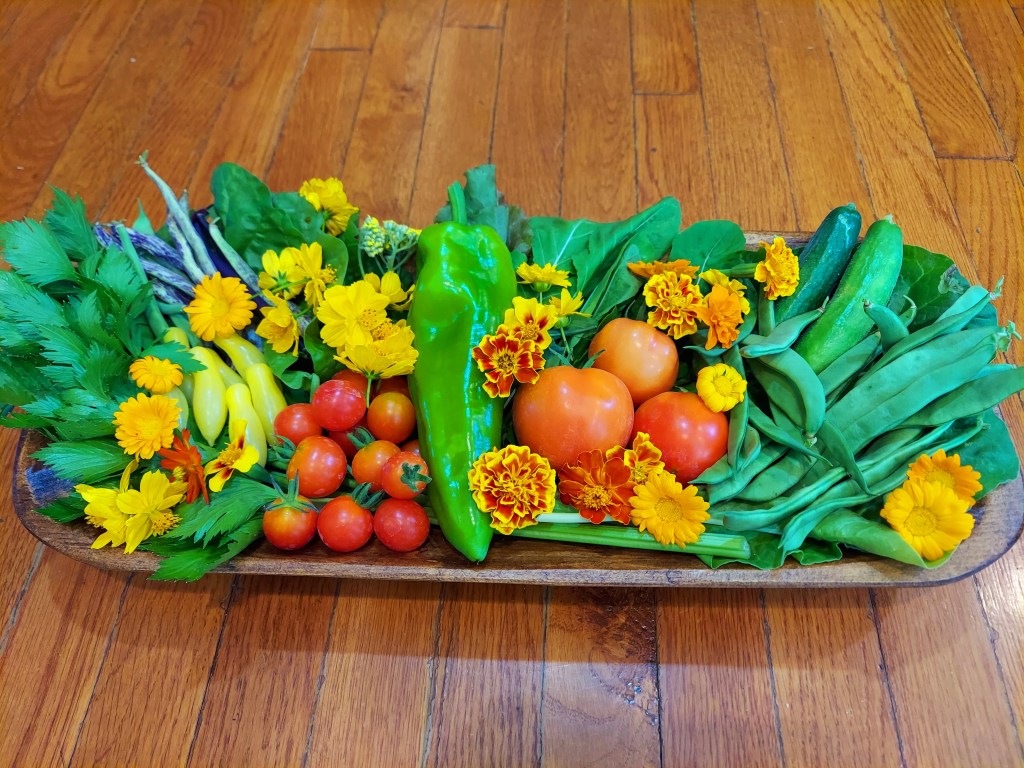
Looking forward to more of these types of harvests!