In the middle of October, I dug up my dahlia tubers to store them for winter. Dahlias are not cold hardy and thus the tubers are susceptible to frost. So once the leafy growth had been killed off by the first light frost in early October, I knew it was time to remove the stems and dig around to find the new tubers.
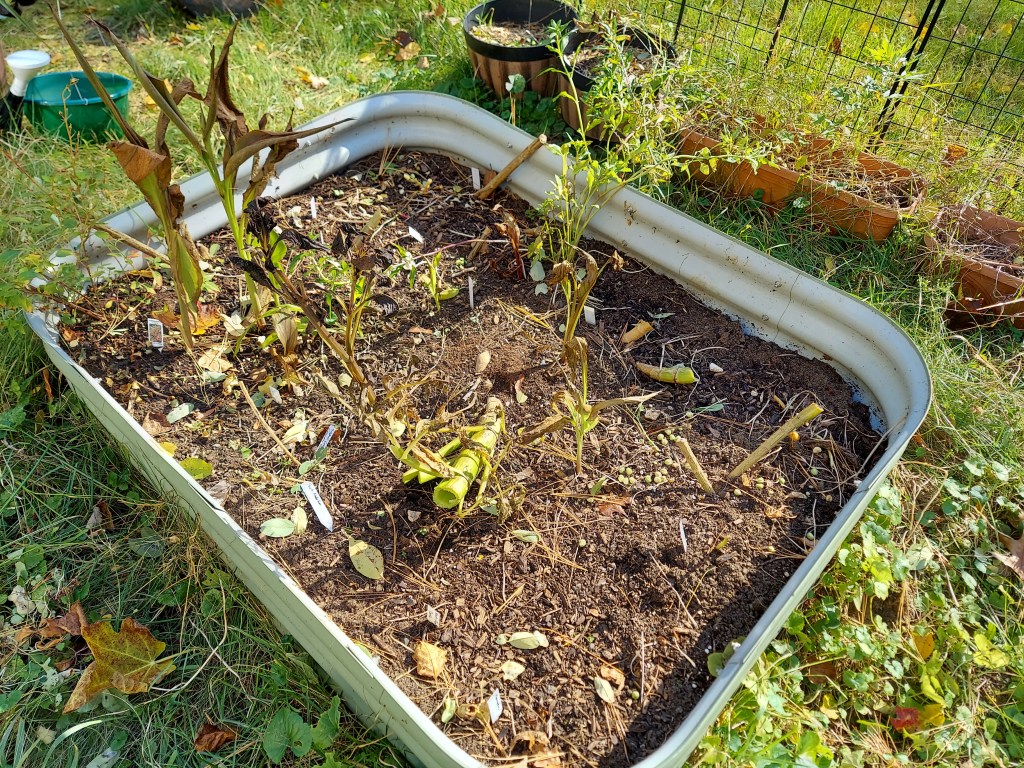
This is what the bed looked like after the bulk of the dead stems and flowers were all removed for the compost bin. You can still see some very thick stalks coming out of the ground, I left them there so I would know where to carefully dig to find the tubers.
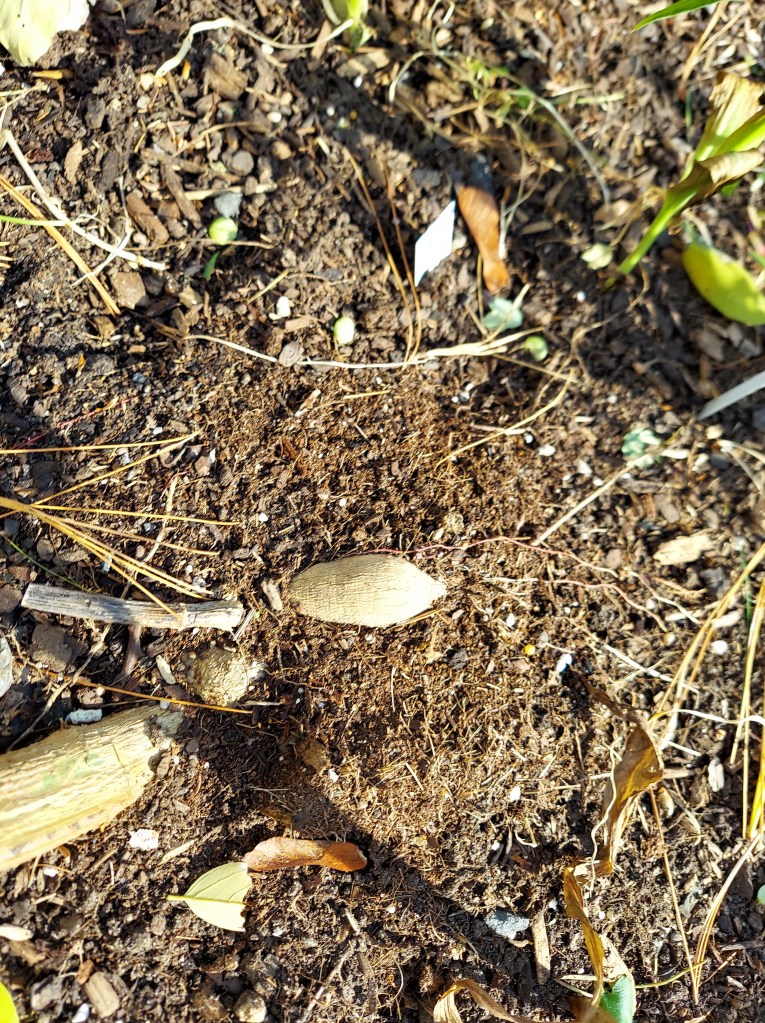
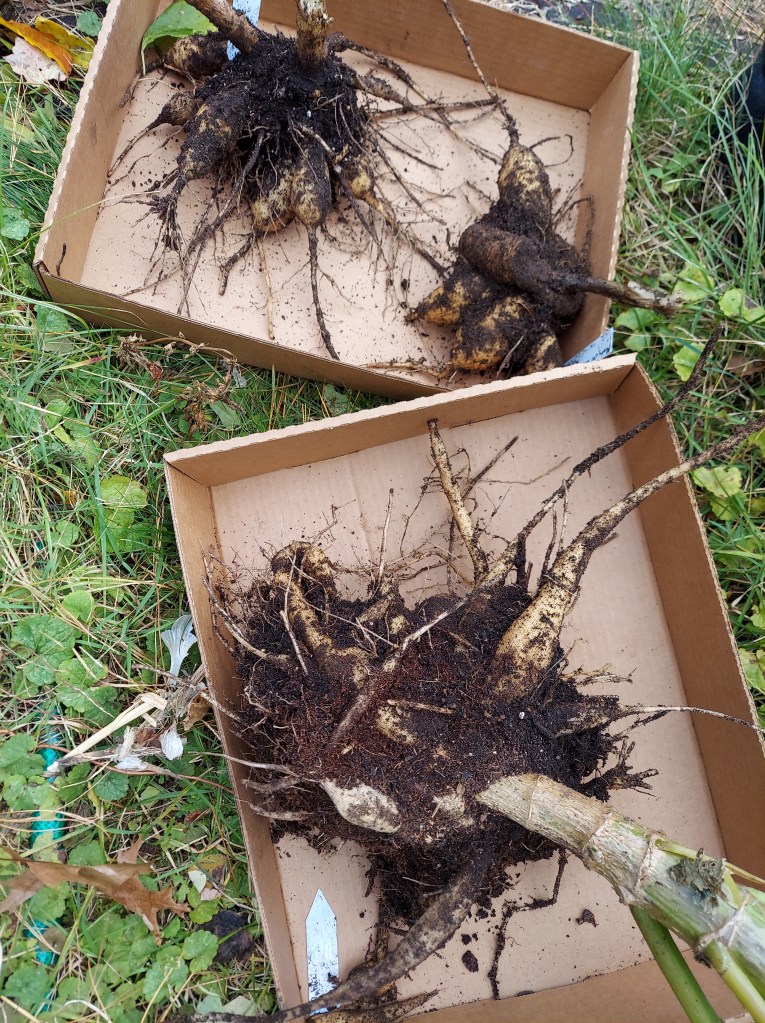
This plant actually grew sideways and started falling over under its own weight, so you can see this one tuber was exposed and above the soil line. I made sure to locate all my plant labels before I started digging so I would be able to keep the different types separated.
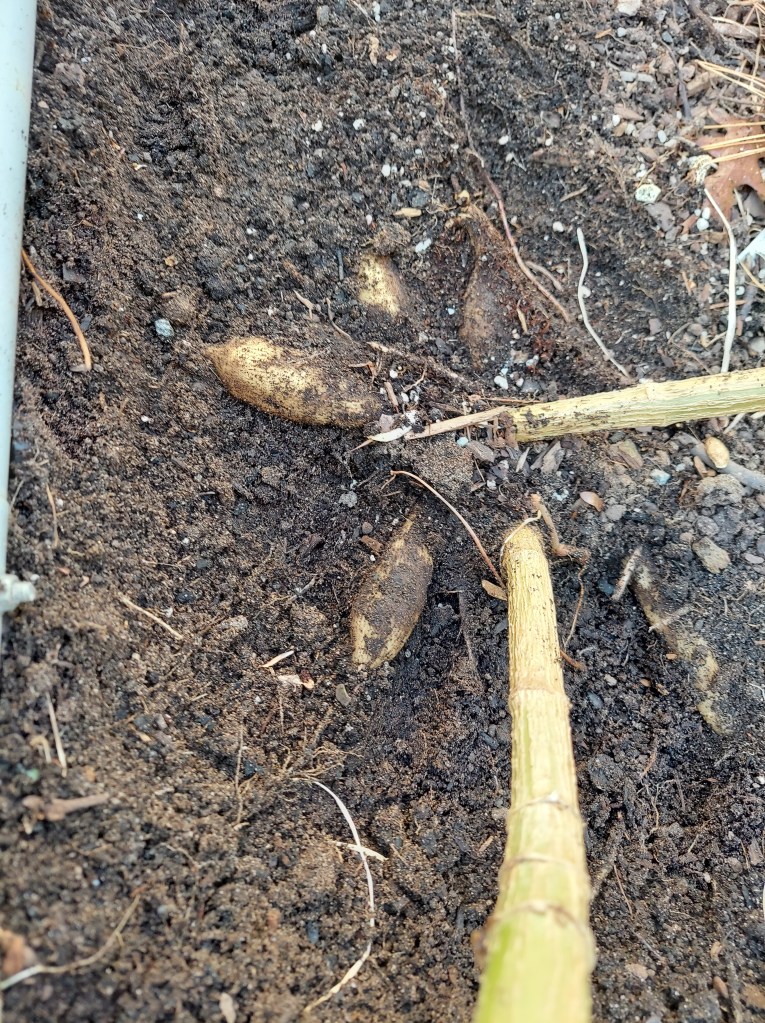
Most of the tubers were very close to the soil level, so I just started clearing dirt with my hands so as to not risk stabbing through and breaking tubers with a shovel. Once I had each clump completely uncovered then I used a small trowel if needed to leverage the roots out and pull them completely free from the bed. I grew the dahlias in a 15-inch-tall bed with hardware cloth across the bottom, so it was easy enough to find the bottom and make sure I had all the tubers.
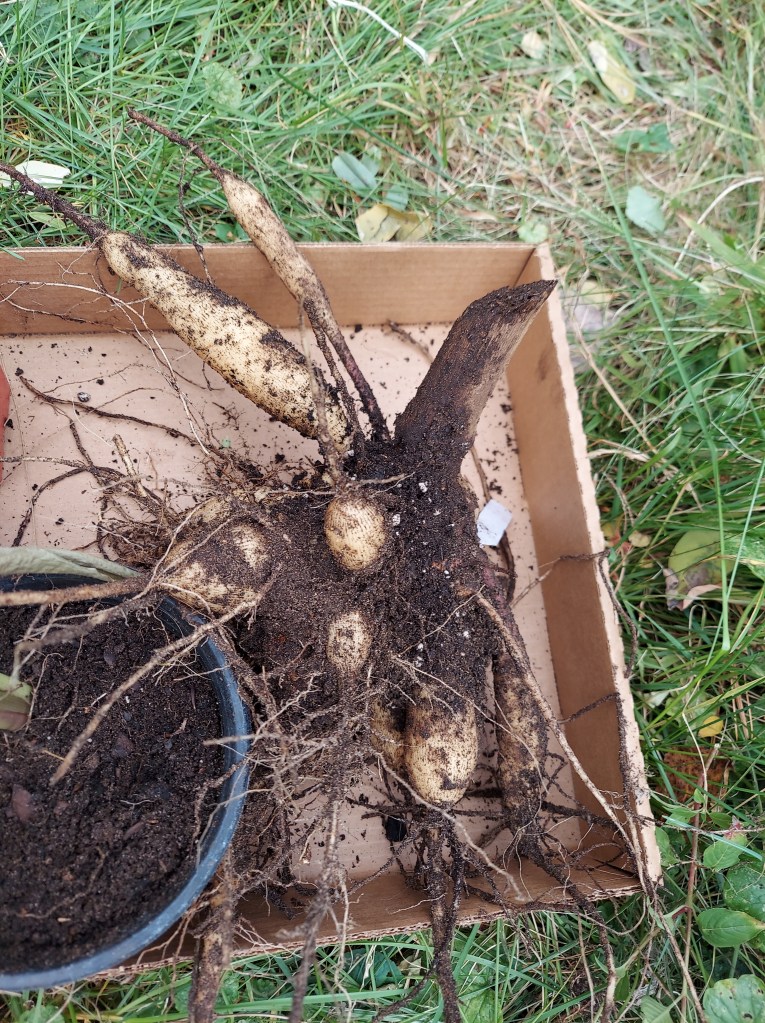
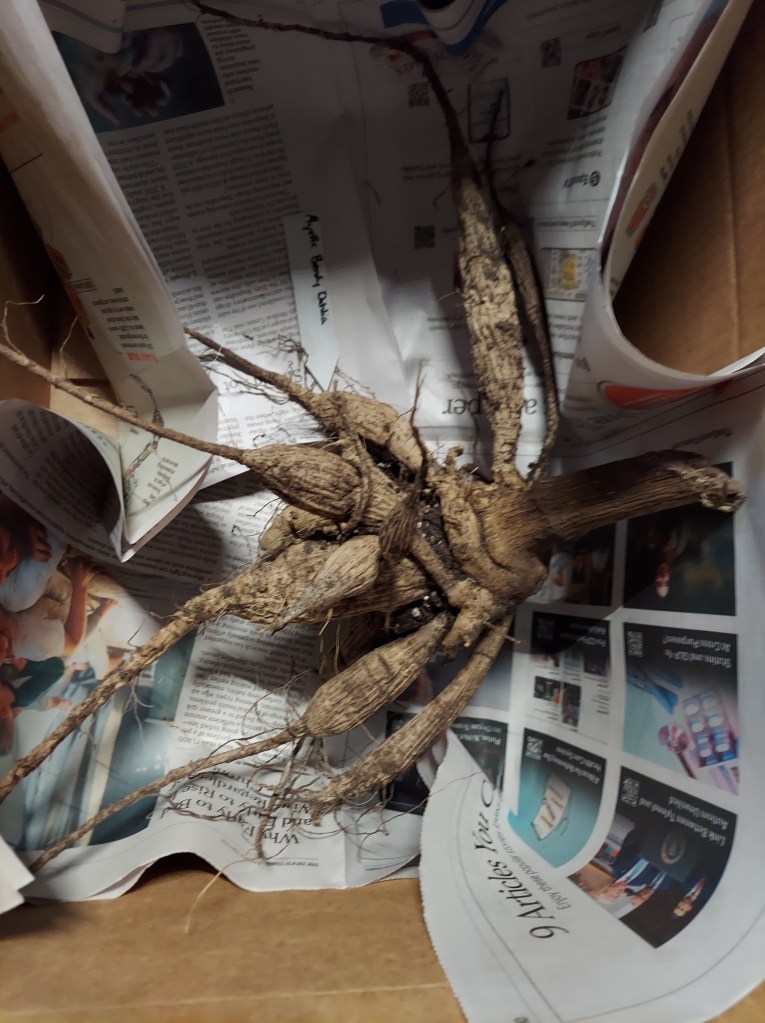
One of the smaller clumps. Each individual tuber that I planted in the spring produced a cluster of tubers around the central stem. Some grew 3 or 4, the largest probably has over a dozen. Once I dug them up from the bed I brushed off some of the dirt and put them on cardboard boxes to dry out and cure for a week in the basement.
Several more clumps, these were smaller from the extra plants that I grew in pots. I will divide them in the spring and start them off indoors to get a jump on the season.
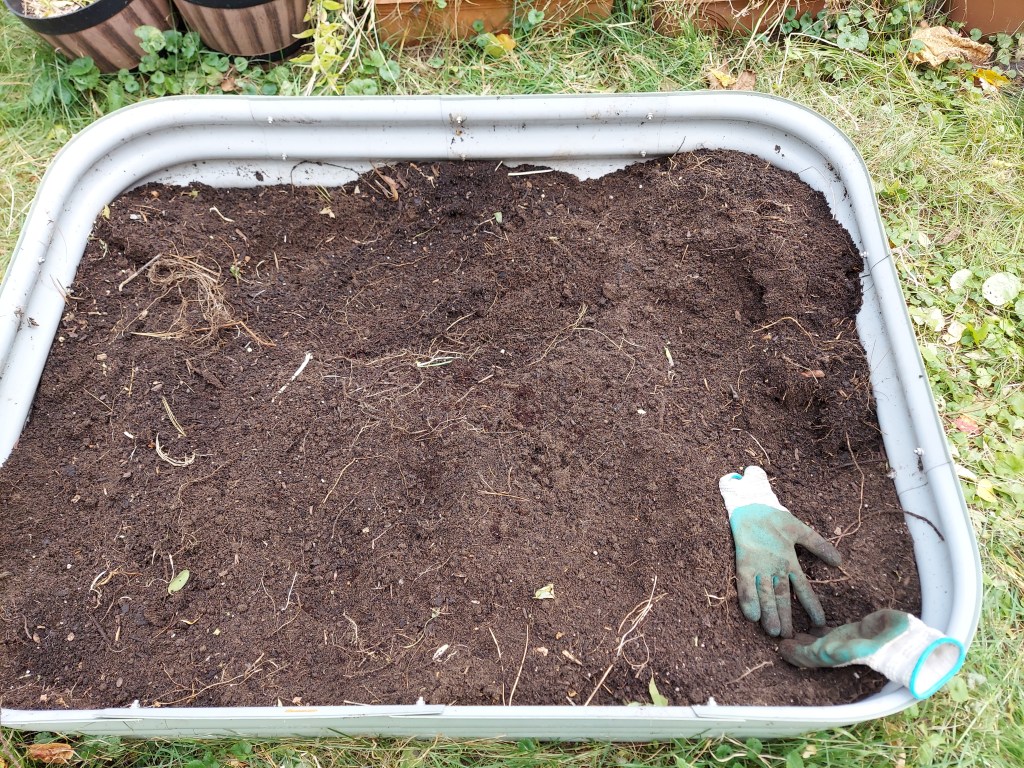
Here’s the dahlia bed after everything was dug up. I leveled it all out and added some homemade compost to provide fresh nutrients for next year.
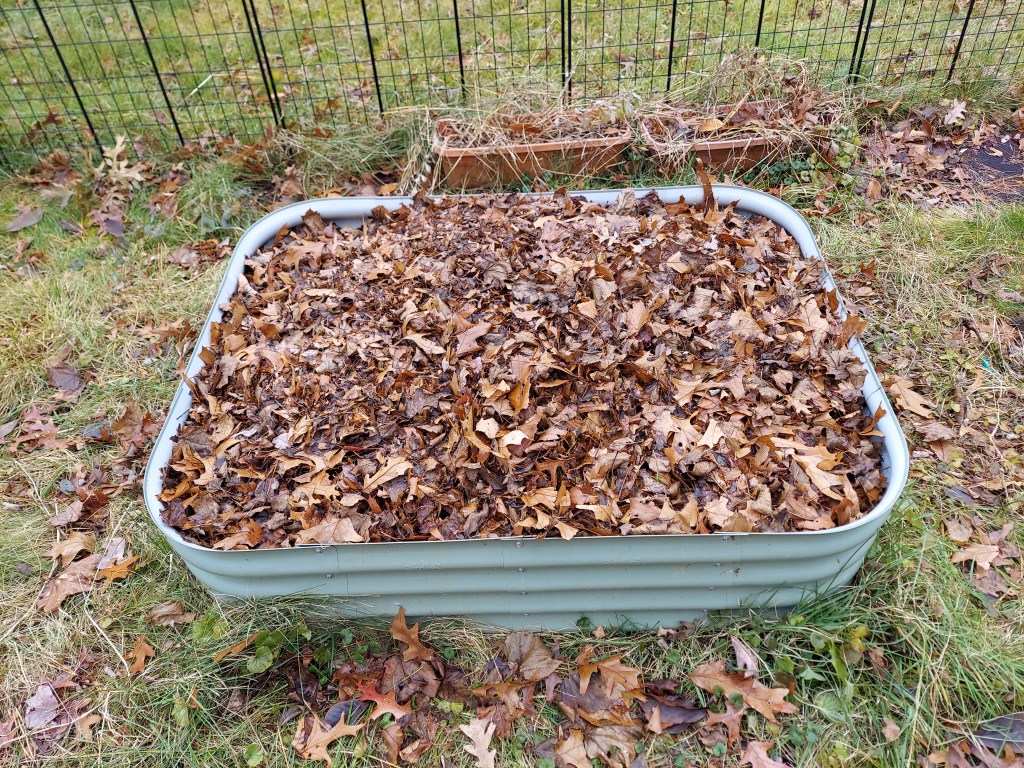
Once that was done I tucked it all in with a nice thick blanket of fall leaves. These will keep the soil insulated and should start to break down a bit before spring arrives. When I’m ready to plant I will remove whatever large bits are left to the compost pile.
After a week or so the tubers were cured and dry enough to store away for winter. I put a layer of bubble wrap in each box, them a couple sheets of newspaper as insulation. The plant labels went into the boxes so that I will be able to identify them come spring.

Once I positioned each clump so that they fit inside the boxes, I added a thick layer of shredded straw and made sure to shake it around to fill in all the nooks and crannies. The boxes were then taped up and put out in the garage, on an interior wall. I will check them in a couple months to make sure they are ok. This method worked well for me last year, so I hope it works again this year.
The second project I had for the end of September and early October was saving seeds from many types of flowers in the garden. I enjoy collecting some of the mature seeds from my garden and then replanting them the following spring. Many types are very easy to save and often involve just snipping off a spent flower head. A single flower can typically provide enough seeds for the following year.
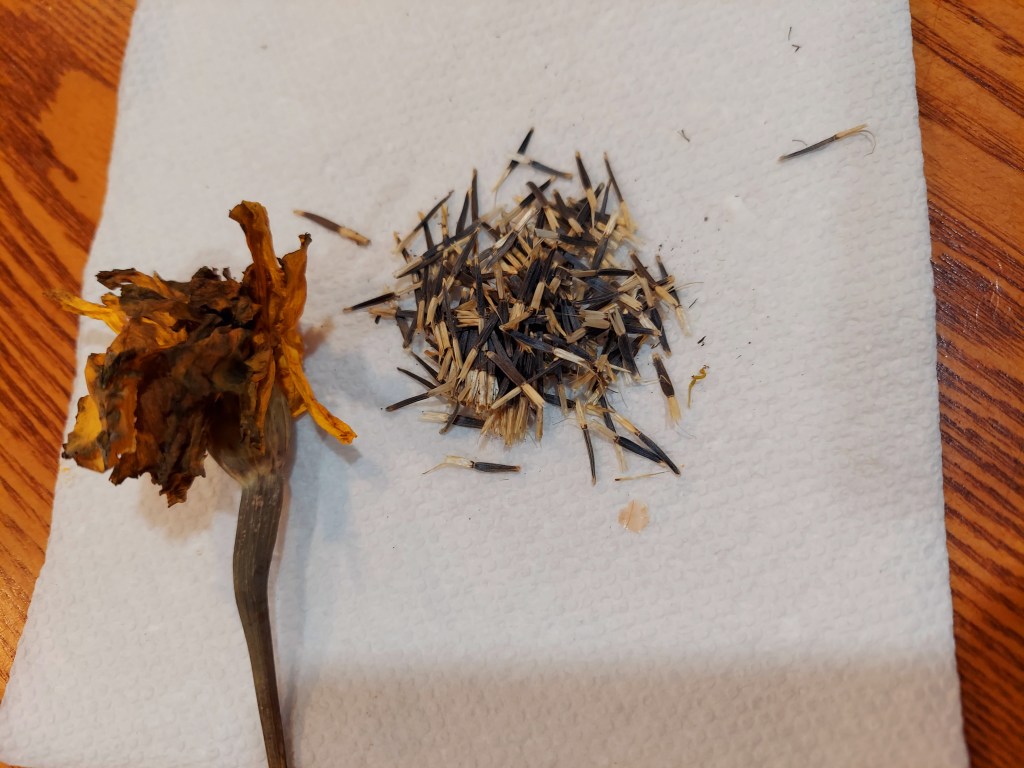
One marigold flower head provided all these seeds. It’s very easy to pull them away from the base, make sure to remove the flower petals too. I let them sit in a single layer for a week to air dry, then store them in little craft envelopes. Make sure to label them so you know which variety/color you saved.
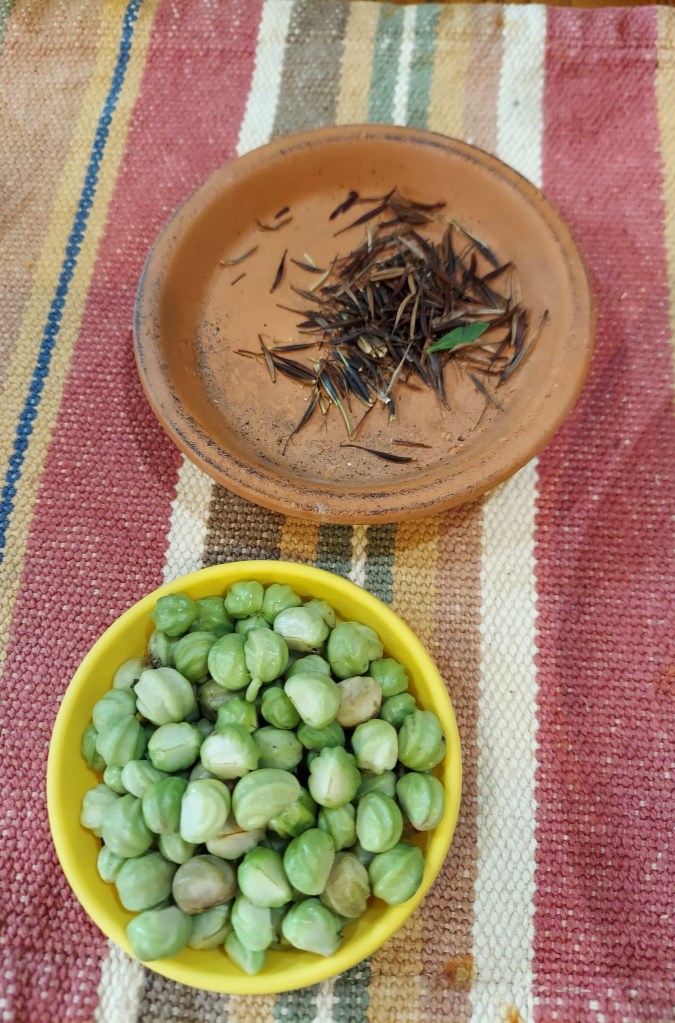
I use whatever bowls or trays I happen to have at hand for seed saving. The top seeds are sulpher cosmos, which make cute little orange or yellow dye flowers. The bottom are nasturtiums; they look like little brains. The nasturtium seeds were collected green because I was going to dig up the bed. They needed to cure and shrink before they could be stored. These were all gathered from the cut flower bed before I cleared it. I’m sure a good number of seeds fell into the bed over the course of the season, so I’m hopeful a few will sprout in the spring without me needing to plant.

Here are some dried nasturtium seeds ready to be stored away til next year, and a few marigolds as well.
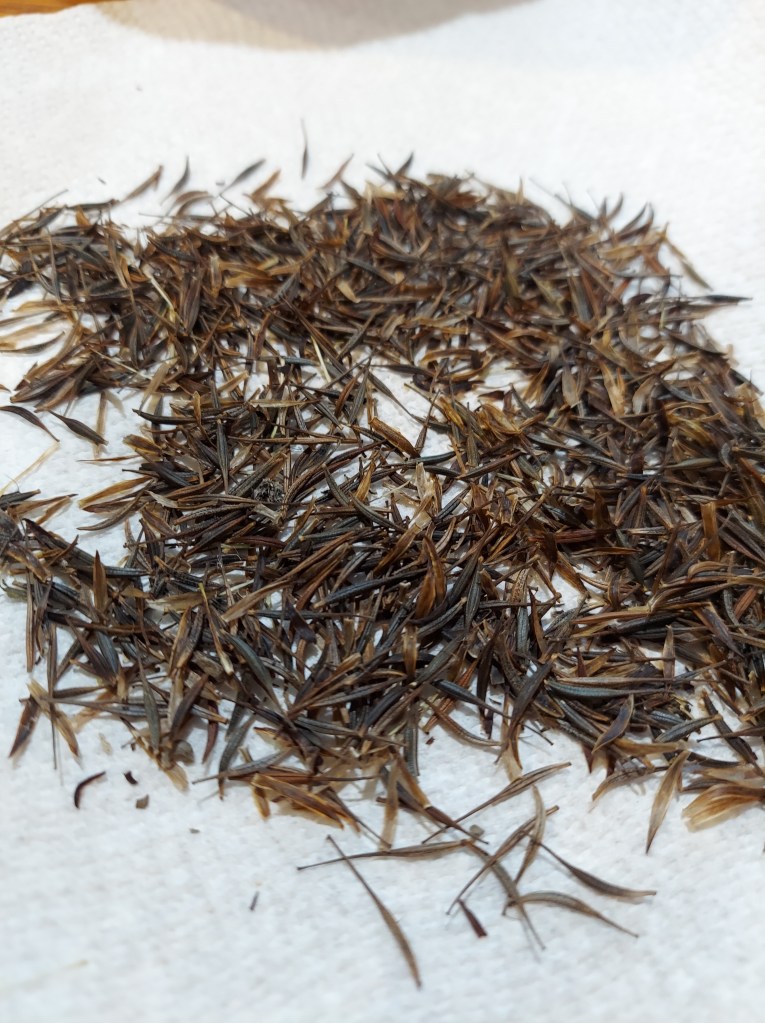
More cosmos seeds than I will ever need! All off of a couple of plants that I grew on the border of the dahlia bed.

I grew multiple types of calendula this year, and had several clumps of plants. They were very productive over the season and I was able to save a bunch of seeds. I also purposefully scattered some of the seeds beneath where the plants grew to see if they come up in the spring. This jar contains seeds from several types including yellow, orange, and pink.
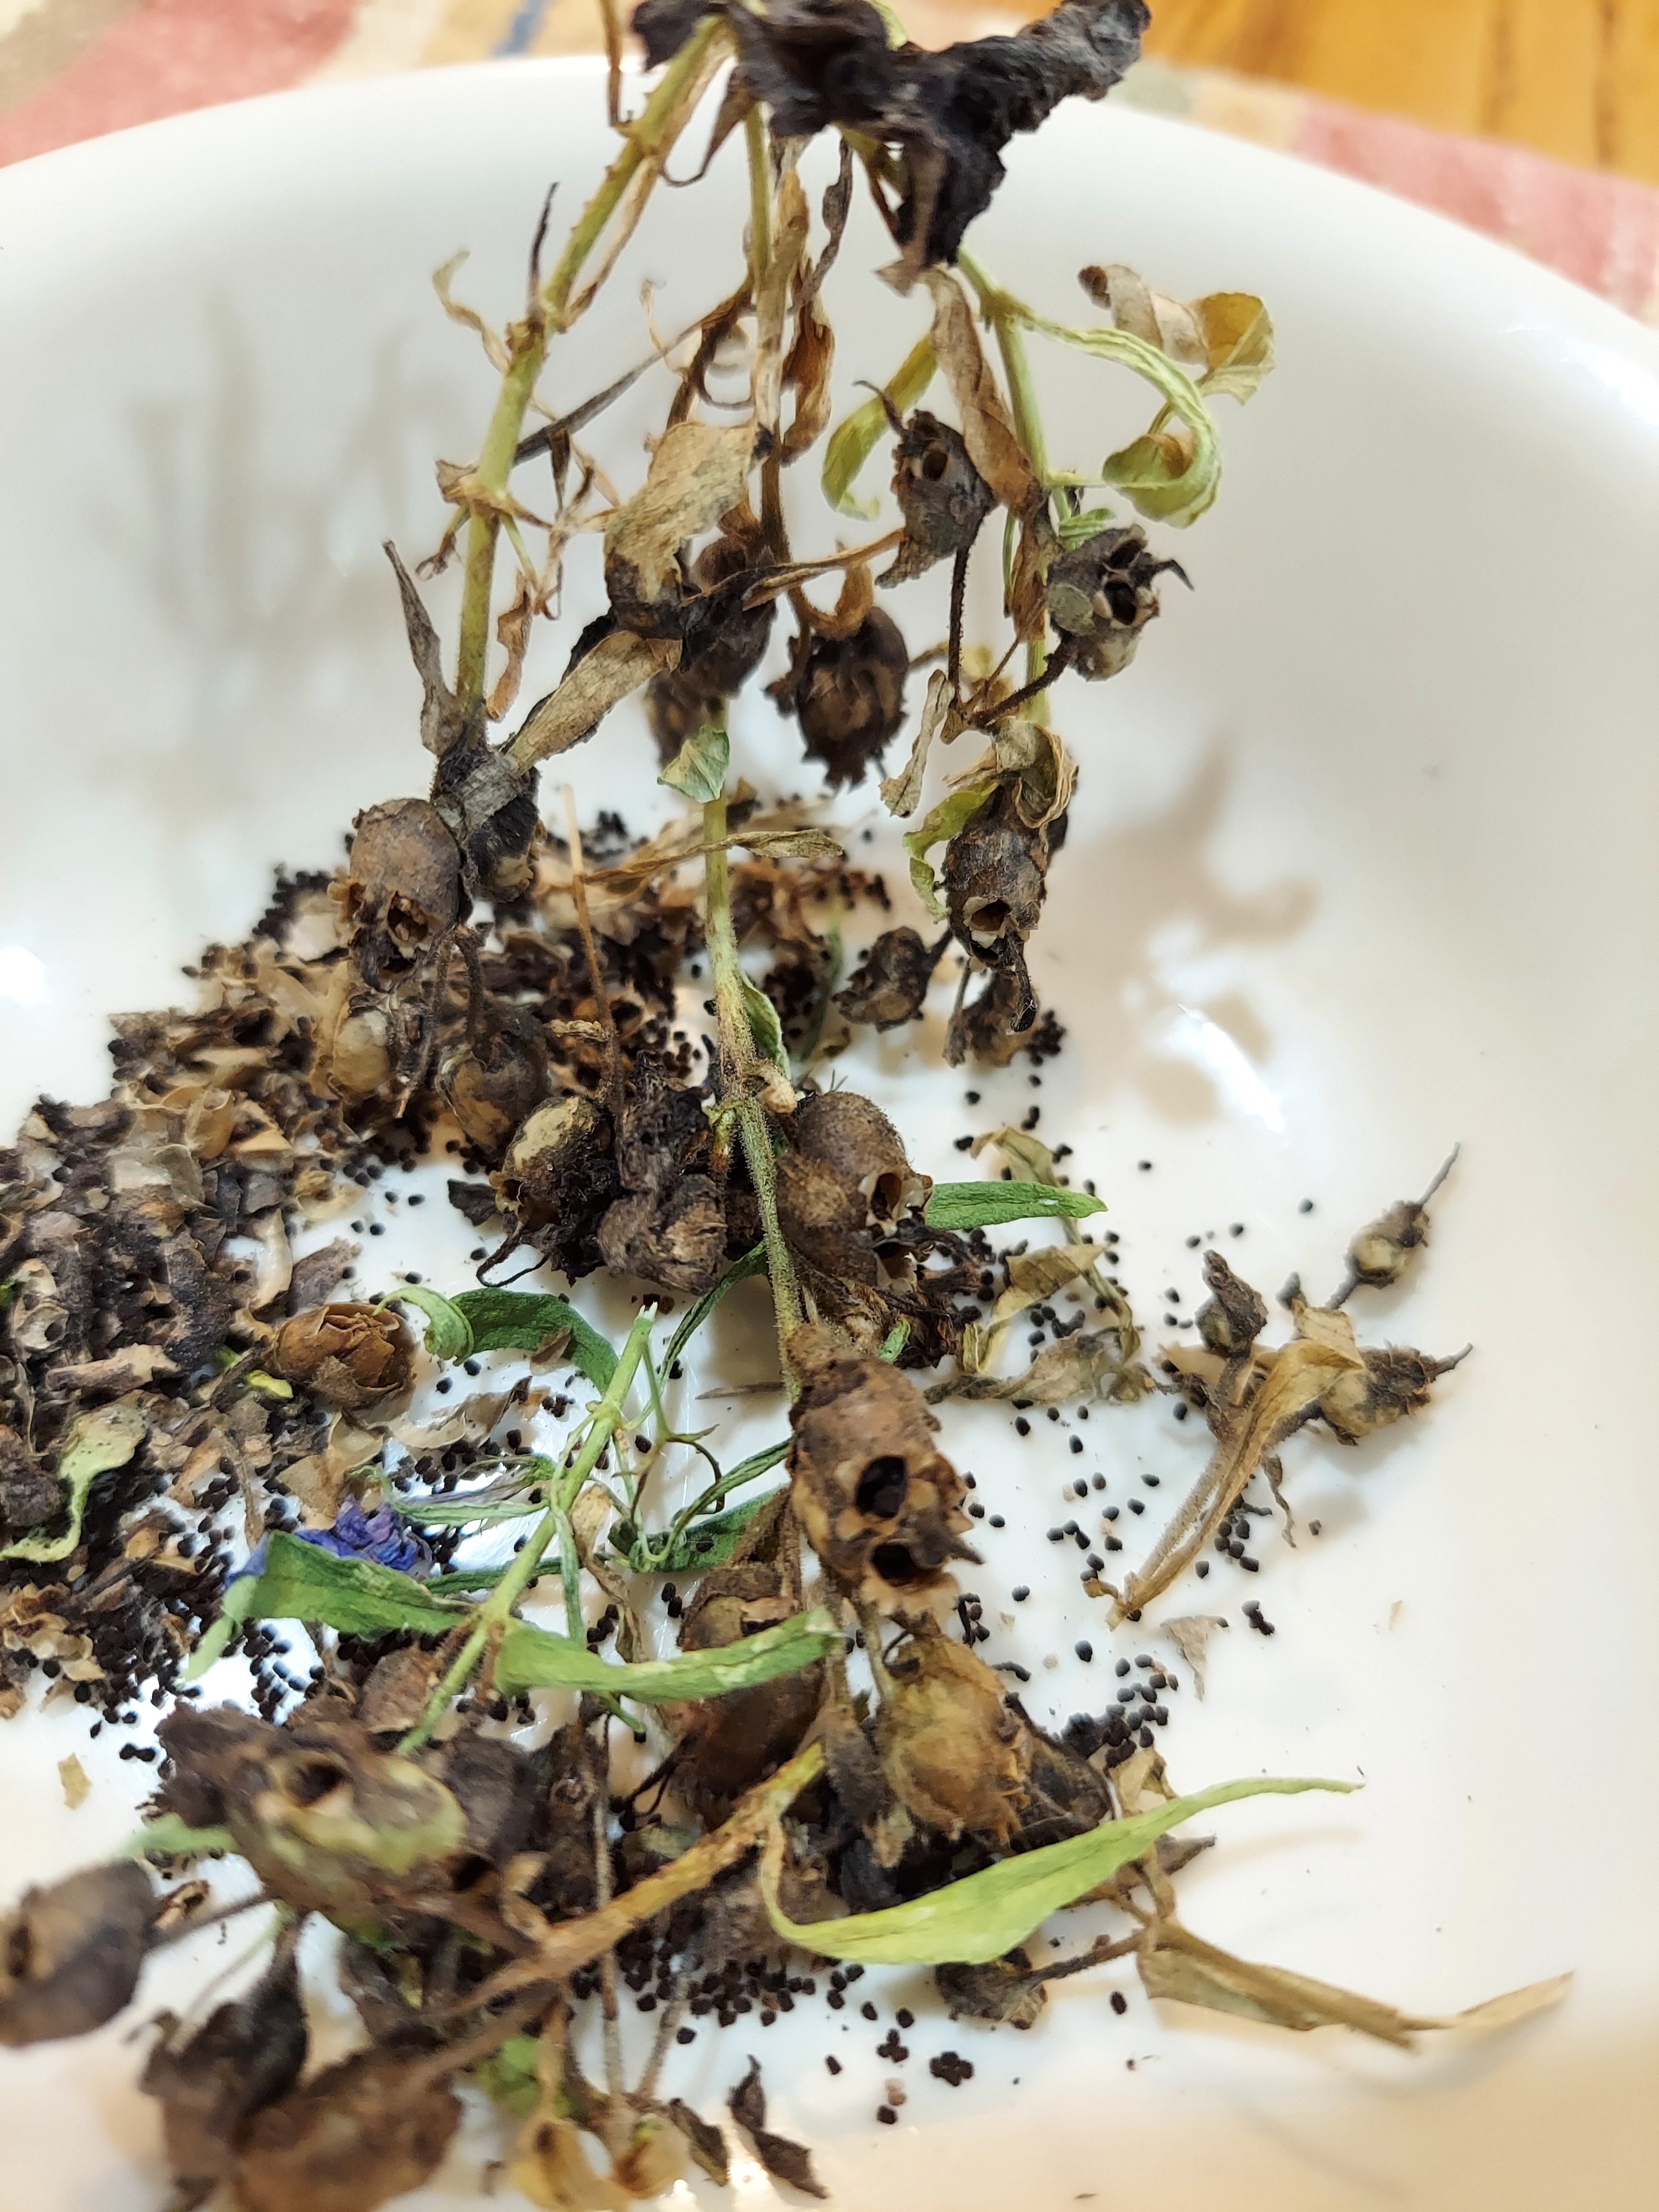
One of the new types of flowers that I grew this year was dwarf snapdragons. I really liked how they looked scattered throughout the garden, and their vertical flower spikes were really pretty. I saved a bunch of the seeds, but these were harder to gather up. First off, they are tiny little specks, you can see them in the bowl. Second, in order to save them, I had to shake or crush the seed pods, which look like skulls! It made for an interesting experience. This is once again a mix of colors all in one bowl; I had red, yellow, white, and pink. They were pretty easy to grow from seeds this year, I had a packet of mixed colors, so I want to do more of them next year. I will probably direct sow and start some off in seed cells.
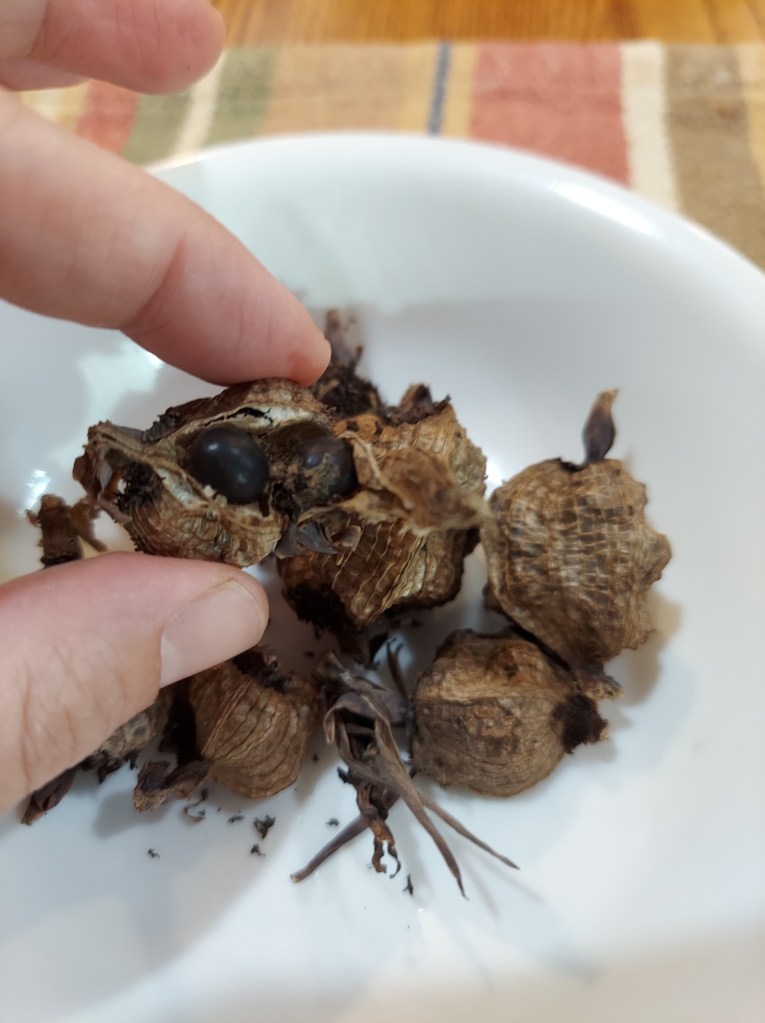
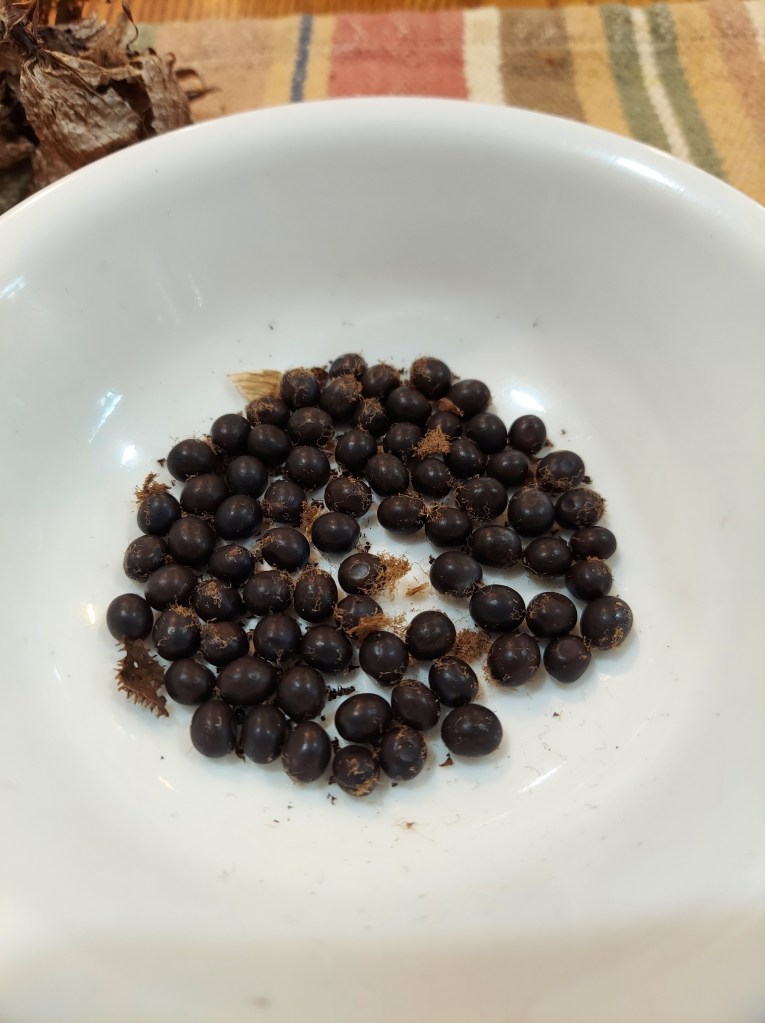
Each year I save a bunch of canna lily seeds, they develop in these large bulky seed pods. They turn from green to brown and when they feel papery thin is when to harvest them. Each pod contains anywhere from 8-20 seeds.
Collecting the seeds is easy, but germinating them in the spring is a bit tricky. They are rock solid and bounce around when dropped. In order to penetrate the seed coat they need to be cut or scarified in some manner. Last year I grew some from seed and my dad had to use a hack saw to slice a thin gap for the water to be able to get in. Canna lilies are pretty easy to propagate via division of the tubers, but if you don’t want to deal with live plants or dried tubers all winter long, then starting from seed is an option. We dug up all of our plants and put them in the basement, so I should have plenty of mature plants to put back out in the spring.
Bean and pea seeds are also easy to save, as are sunflower seeds, as long as you can protect the flower heads, so you get to the seeds before the wildlife. I tend not to save squash or melon seeds because they cross pollinate very easily amongst themselves which can result in strange hybrids. There are ways to do it, but it is more complicated. In past seasons I have saved lettuce and indigo seeds as well. It can be a fun project to try out, and it enables me to be a bit more self-reliant. I know seed packets are pretty cheap, but there’s just something cool about planting seeds I harvested and stored myself. Makes it a more full-circle process.

Leave a comment